MP-324-4 39
Order parts from nearest
SERVICE STATION
shown in directory falling parts list.
IMPORTANT:
Always give Model, Specification and Serial Numbers as shown on name plate
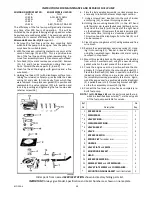
INSTRUCTIONS FOR MAINTENANCE AND REPAIR OF FUEL PUMP
WISCONSIN MOTOR PART NO. ENGINE MODELS USED ON
LP-42-A
THD
LP-42-B
ACN, BKN, AENL
LP-42-G
AGND
LP-42-L
S-7D
LP-42-N
S-8D, TR-10D, TRA-10D
The efficiency of the fuel pump will gradually decrease
any time after 500 hours of operation. This will be
dictated by the engines faltering at high speeds or when
heavy loads are suddenly applied. The pump can easily be
restored to its normal efficiency by the installation of a
Wisconsin Motor No. LQ-28
repair kit.
1. Remove the fuel lines and the two mounting bolts
which hold the pump to the engine. Take the pump to a
work bench or suitable place.
2. With file, make an indicating mark across a point at the
union of castings (11 and 12). This is a positive loca-
tion of the fuel line positions when reassembling. Re-
move four assembly screws (15) and remove fuel head.
3. Turn head (12) over and remove one screw (16). Remove
(10, 3, 6 and 5) valve assemblies, noting their posi-
tions. Discard the above parts (3, 6 and 5).
4. Clean fuel head thoroughly with gasoline and a fine
wire brush.
5. Holding fuel head, (12) with diaphragm surface (con-
taining four clearance holes) up, reassemble the valve
spring (3) and valve (6) into cavity from which they
were removed. Now place new gasket (5) in position and
reassemble the valve retainer (10) into position and
lock it by inserting and tightening the fuel pump valve
retainer screw (16).
6. Place this fuel pump head assembly in a clean place and we
are ready to rebuild the lower diaphragm section.
7. Using a screw driver, inserted into the coils of rocker
arm spring (13), remove this spring and save.
8. Holding the mounting bracket (11) in the left hand
with the rocker arm toward the body and the thumb nail on
the end of the link (9) with the heel of the right hand
on the diaphragm (2) compress the diaphragm spring (4)
at the same time, turning in a clockwise position 90°.
This will unhook the diaphragm from the link (9) so it
can be removed.
9. Clean the mounting bracket (11) with gasoline and fine
wire brush.
10. Replace the new diaphragm operating spring (4), stand-
ing it into casting (11). Repeat in reverse step eight,
using the new diaphragm. Replace rocker arm spring
removed in step seven.
11. Mount this assembly back on the engine in the position
from which it was removed, using the new mounting
gasket which is the last piece of the repair kit.
12. Crank the engine over to a position where the dia-
phragm (2) is laying flat on the mounting bracket (11).
Place the fuel head (12) back in position so that the
indicating marks of step one are in line, and start the
four assembly screws approximately three turns. Again,
crank the engine over to a position where the diaphragm
(2) is pulled down into (11) mounting bracket and tight-
en the four assembly screws (15) tightly.
13. Connect the fuel lines and you have a completely re-
built fuel pump.
NOTE:
The
LQ-28 Repair Kit
and the parts included there-in,
which are identified by an asterisk (*), are the only parts
of the fuel pump available for service.
Ref
No
Description
No
Req
1
* 2
* 3
* 4
* 5
* 6
7
8
9
10
11
12
13
15
16
*
ROCKER ARM
.............................................
DIAPHRAGM
..............................................
VALVE SPRING
............................................
DIAPHRAGM SPRING
..................................
VALVE GASKET
...........................................
VALVE
.........................................................
ROCKER ARM PIN
.......................................
SPRING CLIP
for rocker arm .......................
LINKAGE
.....................................................
VALVE PLATE
and
SEATS.
...........................
MOUNTING BRACKET
................................
HEAD
..........................................................
ROCKER ARM SPRING
................................
ASSEM. SCREW
and
LOCKWASHER
............
VALVE PLATE SCREW
and
LOCKWASHER
...
MOUNTING FLANGE GASKET
(not illustrated)
1
1
2
1
1
2
1
1
1
1
1
1
1
4
1
1
Содержание Air Cooled TR-10D
Страница 6: ...MI 937 2 4 Fig 1 289860C TAKE OFF rear and LEFT HAND SIDE VIEW of ENGINE...
Страница 7: ...5 MI 938 2 FAN END front and RIGHT HAND SIDE VIEW of ENGINE...
Страница 8: ...MI 939 2 6 SECTIONAL VIEWS OF ENGINE...
Страница 28: ......
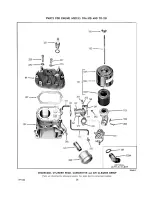
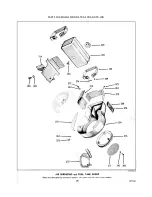
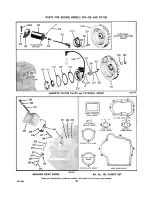
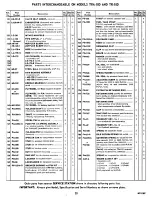
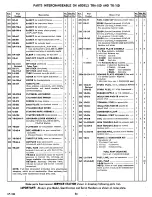
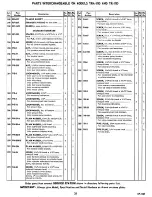
Страница 29: ...PARTS FOR ENGINE MODELS TRA 10D AND TR 10D...
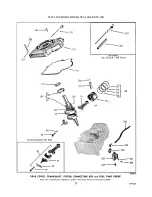
Страница 30: ...PARTS FOR ENGINE MODELS TRA 10D AND TR 10D...
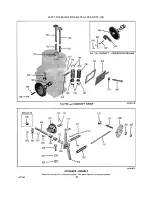
Страница 31: ...PARTS FOR ENGINE MODELS TRA 10D AND TR 10D...
Страница 32: ......
Страница 33: ......
Страница 34: ......
Страница 35: ......
Страница 36: ......
Страница 37: ......
Страница 38: ......
Страница 39: ......
Страница 40: ......
Страница 44: ......
Страница 46: ...WISCONSIN MOTOR CORPORATION MILWAUKEE WISCONSIN 532466 PRINTED IN U S A...

