M O N I T O R P A N E L
page 35
D-12 / July 2006
The STATUS button, when pressed, lights, and
a list of MXM sources and destinations appears on
one of the LCD displays. After viewing the MXM
status, press the desired MONITOR button (MSTR-
D12 panel) to revert the display to normal operation
and turn off the STATUS light.
Monitors
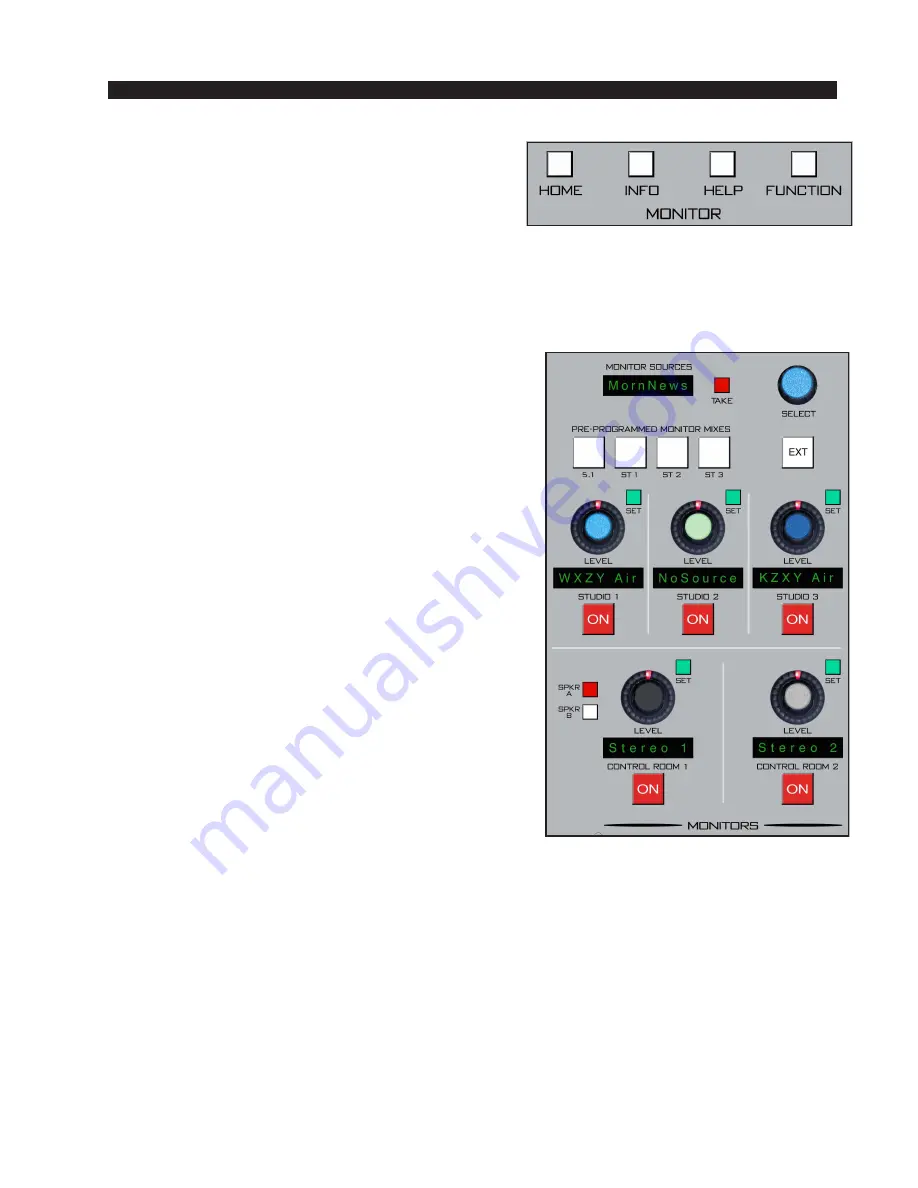
There are five monitor outputs available: STUDIO 1 through 3, and
CONTROL ROOM 1 and 2.
Each monitor has a LEVEL control, a SET button,
an ON switch, and a display.
The CONTROL ROOM 1 monitor section also has
the two speaker select switches.
Pressing a monitor SET button gains access to the
monitor source encoder and master mix hot buttons.
Displays below each monitor pot show the selected
source.
MONITOR SOURCE display – shows the cur-
rently programmed source. Use rotary encoder and
TAKE to select a new source.
Monitor sources can be selected several ways:
• Four PRE-PROGRAMMED MONITOR MIXES
switches (5.1, ST1, ST2 and ST3) allow direct access to
the main mixes most frequently monitored.
• Sources can be randomly selected with the SE-
LECT knob and its attendant SOURCE display and
TAKE button.
• The EXT switch selects the pre-programmed EXT
source. To program this, press and hold the EXT button
until it lights (approx. 3 seconds), then dial up the
desired source with the SELECT knob and press TAKE.
The source is stored. NOTE that to do this, all monitor
SET buttons must be OFF (unlit).
To select a source for a monitor by one of the above methods, first press
the SET button next to the knob for the desired monitor.
The knob controls the level of the monitor signal.
following section for details)
MSTR-D12 Panel


