Preparation
6
2. To ensure proper and quick mounting, read the manual
thoroughly. Allow a second person to assist you. This will make
installation easier.
3. Have the required tools available:
power drill and drill bits, tape measure/folding ruler, open end
wrenches (size 14 and 17), wire stripers, small level, hacksaw,
Philips and slot screwdriver, ball pen/pencil, socket insert set.
4. Disengage the existing mechanical sliding gate lock.
Hint: The sliding gate does not need an additional lock as the
sliding gate opener is self-locking when connecting to the sliding
gate opener and power mains. The gate cannot be easily
opened without damaging the gate opener or the hinges of the
gate system.
5. Built a concrete pad of approx. 46 x 42 x 35 cm (see drawing on
page 7). The concrete pad should be at least 10 cm over the
ground. Increase the pad height if necessary to protect the gate
opener from flooding, heavy snow fall etc. Make sure the con-
crete pad is level. Protect the sliding gate opener from acci-
dental impacts.
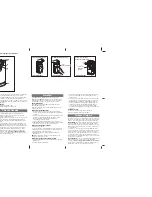
6. Prepare one or more channels for the
cables before pouring the concrete.
Remember that the cable channels
have to pass through the cable hole.
Allow the concrete pad to harden
sufficiently before mounting the sliding
gate opener on the concrete pad.
Cable
hole
Rubber
Plug


