background image

The Weir Group PLC 


Weir Industrial Gateway setup guide rev 0.5 

Copyright © Weir Minerals Australia Ltd 2017. Commercial in Confidence.  All rights reserved.


Page 

46

 of 

46 


Under Industry Canada regulations, this radio transmitter may only operate using an antenna 
of a type and maximum (or lesser) gain approved for the transmitter by Industry Canada. To 
reduce potential radio interference to other users, the antenna type and its gain should be so 
chosen that the equivalent isotropically radiated power (e.i.r.p.) is not more than that 
necessary for successful communication. 
 
Conformément à la réglementation d'Industrie Canada, le présent émetteur radio peut 
fonctionner avec une antenne d'un type et d'un gain maximal (ou inférieur) approuvé pour 
l'émetteur par Industrie Canada. Dans le but de réduire les risques de brouillage 
radioélectrique à l'intention des autres utilisateurs, il faut choisir le type d'antenne et son gain 
de sorte que la puissance isotrope rayonnée équivalente (p.i.r.e.) ne dépasse pas l'intensité 
nécessaire à l'établissement d'une communication satisfaisante. 
 
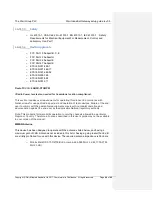
This radio transmitter 

IC:23347-STX000004 

has been approved by Industry Canada to 

operate with the antenna types listed below with the maximum permissible gain and required 
antenna impedance for each antenna type indicated. Antenna types not included in this list, 
having a gain greater than the maximum gain indicated for that type, are strictly prohibited for 
use with this device. 
 
Le présent émetteur radio 

IC:23347-STX000004 

a été approuvé par Industrie Canada pour 

fonctionner avec les types d'antenne énumérés ci-dessous et ayant un gain admissible 
maximal et l'impédance requise pour chaque type d'antenne. Les types d'antenne non inclus 
dans cette liste, ou dont le gain est supérieur au gain maximal indiqué, sont strictement 
interdits pour l'exploitation de l'émetteur. 

Содержание MPM

Страница 1: ...1 Marden St Artarmon NSW 2064 Australia Tel 61 2 9934 5100 Weir Industrial Gateway Setup guide Document ID 00 40 20 40_20 Revision 0 5 November 15 2017 Copyright Weir Minerals Australia Ltd 2017 Commercial in Confidence All rights reserved ...

Страница 2: ...ls Australia Ltd 2017 Commercial in Confidence All rights reserved Page i Document Approval Name Designation Date Signature Submitted By C Strudwicke Principle Control Systems Engineer Accepted By C Strudwicke Principle Control Systems Engineer Approved By B Baker Head of Mechatronics ...

Страница 3: ...Date Author Details 0 1 9 3 2017 C Strudwicke First version 0 2 21 03 2017 C Strudwicke Addition of feedback relating to certification requirements 0 3 08 09 2017 W Cooke Addition of feedback relating to certification requirements 0 4 10 06 2017 W Cooke Addition of feedback relating to certification requirements 0 5 11 15 2017 W Cooke Document name change to match regulatory documents ...

Страница 4: ...STORAGE 4 3 SYSTEM COMPONENTS 4 4 SYSTEM ARCHITECTURE 6 5 PSM POWER SUPPLY MODULE 7 5 1 PARAMETERS RELEVANT TO INSTALLATION AND OPERATION 7 5 2 INSTALLATION 8 6 MPM MAIN PROCESSING MODULE 9 6 1 PARAMETERS RELEVANT TO INSTALLATION AND OPERATION 9 6 2 IMAGES 9 6 3 CONNECTOR KEYING TYPES 12 6 4 LED INDICATORS 12 6 5 INSTALLATION 13 Mounting plate Hardware 13 6 5 1 13 6 5 2 MPM PSM 14 6 5 3 Hazardous ...

Страница 5: ...5 1 Equipment and materials required 38 9 5 2 Installation 38 9 5 3 VT 11 38 9 5 4 Removal 39 9 6 TEMPERATURE RTD S 39 9 6 1 Equipment and materials required 39 9 6 2 Hazards 40 9 6 3 Installation 40 9 6 4 Removal 40 9 7 GLAND WATER FLOW METER AND PRESSURE TRANSDUCER 40 9 7 1 Equipment and materials required 40 9 7 2 Possible Hazards 40 9 7 3 Installation 40 9 8 SPEED PROXIMITY SENSOR 41 9 8 1 Equ...

Страница 6: ...M 17 Figure 6 14 Antenna mount attached 18 Figure 6 15 Installation of Antenna e 19 Figure 6 16 Antenna with and without cable attached 19 Figure 6 17 Antenna connector wrapped in protective tape 20 Figure 6 18 Schematic of Wifi and Cellular antennae connections to MPM 20 Figure 7 2 RSP shown with connector shield installed 23 Figure 7 3 RSP Physical dimensions 24 Figure 7 4 RSP Connector layout a...

Страница 7: ...ocessor RSP The important specifications of these devices and the basic installation process will be covered 1 3 Target Audience This document is directed towards maintenance fitters technicians and any staff involved in installing this system 1 4 Safety 1 4 1 Safety Terminology and Symbols You must observe the instructions contained in this manual Failure to do so could result in damage to equipm...

Страница 8: ...OCATION ENVIRONMENT CAN CREATE A SPARK CABLES ARE ONLY TO BE DISCONNECTED BY QUALIFIED SERVICE PERSONNEL AVERTISSEMENT LA SÉCURITÉ DE TOUT SYSTÈME INCORPORANT CET ÉQUIPEMENT EST LA RESPONSABILITÉ DE L ASSEMBLÉE DU SYSTÈME AVERTISSEMENT POUR ÉVITER LE RISQUE D INCENDIE OU DE CHOCS NE PAS OUVRIR LES COUVERTURES AUCUNE PIÈCE DE SERVICE UTILISABLE À L INTÉRIEUR CONSULTER L ENTRETIEN AU PERSONNEL DE SE...

Страница 9: ...tors are attached All connections are watertight with Nitto No 15 self amalgamating tape used on the RF connections to ensure that water cannot get into the connector The sensors are installed in such a manner that they will not come off from operation and the sensor cables will not interfere with equipment operation It is preferable that sensor cables do not get very close to electric motor windi...

Страница 10: ...ay and its components are designed to be lifted and man transported without cranes or other lifting equipment 2 3 Storage For long term storage ensure connector caps are firmly secured on the all gateway connectors 3 System components A number of main components are common across many of the product implementations These are o Power Supply Module PSM o Main Processor Module MPM o Remote Signal Pro...

Страница 11: ...ice that interfaces with sensors on the equipment Junction Boxes Various A number of junction boxes and cables are used to connect the RSP to sensors on the equipment example shown to right WiFi Antenna 2 4GHz Default WiFi antenna 2 4GHz 6dB Omnidirectional Mobilemark Cellular Antenna Default Cellular band Antenna 9dB Omnidirectional Mobilemark WiFi Antenna 2 4GHz 5GHz Dual Band Operation Laird ...

Страница 12: ... Sensor Sensor Sensor Sensor Sensor Sensor Sensor Sensor Sensor Sensor Sensor Sensor Sensor Sensor Sensor ECA_MR_nn 24VDC LAN ECA_RS_nn Analog ECA_MQ_01 24VDC Serial ECA_PM_01 24VDC WIFI Module ECA_MW_01 POE Figure 4 1 System diagram o MPM can support 4 x RSPs directly wired via Ethernet o PSM is rated to support MPM 4 x RSPs all other optional items o Each RSP is located near a piece of equipment...

Страница 13: ...operates from 6 15 1 Parameters relevant to installation and operation o Model SPSM 000001 o DELL SKU IP67IPS500 24 o Supply 90 to 264 VAC 47 to 400 Hz o Output 20A 24Vdc Nominal 500W o IP rating 67 o IK rating 09 o Hazloc Certified for Class 1 Div 2 environment o Temperature range operating 30 C Tamb 70 C o Mass 1 587kg o MTBF 500 000 hours o Casing material Powder coated die cast aluminium o Mou...

Страница 14: ...e as follows AC Cable PN LFS04876 connects to the 3 pin port marked power in DC Cable PN LFS04875 connects to the 4 pin port marked power out 6 25 2 Installation Physical installation of the PSM is covered in section 6 4 Electrical installation must include a current limiting device fuse or circuit breaker rated to protect the AC supply cable connected to J1 This circuit breaker should be rated to...

Страница 15: ...mote access mechanism to allow diagnosis and analysis of issues on site The MPM is housed in a rugged enclosure fitted with signal conditioning data acquisition data processing and cloud interfacing systems 7 16 1 Parameters relevant to installation and operation o Supply 14 6A 24Vdc o IP rating 66 o IK rating 09 o Hazloc Certified for Class 1 Div 2 environment o Temperature range operating 30 C T...

Страница 16: ...r shroud installed Connector shroud must be installed at all times once connectors are in place to prevent slurry mud etc getting onto the connectors AND to meet hazardous location standards Figure 6 3 MPM connector view protective caps installed Connector caps shown are to be left installed for all connectors without a cable assembly attached This is required for hazardous location approvals ...

Страница 17: ...up PLC Weir Industrial Gateway setup guide rev 0 5 Copyright Weir Minerals Australia Ltd 2017 Commercial in Confidence All rights reserved Page 11 of 46 Figure 6 4 MPM External dimensions Figure 6 5 Connector view ...

Страница 18: ...100 WiFi CA120 195 XX N A Wifi 2 WiFi connector to EG5100 WiFi CA120 195 XC N A 3G 1 WWAN primary connector to EG5100 CA120 195 XX N A 3G 2 WWAN connector to EG5100 CA120 195 XC N A Qpro Qpro GPS receiver power and signal LFS04869 SNH POE POE Lan port LFS04870 SWH LAN LAN LFS04870 SWH RS485 RS485 LFS04880 SNH CAN CAN LFS04872 SWH RSP 1 RSP 1 LFS04873 SYH RSP 2 RSP 2 LFS04873 SYH RSP 3 RSP 3 LFS048...

Страница 19: ...unting plate is provided below Equipment Module Equipment Module Power Supply Power Supply Weather protector attachment Weather protector attachment Weather protector Weather protector SIDE VIEW SIDE VIEW FRONT VIEW FRONT VIEW Figure 6 8 MPM PSM generic mounting plate 11 2 1 110 2 1 1 Installation 1 The mounting plate must be mounted in the vertical plane and as level as possible 2 Fasten or weld ...

Страница 20: ...pping screws for mounting Provisioned SIM card 11 2 2 210 2 2 2 Hazards The MPM is relatively heavy 16kg and requires 2 people to transport and assist each other during mounting If dropped from height this module is a potentially deadly hazard hence the area below the installation must be cordoned off with danger tape Mains power is a potentially deadly hazard and hence must only be modified or co...

Страница 21: ...e shroud needs to be removed to do this needs Torx T27 driver Be sure to re install the protective cap afterwards Figure 6 10 SIM card receptacle in MPM 5 Connect 24Vdc power lead PN LFS04875 012M00 from PSM J2 into DC power input port J14 on MPM Figure 6 11 24Vdc power connection from PSM to MPM 6 Ensure the customer mains outlet is either isolated or turned off and locked 7 Connect the mains pow...

Страница 22: ...NT AVERTISSEMENT RISQUE D EXPLOSION NE PAS CONNECTER OU DÉCONNECTER DES CÂBLES QUI ENERGISES DANS UN ENVIRONNEMENT DE LOCALISATION DANGEREUSE 9 Protective earth grounding of the system is provided by the earth ground connection from the power supply AC cable and connection of the enclosures of the MPM and PSM to earth ground is optional 11 2 310 2 3 Hazardous Location Requirements The enclosure of...

Страница 23: ...igure 6 14 Location of Protective Earth Grounding on MPM The connector shroud must be installed at all times once connectors are in place to prevent slurry mud etc getting onto the connector threads AND to meet the standards certified against for Hazardous Location operation WARNING THE POE AND 24 AUX PORTS SHALL NOT BE USED IN HAZARDOUS LOCATION AREAS WARNING EXPLOSION HAZARD DO NOT CONNECT OR DI...

Страница 24: ...lular antenna o OD 850 Mobilemark Longer antenna comes with mounting bracket o Cable assembly CA120 195 XX Mobile Mark Wi Fi antenna Default o OD 2400 Mobilemark shorter antenna o Cable assembly CA120 195 XX Mobile Mark Wi Fi antenna Optional o Laird PVD24515 DE1 11 2 4 210 2 4 2 Hazards If dropped from height the antenna e are a potential hazard for people below Working from height while installi...

Страница 25: ...ts reserved Page 19 of 46 Figure 6 16 Installation of Antenna e 4 Remove the red protective cap and connect the antenna cable to the antennas coax connector Figure 6 17 Antenna with and without cable attached 5 Wrap connector interface with self amalgamating tape to protect from slurry etc This is required for hazardous location compliance ...

Страница 26: ...ns to MPM For best results Mount the antenna as high up as the cable length location permits with optimal line of sight to the receiver Attach to a pipe mast if possible If mounted near other antenna maintain a separation of at least 300mm 1 foot Avoid placement near close metal objects as unpredictable disturbance can result Avoid placing on the side of a building or tower as directivity can be e...

Страница 27: ...The Weir Group PLC Weir Industrial Gateway setup guide rev 0 5 Copyright Weir Minerals Australia Ltd 2017 Commercial in Confidence All rights reserved Page 21 of 46 ...

Страница 28: ...ith signal conditioning data acquisition and data processing systems 12 111 1 Parameters relevant to installation and operation Supply 4 2A 24Vdc IP rating 66 IK rating 09 Hazloc Certified for Class 1 Div 2 environment Temperature range operating 30 C Tamb 70 C Mass 10 5kg 23 1 lb Casing material Powder coated die cast aluminium Mounting orientation On vertical plate wall with all connectors facin...

Страница 29: ... in Confidence All rights reserved Page 23 of 46 Figure 11 2 RSP shown with connector shield installed Connector shroud must be installed at all times once connectors are in place to prevent slurry mud etc getting onto the connector threads AND to meet the standards certified against for Hazardous Location operation ...

Страница 30: ...ce All rights reserved Page 24 of 46 Figure 11 3 RSP Physical dimensions Figure 11 4 RSP Connector layout and descriptions 12 311 3 Connector Keying Types The multi conductor cables have three different keying types which are shown below One of the tabs is moved in order to provide keying this tab is shown with the orange arrow ...

Страница 31: ...ain MPM connector LFS04873 SYH AO0 Analog Output Bank 0 No Application SZH AI0 Analog Input Bank 0 LFS05179 SNH AI1 Analog Input Bank 1 LFS05179 SNH DO0 Digital Output Bank 0 LFS04879 SNH DO1 Digital output Bank 1 LFS04879 SNH DI0 Digital Input Bank 0 LFS04878 SWH DI1 Digital Input Bank 1 LFS04878 SWH DI2 Digital Input Bank 2 LFS04878 SWH AI2 Analog input bank 2 LFS04877 SNH AI3 Analog input bank ...

Страница 32: ...ng location Figure 11 7 RSP Mounting Dimensions 12 5 211 5 2 Hazardous Location Compliance The enclosure of the RSP will need to be grounded to earth ground according to local building codes for hazardous location use The RSP has an M6 sized external grounding screw for protective earth grounding Insulated 10AWG wiring is needed to connect this grounding screw to the mounting plate along with the ...

Страница 33: ...ÉCONNECTER DES CÂBLES QUI ENERGISES DANS UN ENVIRONNEMENT DE LOCALISATION DANGEREUSE 12 5 311 5 3 Protective Earth Grounding for Non Hazardous Locations Protective earth grounding of the system is provided by the earth ground connection from the power supply AC cable and connection of the enclosures of the RSP to earth ground is optional 12 5 3 111 5 3 1 Hazards The RSP may be difficult to mount w...

Страница 34: ...om J5 Figure 11 9 MPM Comms power connector on RSP 4 RSP Pass the MPM RSP comms power cable through the hole in the shroud associated with J5 and make the connection by pushing and turning the bayonet fitting 5 RSP Ensure that all other connectors not being utilised have their protective caps installed 6 RSP Re install the connector shroud per Fig 7 2 7 MPM Remove the connector shroud ensuring tha...

Страница 35: ... shroud 11 MPM Turn on power to the MPM 12 MPM Confirm that the following LEDs are lit a LED 1 power b LED 2 System running 13 RSP Confirm that the following LEDs are lit a LED 1 power b LED 2 System running 14 If all above LEDs are lit the configuration process may begin if not contact the Synertrex Operations team for assistance with troubleshooting and or refer to the troubleshooting guide with...

Страница 36: ...speed Analog input TBD AI2 AI3 32pin Low speed Analog input TBD AI0 AI1 32 pin Digital Input TBD DI0 DI1 DI2 19 pin Digital output TBD DO0 DO1 19 pin Analog Output TBD AO TBD 13 1 212 1 2 Junction Box to sensor Sensor type Sensor connector Cable Part number example where XX is length in m Lengths available m Gland water flow meter M12x1 4 pin IndProx_8_DigitalInJB_Cable_XXm 10 20 Inductive Prox M1...

Страница 37: ... single channel analog 4 x DI 4_DigIn_JB 19 19 pin part TBD IndProx_8_DigitalInJB_Cable_XXm 8 x DI 8_DigIn_JB 19 19 pin part TBD IndProx_8_DigitalInJB_Cable_XXm 4 x DO 4_DigOut_JB 19 19 pin part TBD TBD 8 x DO 8_DigOut_JB 19 19 pin part TBD TBD 2 x AO TBD 13 312 3 Installation This section covers the generic installation process for the junction boxes Locking clips need to be installed on the powe...

Страница 38: ...ased Type details Manufacturer Part Accelerometer Tri axial 500mV g PCB 604B32 Accelerometer Uni axial 500mV g cylindrical PCB 601A02 Accelerometer Uni axial 500mV g RA connector PCB 602D02 Accelerometer Tri axial 50g 100mV g PCB 604B31 Accelerometer Uni axial 100mV g cylindrical PCB 601A01 Accelerometer Uni axial 100mV g RA connector PCB 602D01 Accelerometer mounting block Tri axial mounting cube...

Страница 39: ...endive field wiring outputs are rated to the following parameters Parameter Value Voltage VO 24V Current IO Power PO Capacitance CO Inductance LO WARNING EXPLOSION HAZARD DO NOT CONNECT OR DISCONNECT SENSORS WHEN ENERGIZED IN A HAZARDOUS LOCATION ENVIRONMENT AVERTISSEMENT NE PAS CONNECTER OU DÉCONNECTER LES CAPTEURS DE SONDAGE QUAND IL EST ENERGISE DANS UN ENVIRONNEMENT DE LOCALISATION DANGEREUSE ...

Страница 40: ...led and tapped hole typically used for bearing assembly locations and ductile iron parts intended to be created at time of manufacture for all products where possible B Via an adhesively bonded mounting pad fig 5 6 below To be used when it is not possible to drill and tap It is also possible to change the orientation of a single axis sensor by placing a placing a tri block mounting accessory in be...

Страница 41: ...the mounting puck 14 4 2 113 4 2 1 Equipment and materials required Minimum PPE eye protection gloves hard hat long sleeves and trousers Wire brush Clean cloth Adhesive Loctite Hysol 9461 Abrasive paper eg 120grit o A suitable portable drill tool can be used if approved by site Cleaning solvent eg isopropyl alcohol Plastic card or similar for mixing 2 part epoxy components 14 4 2 213 4 2 2 Hazards...

Страница 42: ...ng cure Figure 13 4 Slurry pump Mounting pump adhesively bonded to pump 8 Allow 24 hour cure time before installing sensors Denso tape can be used to help secure vertically mounted pucks if needed 14 4 313 4 3 Drilled and tapped mount This method is most often utilised for bearing assemblies but can also be used on suction covers and casings made of cast iron In this case an official drawing will ...

Страница 43: ...e three versions of the kit available to allow for different mounting threads M6 and M8 See http www hansfordsensors com wp content uploads datasheets TS161U pdf for more information Tapping compound cutting fluid Battery drill 14 4 3 213 4 3 2 Hazards Swarth associated with drilling can be sharp Do not brush away with your hands Ensure that any electrical equipment is in good condition and meets ...

Страница 44: ... cable to the allocated sensor making sure to use the correct cable and observe keyways cables have stamped metal labels 3 Wrap connector interface including nut and exposed thread with Nitto No 15 tape as shown in Figure 13 5Figure 9 5 Figure 13 5 Uni axial accelerometer with connector and protective tape applied 4 Screw Accelerometer thru bolt or cap screw into mounting puck or prepared threaded...

Страница 45: ...disconnect sensor from cable a Unwrap protective tape b Remove connector c Install plastic bung cap on both sensor and cable connectors 14 613 6 Temperature RTD s 14 6 113 6 1 Equipment and materials required Minimum recommended PPE gloves eye protection hard hat long sleeves and trousers Allen key 3 16 Small Philips screwdriver UNF x 1 long cap screw and washer x qty 4 RTD leads part SD014 3M x q...

Страница 46: ...rench for Pressure transducer 1x Flow Meter part xxxxxxx 1x Pressure Tranducer part xxxxxxxx Protective tape Nitto Self fusing Butyl Rubber Tape No 15 Plumbers thread tape 14 7 213 7 2 Possible Hazards Water within the gland supply system may be at elevated pressure enough to cause eye damage if accidentally directed into the eye Gland water supply is not likely potable water hence should not be i...

Страница 47: ...t and bearing assembly Fasteners 1x Speed Sensor Part 872C N8NP12 04 Mounting bracket dwg xxxxx Target bracket dwg xxxxxx Protective tape Nitto Self fusing Butyl Rubber Tape No 15 Gap measurement tool Speed sensor integrity check tool 14 8 213 8 2 Hazards The Pump Shaft speed sensor is mounted off the motor end of the bearing assembly To install the speed sensor the motor must be turned off and ta...

Страница 48: ...ensor to the test box Rock the shaft back and forth ensuring that the indicator LED on the test box illuminates each time the target passes under the sensor 10 Remove the test box from the sensor and connect the regular cable 11 Wrap connector interface with protective tape Nitto No 15 1514 Cleaning and Maintenance The enclosure of the system is able to withstand slurry This slurry should be remov...

Страница 49: ...he MPM RSP and power supply are certified to meet the following hazardous location standards and gas groups o Class I Division 2 Groups B C D T3 o Class I Zone 2 AEx nA IIB H2 T3 o Ex II 3GD EEx nA IIB H2 T3 Dc Canada US Hazardous Location Compliance o ANSI ISA 12 12 01 Nonincendive Electrical Equipment for Use in Class I and II Division 2 and Class III Divisions 1 and 2 Hazardous Classified Locat...

Страница 50: ...r requirements for operating this product in accordance with National laws for usage of radio spectrum and operation of radio devices Failure of the end user to comply with the applicable requirements may result in unlawful operation and adverse action against the end user by the applicable National regulatory authority Note This product s firmware limits operation to only the channels allowed in ...

Страница 51: ...forth for an uncontrolled environment The antennas used for this transmitter must be installed to provide a separation distance of at least 20 centimetres from all persons and must not be co located or operating in conjunction with any other antenna or transmitter To comply with FCC RF exposure compliance requirements a separation distance of at least 33 9 centimetres must be maintained between th...

Страница 52: ...électrique à l intention des autres utilisateurs il faut choisir le type d antenne et son gain de sorte que la puissance isotrope rayonnée équivalente p i r e ne dépasse pas l intensité nécessaire à l établissement d une communication satisfaisante This radio transmitter IC 23347 STX000004 has been approved by Industry Canada to operate with the antenna types listed below with the maximum permissi...

Отзывы: