56 |
P a g e
RECESS/INSIDE FIT MOUNT INSTALLATION WITH
D, T, BULLNOSE Z OR Z-FRAMES
1.
ASSEMBLE FRAMES
•
See relevant frame assembly pages
2.
PLACE FRAME IN OPENING
•
The top part of the frame is indicated by a greater amount of distance from the
top of the top hinge to the edge of the frame. The label will indicate left and right
side.
3.
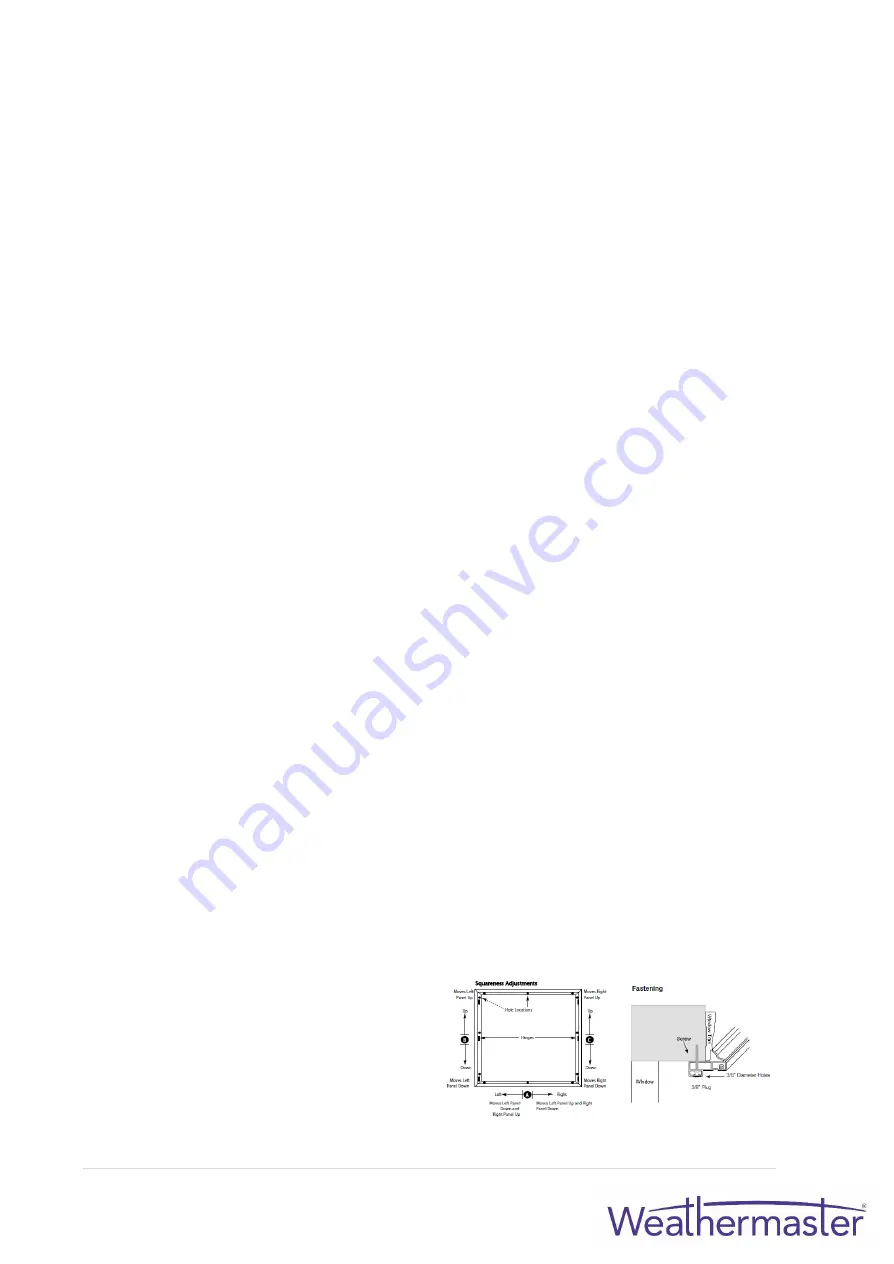
FASTEN FRAME
•
Drill 10mm holes through the first layer and in line with the top of the hinges on the
frame.
•
Insert a screw in both the left and right top side frame holes. Centre the frame in
the opening, then drill the screws into the jambs. Ensure the screw head is deep
within the hole, but do not distort the frame.
4.
HANG PANELS
•
With upper and lower hinge pins only.
5.
SQUARE/LEVEL PANELS TO THE OPENING
•
Move bottom frame left or right until the panels are level (A). If this does not work,
then:
•
Move left frame up or down until the panels are level (B). If this does not work,
then:
•
Move right frame up or down until the panels are level (C).
•
When the panels are level within the frame, pull the bottom frame fully to one
side and insert screw into the opposite bottom corner. Continue to use this screw
to adjust the frame until the panels are once again level.
6.
FASTEN REMAINING SCREWS
•
Insert screws in the remaining holes and check to ensure panels are level after
every screw has been drilled into position.
7.
INSTALL MAGNETS AND PLATES OR RAMPS (if applicable)
•
See previous pages for instructions
8.
CAP INSTALLATION HOLES
•
Once all screws have been installed and panels checked for levelness, cap all
holes with the provided button plugs.
9.
CLOSE ANY GAPS
•
For gaps that may occur at frame
corners or around frame, apply Caulk
as needed.
Содержание Eclipse Shutters
Страница 1: ...Eclipse Shutters Installation Manual ...
Страница 3: ...3 P a g e GENERAL INFORMATION SHUTTER PANEL PARTS DIAGRAM ...
Страница 5: ...5 P a g e SHUTTER PANEL PARTS ...
Страница 15: ...15 P a g e SLIDING OPEN SLIDING SHUTTERS TRACK SYSTEM SLIDING SHUTTERS TRACK SYSTEM DIAGRAM ...
Страница 16: ...16 P a g e SLIDING SHUTTERS TRACK SYSTEM DIAGRAM OPEN SLIDING ...
Страница 20: ...20 P a g e SLIDING SHUTTERS RECESS MOUNT APPLICATION ...
Страница 21: ...21 P a g e SLIDING SHUTTERS RECESS MOUNT APPLICATION ...
Страница 22: ...22 P a g e SLIDING SHUTTERS FACE MOUNT APPLICATION ...
Страница 23: ...23 P a g e SLIDING SHUTTERS FACE MOUNT APPLICATION ...
Страница 27: ...27 P a g e TRIPLE SLIDING SHUTTERS TRACK SYSTEM DIAGRAM ...
Страница 30: ...30 P a g e SLIDING SHUTTERS RECESS MOUNT APPLICATION ...
Страница 31: ...31 P a g e SLIDING SHUTTERS FACE MOUNT APPLICATION ...
Страница 35: ...35 P a g e BI FOLD TRACK SYSTEM DIAGRAM Clearance 15mm Internal Tracks Nominal ...
Страница 38: ...38 P a g e BI FOLD SHUTTERS DIAGRAM D FACE MOUNT ...
Страница 39: ...39 P a g e BI FOLD SHUTTERS DIAGRAM E RECESS MOUNT ...
Страница 41: ...41 P a g e BI FOLD SHUTTERS FRAME EXTENSIONS ...
Страница 45: ...45 P a g e VALANCE RETURN OPTIONS RECESS MOUNT FULLY RECESSED FRAME SQUARE CUT VALANCE ...
Страница 46: ...46 P a g e FACE MOUNT STANDARD FULL LENGTH VALANCE RETURNS ...


