


Document #10-32813 Rev A; June 07, 2019
Page
25
of 69
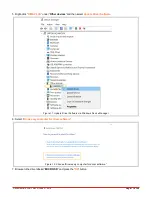
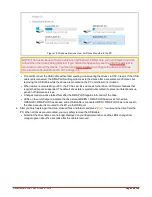
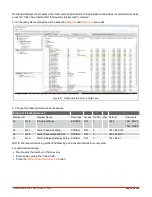
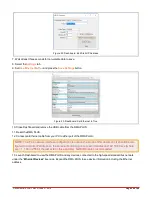
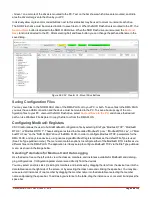
Figure 22: Dashboard: Edit Static IP Address
7. Wait at least three seconds for non-volatile data to save.
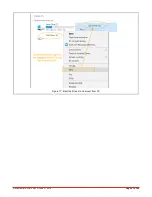
8. Select the
Settings
tab.
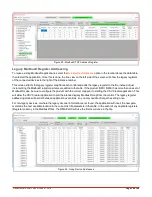
9. Set
Use Ethernet
to
True
and press the
Save Settings
button.
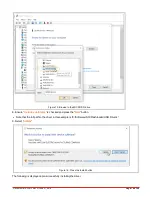
Figure 23: Dashboard: Set Ethernet to True
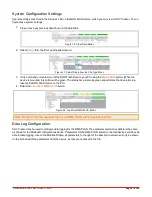
10. Close Dashboard and remove the USB cable from the RMA PLUS.
11. Reset the RMA PLUS.
12. Connect an Ethernet cable from your PC to either port of the RMA PLUS.
NOTE: The PC’s network interface configuration is outside the scope of this document. It should be con-
figured for a static IP address on the same subnet taking care to avoid addresses 192.168.0.xxx (where
xxx = 1, 100 or 255 for the last octet in this example). NetBIOS is also recommended.
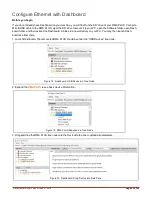
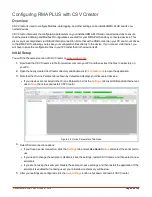
13. Launch Dashboard to view the RMA PLUS and any devices connected to the high-speed standard bus network
under the “
Ethernet Devices
” tree node. Expand the RMA PLUS to see device information including the Ethernet
address.


