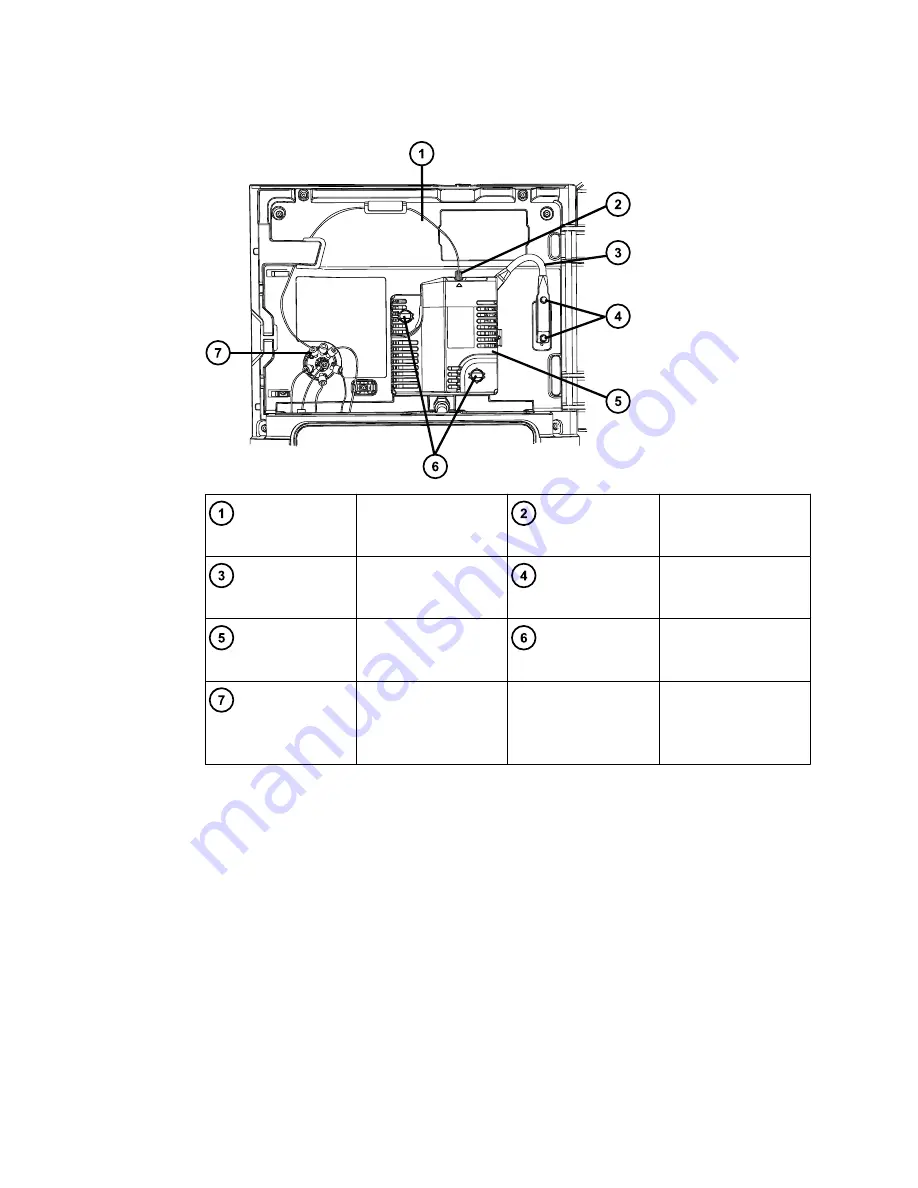
Figure 3–17: The main components
Probe capillary
assembly
Probe capillary
connection at source
Electrical cable
Electrical cable
screws
Source enclosure
Source enclosure
thumbscrews
Probe capillary
connection at divert
valve
3. Disconnect the source enclosure's electrical cable from the front of the instrument by
loosening the screws and pull the cable from the socket.
4. Loosen the two thumbscrews on the front of the source enclosure.
5. Remove the source enclosure by pulling it away from the instrument using both hands and
place it on a flat surface.
6. Loosen the probe fitting, and then remove the probe capillary from the top of the source
enclosure before you carefully insert it into the inlet on the new source enclosure.
7. Tighten the probe fitting until it clicks.
8. Discard the old source enclosure.
9. Use both hands to slide the replacement source enclosure onto the instrument's supporting
rods.
10. To secure the enclosure against the instrument, tighten the two thumbscrews on the front
of the source enclosure.
August 20, 2021, 715005003 Ver. 04 (Previously released as Revision C)
Page 51


