


12
on-screen keypad to enter the dots.
3.
Press the OK button to confirm the new address.
To enter a volume name for the new disk:
1.
Use the Up and Down arrow buttons on the remote control to highlight the Volume option and press the Right arrow
button to confirm the choice.
2.
Use the on-screen keyboard to enter a volume label for the new disk.
To test a network disk:
1.
Use the Up and Down arrow buttons on the remote control to highlight the Test! option.
2.
Press the OK button to confirm the choice.
The test result will appear on the screen.
To save disk parameters:
1.
Use the Up and Down arrow buttons on the remote control to highlight the Save! option.
2.
Press the OK button to confirm the choice.
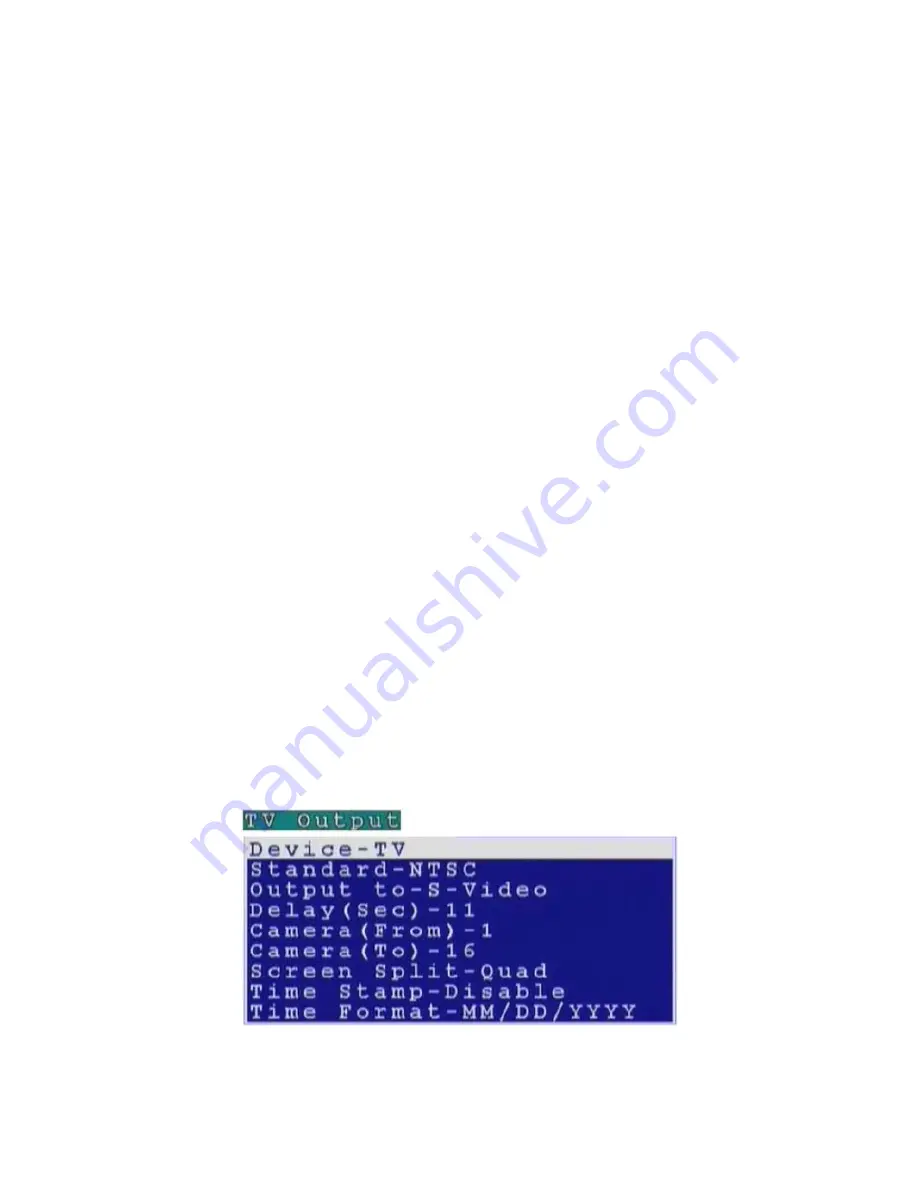
3.3.4 TV
output
The VP- 101 can be connected to a VGA monitor or a TV to view the camera video signal. Use the TV Output menu to set the
following parameters for the video output port:
Device -
sets the output to VGA or TV.
Standard -
sets the signal format for the output device. Select from NTSC, PAL, SECAM, and so on.
Output to -
sets the video output to the composite or S-Video signal.
Delay -
sets the delay between consecutive camera signals when displaying all the camera signals automatically.
Camera (From) -
specifies the first camera signal displayed in the automatic cyclic camera mode.
Camera (To) -
specifies the last camera signal displayed in the automatic cyclic camera mode.
Screen Split -
sets the number (1, 4, 9, or 16) of cameras to be shown on the local screen.
Time Stamp -
Enables and specifies the position of the time stamp on the screen.
Time Format -
Specifies the format of the time stamp.
Use the Up and Down arrow buttons on the remote control to select any one of the displayed parameters and use the Left and
Right buttons to cycle through the available options. Press the OK button when parameters are set correctly.


