


Device Controls
GPS400 User Manual
4
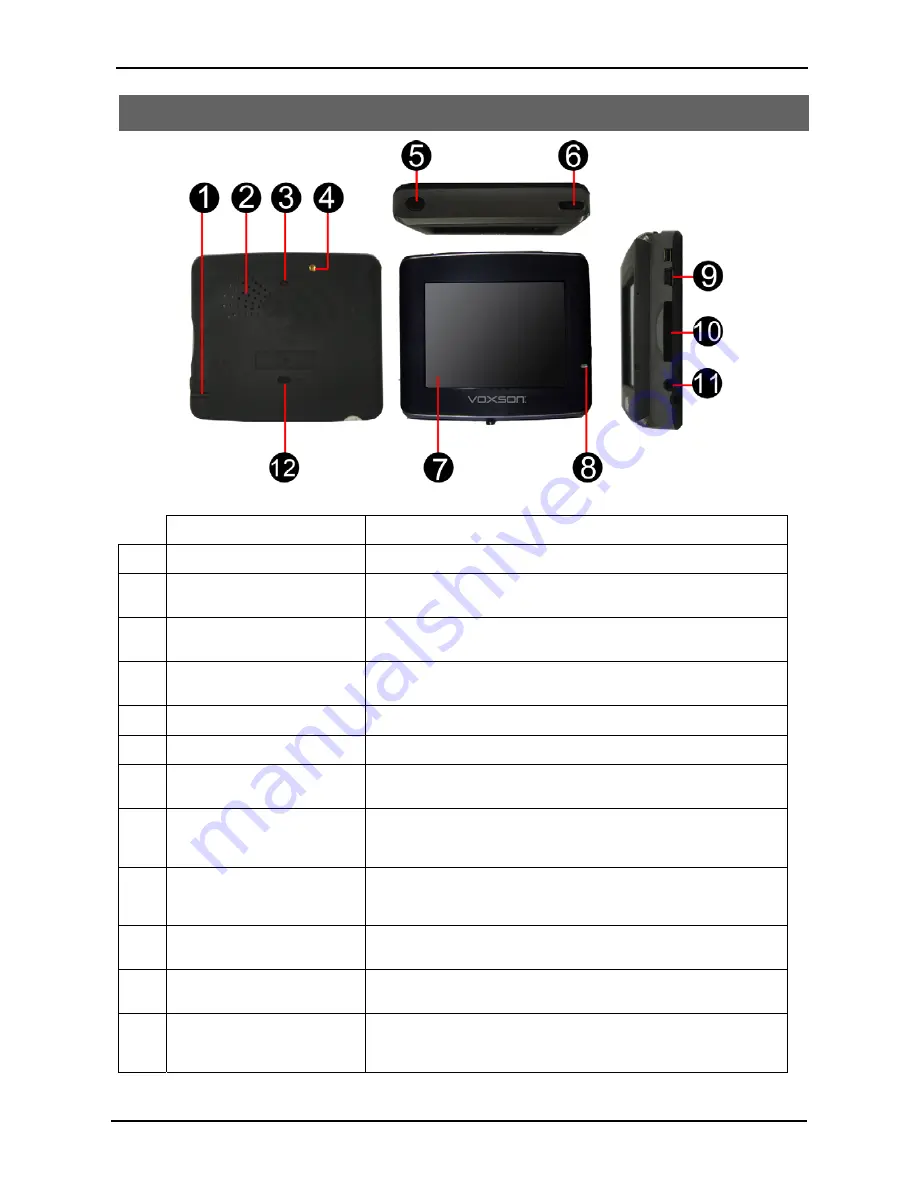
1. Device Controls
Item Description
1
Stylus
Remove to use on touch screen.
2
Speaker
Internal speaker to play voice guidance from navigation
software. Volume may be adjusted using volume key (6).
3
Reset Button
Used to restart the device in the case that it becomes
non-responsive or unstable. Press with the tip of the stylus.
4 External
GPS
Antenna
Connector
Optional external GPS antenna available for applications where
the internal antenna is obstructed from receiving GPS signal.
5
Power Button
Slide upward to turn unit on or off.
6
Volume Key
Slide the key left or right to adjust the volume.
7
Touch screen
Used as the display as well as input device. Tap on the screen
area to activate corresponding buttons as displayed.
8
Battery Charging LED
Indicates the status of the battery:
Orange:
Charging
Green:
Charged
9
USB / Charger Connector
Plug in the supplied charger to charge the device. Device should
be connected to cigarette lighter charger whenever in use in the
vehicle.
10
SD / MMC Card Slot
SD card contains the navigation software and maps. The card
must remain in the unit whilst using the navigation software.
11
Earphone Jack
3.5mm stereo jack used to connect headphones to use as
alternative to internal speaker.
12
Battery Switch
Disconnects the internal battery to completely switch device off.
This is only necessary if the device is to be stored for an
extended period of time.
Содержание GPS400
Страница 1: ...GPS400 User Manual ...


