


Vision VR48 Series 4 Router User Manual
184
© 2015 Vision Engraving and Routing Systems
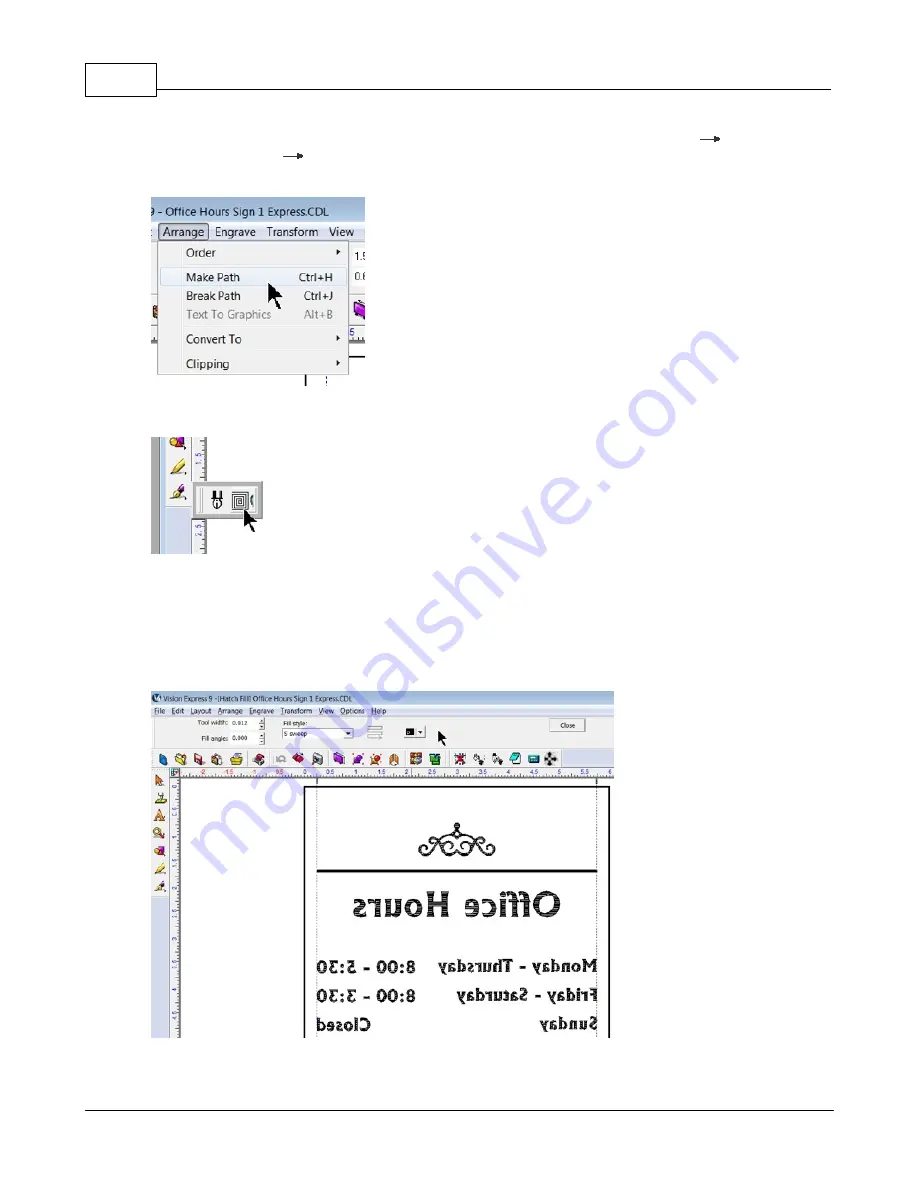
Once the color of all objects is the same, select only the clipart, then select Arrange
Break Path,
then select Arrange
Make Path. This resets the fill path so that when we use the Hatch Fill tool, the
correct parts of our clipart object will be filled.
Lastly, select the Stroke and Fill Tools (or the Tool Path Tools in Vision Expert or Pro) icon from the left
toolbar, and click on the Hatch Fill tool.
The top menu bar will change to the Hatch Fill toolbar in Vision Express only. (For Vision Expert or Pro,
see Fill Tool usage in Example Job 6). Since we are using a 0.015 Flex Cutter for this example, we need
to change the Tool width setting to about 25% less than the cutter tip width. In this case, the Tool Width
was set to 0.012 inches, the Fill angels was left as 0 degrees, the S sweep patter was used (it is faster
than the line sweep pattern) and the color was set to black. Once these settings have been changed,
click on Close to exit the Hatch Fill toolbar.
Содержание VR48 4 Series
Страница 1: ...2015 Vision Engraving and Routing Systems Vision VR48 Series 4 Router User Manual Revised 8 19 2015...
Страница 13: ...Introduction 13 2015 Vision Engraving and Routing Systems...
Страница 28: ...Vision VR48 Series 4 Router User Manual 28 2015 Vision Engraving and Routing Systems NECESSARY...
Страница 57: ...Router Engraving and Knife Heads 57 2015 Vision Engraving and Routing Systems...
Страница 212: ...Vision VR48 Series 4 Router User Manual 212 2015 Vision Engraving and Routing Systems The finished part...
Страница 343: ...Optional Accessories 343 2015 Vision Engraving and Routing Systems...
Страница 352: ......


