


VIP Vision Access Control Installation Guide - Version: VIPACC-Q219.1
22
3.2 Smart PSS Installation (continued)
3.2.2 Set Password for Smart PSS
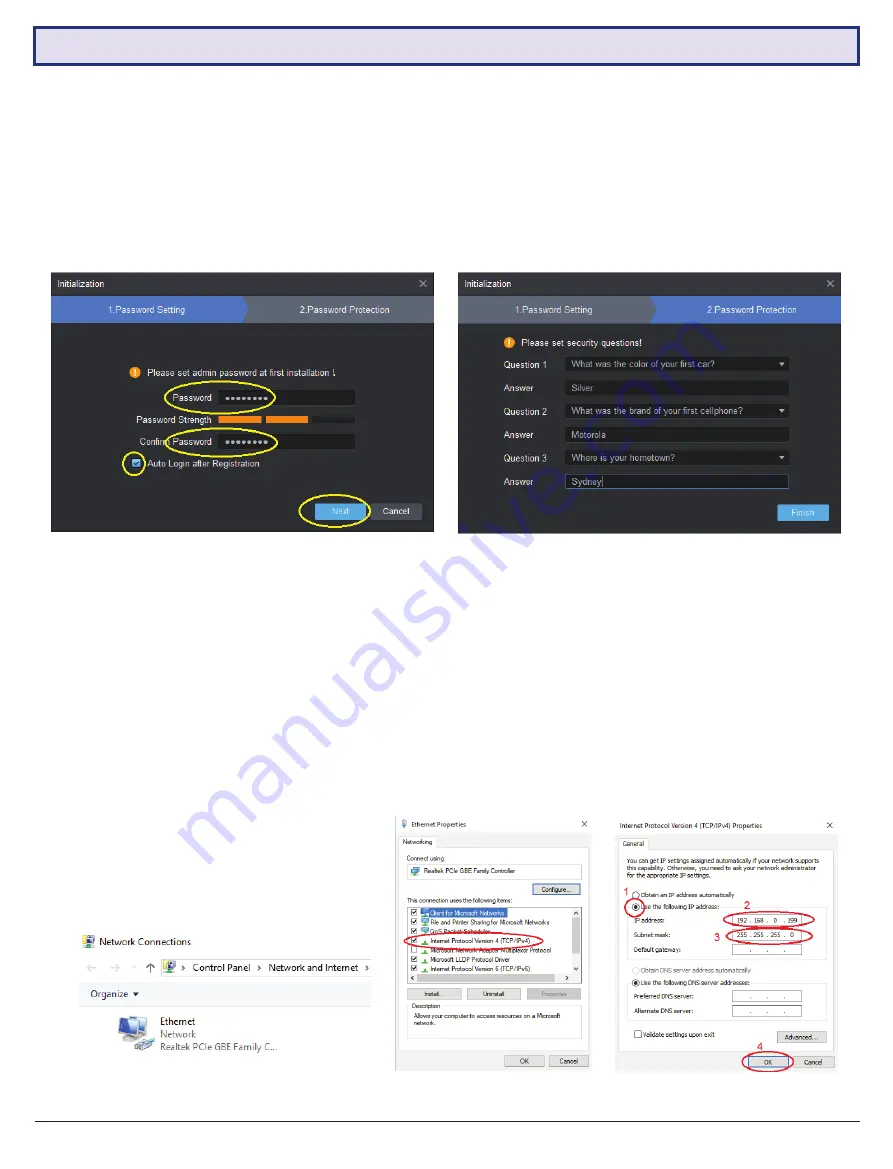
When the program launches for the first time, it will begin Initialisation and prompt the user to set a password. Enter a
password, then check “Auto Login after Registration” and click “Next”.
Note: The password must be 8 digits with and contain both numbers and letters.
Next, set three security questions and click “Finish”.
3.2.3 Configure the PC Network Card (Ethernet Card)
The default IP address of the Access Controller is
192.168.0.2
. You must change the PC network card IP address to this
subnet, i.e. you must set the IP of the PC network card to
192.168.0.xx
, where
xx
is a number from 0 to 255 other than
2. We recommend setting
xx
to a larger number to reduce the possibility of conflicting with other devices.
For this example, we’ll set the IP of the network card to
192.168.0.199
1. Press the
Windows key + R
to open Run. Type “ncpa.cpl” and click “OK” to access Network Communications.
2. Right click on the Ethernet icon and click Properties.
3. Double click the item “Internet Protocol Version 4 (TCP/IPv4)
4. Select “Use the following IP address” and enter:
IP address:
192.168.0.xx
Subnet mask:
255.255.255.0
5.
Click “OK” to confirm.
6.
Click “OK” again to finish.
Содержание ACCON Series
Страница 11: ...Visit www vip vision com for full user manual and support 11 2 2 Wiring Diagrams continued ACCON 2P41...
Страница 12: ...VIP Vision Access Control Installation Guide Version VIPACC Q219 1 12 2 2 Wiring Diagrams continued ACCON 2P42...
Страница 13: ...Visit www vip vision com for full user manual and support 13 2 2 Wiring Diagrams continued ACCON 2P81...


