


VCOP Gold User Manual
Vighnaharta Technologies Pvt. Ltd. Page
14
of
44
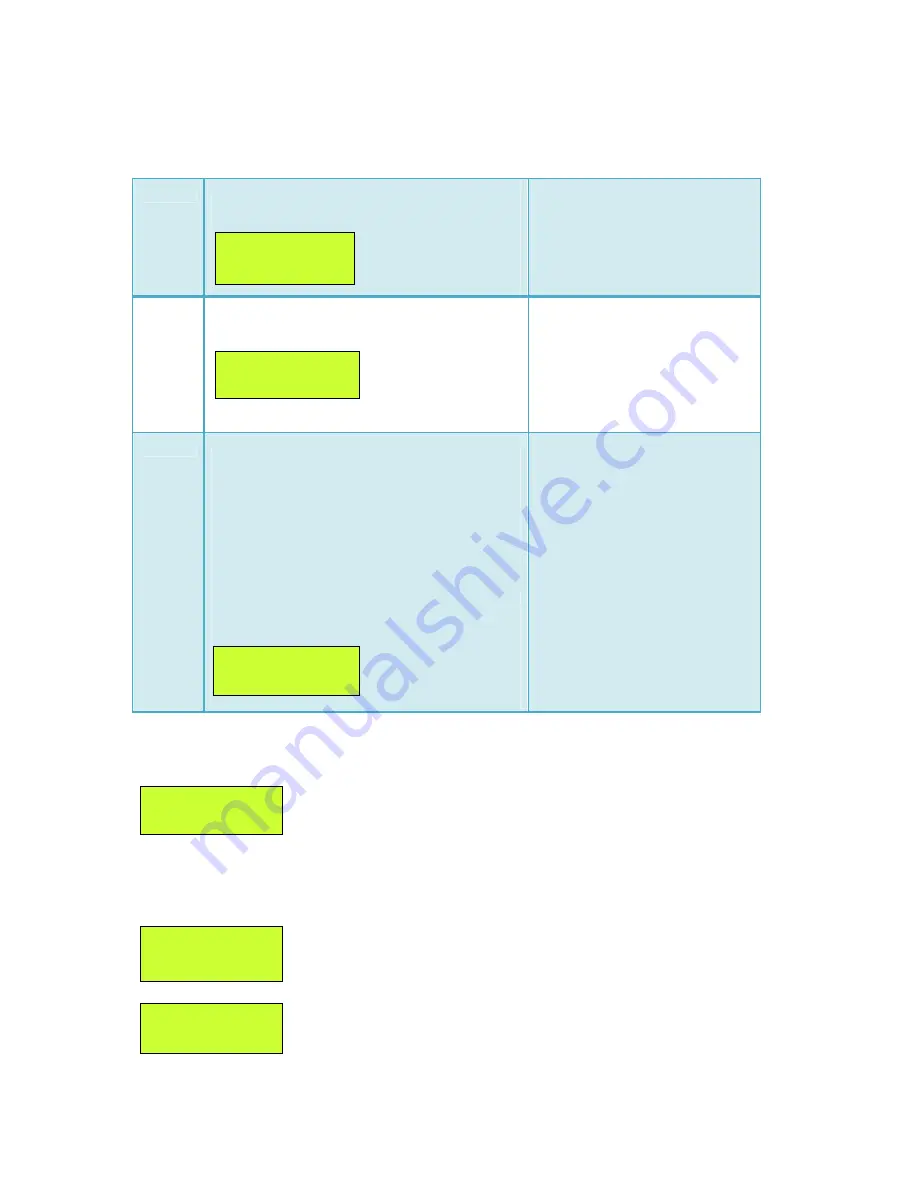
To select
Inst
, press
MENU 1
key.
To select
User
, press
MENU 2
key.
To select
Dures
, press
MENU 3
key.
4.1.2 Delete Log
Installer can delete the event log of the system.
To delete the event log,
Press
MENU 3
key in disarmed state. The LCD displays as shown below.
To exit from this menu press the ESC key to enter the pervious menu or to exit on main screen.
Inst
The system allows configuring password for
installer.
Enter
password
as
4
digit
numeric characters. Also user
can modify it. Press Enter key to
save the PIN.
User
The system allows configuring 4 authenticated
users. Each user has password.
Enter number from 1 to 4 as a
user number and password as 4
digit numeric characters. Also
user can modify it. Press Enter
key to save the user and PIN.
Dures
In case of emergency or panic situation, if user
is forced to disarm the system, user is
supposed to enter duress PIN instead of disarm
PIN. Then system sends alert to desired users
silently, but on the front panel it shows the
disarm message.
Note:
Do not set Duress PIN unless it is
absolutely necessary. Its use often results in
false alarm.
Enter 4 digits PIN as numeric
characters and press
Enter
key
to save the PIN.
Event Log Erased
Press ESC
Wait For Action
Deleting Log…
Inst Config 1/1
Set PIN Del Log
Set USERPIN(1-4)
User:x PIN:xxxx
Set Duress PIN:
Enter PIN: xxxx
Set InstallerPIN
Enter PIN: xxxx


