


ViewSonic
Wireless Media Adapter
18
Step 6: Adjusting the Screen Image
•
If you used the WMA100’s Composite Video or S-Video port to connect
to your display, no adjustment is necessary.
•
If you used the WMA100’s Component or DVI/VGA port(s) to connect
to your display, adjustments may be necessary if you see symptoms (a)
or (b) below.
(a) There is no screen image or the screen image does not look clear.
After you turn on the WMA100, press the
Output
button on the Remote
Control. Wait two (2) seconds and if the image is still not clear, press the
Output
button again. If the screen image is still not clear, press
Output
a
third time. The
Output
button has a total of three (3) settings.
(b) The screen image is shifted to the left or right.
(For DVI or VGA only)
Select your displays’s Auto adjustment control,
which automatically optimizes the size and position of the screen image.
See your display’s user manual for further instructions.
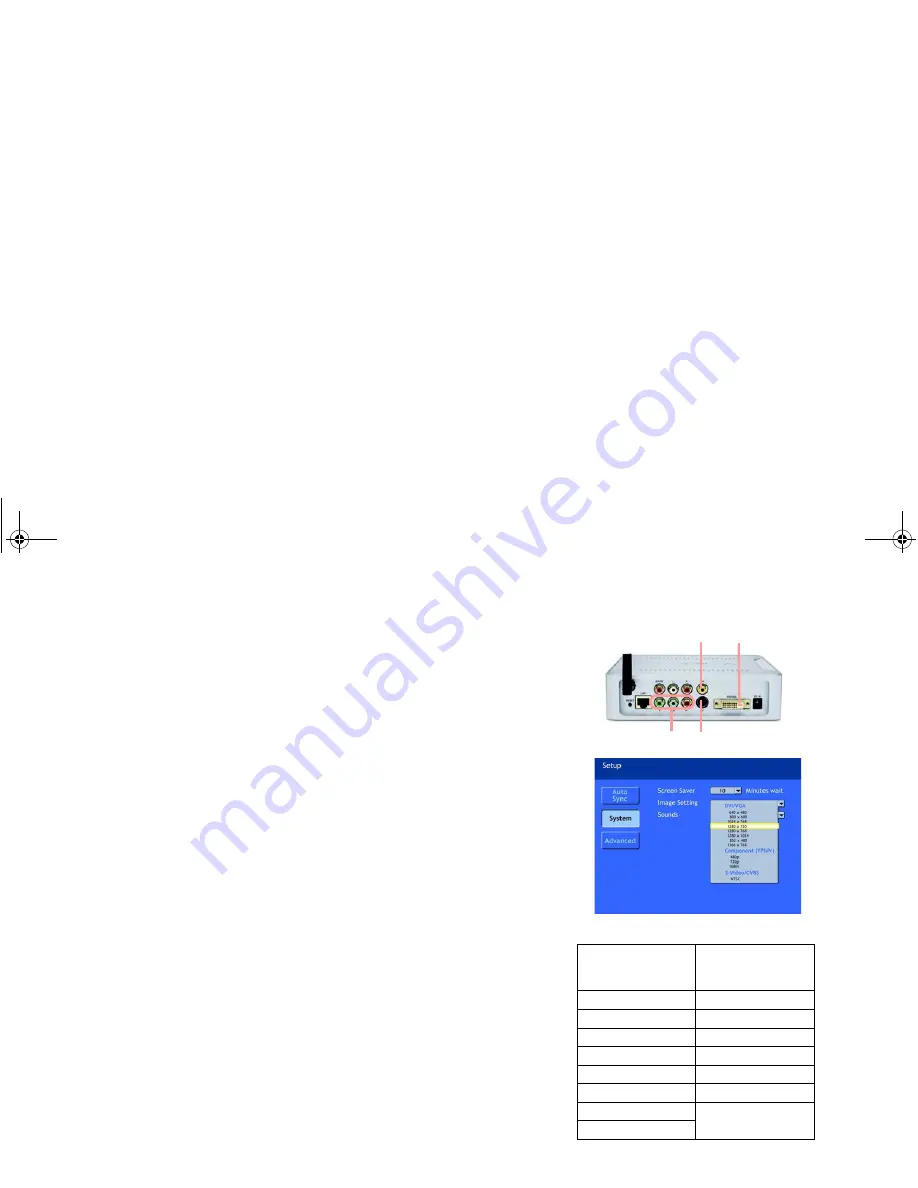
Optimizing the WMA100’s Screen Image
To optimize the screen image, do the following.
(for Component Video or DVI/VGA only)
1
Select
Setup
from the
Home
page, then select
System
from the
Setup
menu.
2
Use the
Up/Down Arrow
buttons on the Remote Control to select an
image setting from the table to the right, then press
OK
.
NOTE:
For the best screen image, select your display’s Preferred Resolution
(see your display’s user manual)..
Image Setting Screen
DVI/VGA
Component
Video
Composite
(CVBS) Video
S-Video
Image Settings
(resolutions) for
DVI / VGA
Image Settings for
Component Video
(YPbPr)
640 x 480
480p
800 x 600
720p
1024 x 768
1080i
1280 x 720
1280 x 768
1280 x 1024
S-Video/Composite
852 x 480
NTSC
(Composite = CVBS)
1366 x 768
WMA_UG.book Page 18 Tuesday, October 12, 2004 3:29 PM


