3
Operating Manual Reprint
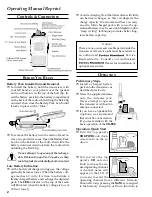
select the Memory Channel Group to be you want
before selecting the operating channel. A group
name will appear on the LCD whenever the
Soft
key is pressed.
Note: Some models are programmed so that the
operating channels are selected by the Soft
key and the memory channel group is se-
lected by the channe selector knob. For fur-
t h e r d e t a i l s , c o n t a c t y o u r
dealer.
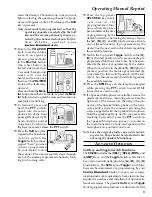
Rotate the
VOL/PWR
knob to set the volume
level. If no signal is
present, press and hold
in the
Monitor
button
(the center button on
the left side) more than
2 seconds; background
n o i s e w i l l n o w b e
heard, and you may use
this to set the
VOL/PWR
knob for the desired au-
dio level.
Press and hold the
Moni-
tor
button more than 2 seconds (or press the
Moni-
tor
button twice) to quiet the noise and resume nor-
mal (quiet) monitoring.
To transmit, press and
hold the
PTT
switch.
Speak into the micro-
phone area of the front
panel grille (lower right-
hand corner) in a normal
voice level. To return to
the Receive mode, release the
PTT
switch.
Press the
Soft
key (if as-
signed to the Scan func-
t i o n ) o r s w i t c h t h e
Toggle
Switch to the as-
signed “Scan” position
(when so programmed
by your dealer) to start
the scanner. The scanner rapidly steps through
each of the dealer-programmed channels, look-
ing for incoming calls.
Press the top panel’s
SEL1/SEL2
key to acti-
v a t e o n e o f t h e
preprogrammed func-
tions which may have
been enabled at the time
of programming by the
dealer. Similarly, when using the 16-key version,
the [
A
], [
B
], [
C
], and [
D
] function keys activate
one of these functions, if programmed by the
dealer. See the next section for details regarding
the available features.
Switch the top panel’s
Toggle
Switch to the [
A
],
[
B
] or [Center] position to activate one of the pre-
programmed functions which may have been en-
abled at the time of programming by the dealer.
When this switch is in the [
A
(left)], [
B
(right)] or
[Center] position, the feature programmed (by
your dealer) to that switch position will be acti-
vated. See the next section for details regarding
the available features.
Press the
DTMF
keys on the telephone keypad
while pressing the
PTT
switch to send DTMF
tones (16-key version only).
If a Speaker/Microphone is available, remove the
plastic cap and its two mounting screws from the
right side of the transceiver, then align the con-
nector of the Speaker/Microphone on the trans-
ceiver body; secure the connector pin using the
screws supplied with the Speaker/Microphone.
Hold the speaker grille up next to your ear while
receiving. To transmit, press the
PTT
switch on
the Speaker/Microphone, just as you would on
the main transceiver’s body, and speak into the
microphone on a normal voice level.
Note: Save the original plastic cap and its mount-
ing screws. They should be reinstalled when
not using the Speaker/Microphone.
A
DVANCED
O
PERATION
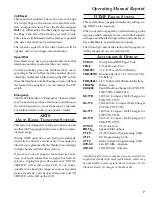
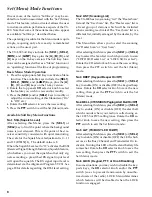
Soft Key and Toggle Switch Functions
The
VX-800
includes the [
SEL1
], [
SEL2
], [
MON
], and
[
LAMP
] Keys, and the
Toggle
Switch, while the 16-
key version additionally provides [
A
], [
B
], [
C
], [
D
]
function Keys. The
Soft
key and
Toggle
Switch func-
tions can be customized, via programming by your
dealer, to meet your commu-
nications/network requirements. Some features may
require the purchase and installation of optional in-
ternal accessories. The possible
Soft
key and
Toggle
Switch programming features are illustrated at the
Содержание VX-800
Страница 10: ...10 Set Menu Mode Functions Note ...
Страница 13: ...13 Block Diagram ...
Страница 14: ...14 Note Block Diagram ...
Страница 24: ...24 Note ...
Страница 26: ...26 Main Unit Lot 1 3 Note ...
Страница 29: ...29 Main Unit Lot 4 50 Circuit Diagram ...
Страница 30: ...30 Main Unit Lot 4 50 Note ...
Страница 33: ...33 Main Unit Lot 51 Circuit Diagram ...
Страница 34: ...34 Main Unit Lot 51 Note ...


