6
Follow-Me Scan
“Follow-Me” Scan feature checks a User-assigned
Priority Channel regularly as you scan the other
channels. Thus, if only Channels 1, 3, and 5 (of the 8
available channels) are designated for “Scanning,”
the user may nonetheless assign Channel 2 as the
“User-assigned” Priority Channel via the “Follow-
Me” feature.
To activate “Follow-Me” scanning, first select the
channel you want to designate as the “User-As-
signed Priority Channel” and Switch the
Toggle
Switch to the assigned position. Then turn the
CH
selector knob to the “Scanning Start” channel which
has been programmed by your dealer to activate the
scanner. When the scanner stops on an “Active”
channel, the User-assigned Priority Channel will
automatically be checked every few seconds; if ac-
tivity is found on the User-assigned Priority Chan-
nel, the radio will switch between it and the Dealer-
Assigned Priority Channel, if any.
Follow-Me DW
To set up a “Dual Watch” frequency pair using the
“Follow-Me” feature, select a channel using the
CH
selector knob. Now press the assigned
Soft
key;
pressing the assigned
Soft
key locks the current
channel as the User-assigned Priority Channel. Now
rotate the
CH
selector knob to another channel (not
the “Scanning Start” channel). Your radio will now
switch back-and-forth between the currently-se-
lected channel (shown on the
CH
selector knob) and
the User-assigned Priority Channel.
During “Follow-Me” scanning (after you have
pressed the key), you can set up the “Dual Watch”
feature by rotating the
CH
selector knob to another
channel. The radio will then scan back and forth
between the original User-assigned Priority Chan-
nel and the newly-selected channel.
The Priority Channel you have assigned (before
pressing the key) will be retained in memory until
you change it.
Channel Group Selection
The VX-800 is capable of separating its 200 memory
channels into any of ten Groups. There is no limit
as to the number of channels which may be assigned
Operating Manual Reprint
to each Group. The Dealer will have made the Group
assignment at the time of channel programming. At
the same time, one of the Soft Keys will be assigned
as the Channel Group Selection key.
To change Channel Groups, press the assigned soft
key to step through the available Groups. Once the
desired Group is reached, rotate the
CH
selector
knob to select the desired channel within the selected
Group.
You may wish to have the Scanner (described previ-
ously) pass through more than one Group during
the scanning process (normally, scanning is per-
formed within the current group only). To include
the current Group in the scanning loop, press and
hold in the assigned
Soft
key for one second.
To remove a Group from Group Scan, press and hold
in the assigned
Soft
key again for one second.
Multi-Group Scanning is only possible if you are
using the “User Scan” list.
The VX-800 has two scanning “lists:” the “Dealer
Scan” list and the “User Scan” list. The “Dealer Scan”
list is a fixed group of stations which will be included
when scanning is activated. The “User Scan” list is a
different list, initially arranged by the Dealer, which
may be modified by the User (if, for example, you
want to delete one or more of these channels from
the scanning list).
To edit the User Scan list, press and hold the
Soft
key (assigned to the Group Up/Down function) to
delete the current Memory Group from the Scan-
ning. Alternatively, press and hold the “Scan”
Soft
key for one second to delete the Current Memory
channel from the Scanning.
When you delete a Group or channel, “-SKIP-” will
appear on the LCD for one second after pressing the
Soft
key. To restore a particular channel to your scan-
ning list, press and hold in the
Soft
key again for
one second; “-STOP-” will appear on the LCD for
one second after pressing the Soft key.
Содержание VX-800
Страница 10: ...10 Set Menu Mode Functions Note ...
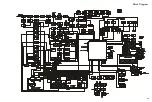
Страница 13: ...13 Block Diagram ...
Страница 14: ...14 Note Block Diagram ...
Страница 24: ...24 Note ...
Страница 26: ...26 Main Unit Lot 1 3 Note ...
Страница 29: ...29 Main Unit Lot 4 50 Circuit Diagram ...
Страница 30: ...30 Main Unit Lot 4 50 Note ...
Страница 33: ...33 Main Unit Lot 51 Circuit Diagram ...
Страница 34: ...34 Main Unit Lot 51 Note ...


