CFDV Series Gas Fireplace
20306739
21
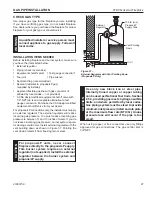
VENTING INSTALLATION
VERTICAL SIDE WALL APPLICATIONS
For all vertical Side wall installations, the supplied fl ue
restrictors must be installed. Install the fl ue restrictor
according to the settings shown in the Vertical Side wall
Installation Flue Restrictor Chart in order to balance the
airfl ow in and out of the unit and to maintain proper fl ame
height.
Vertical Side wall Installation
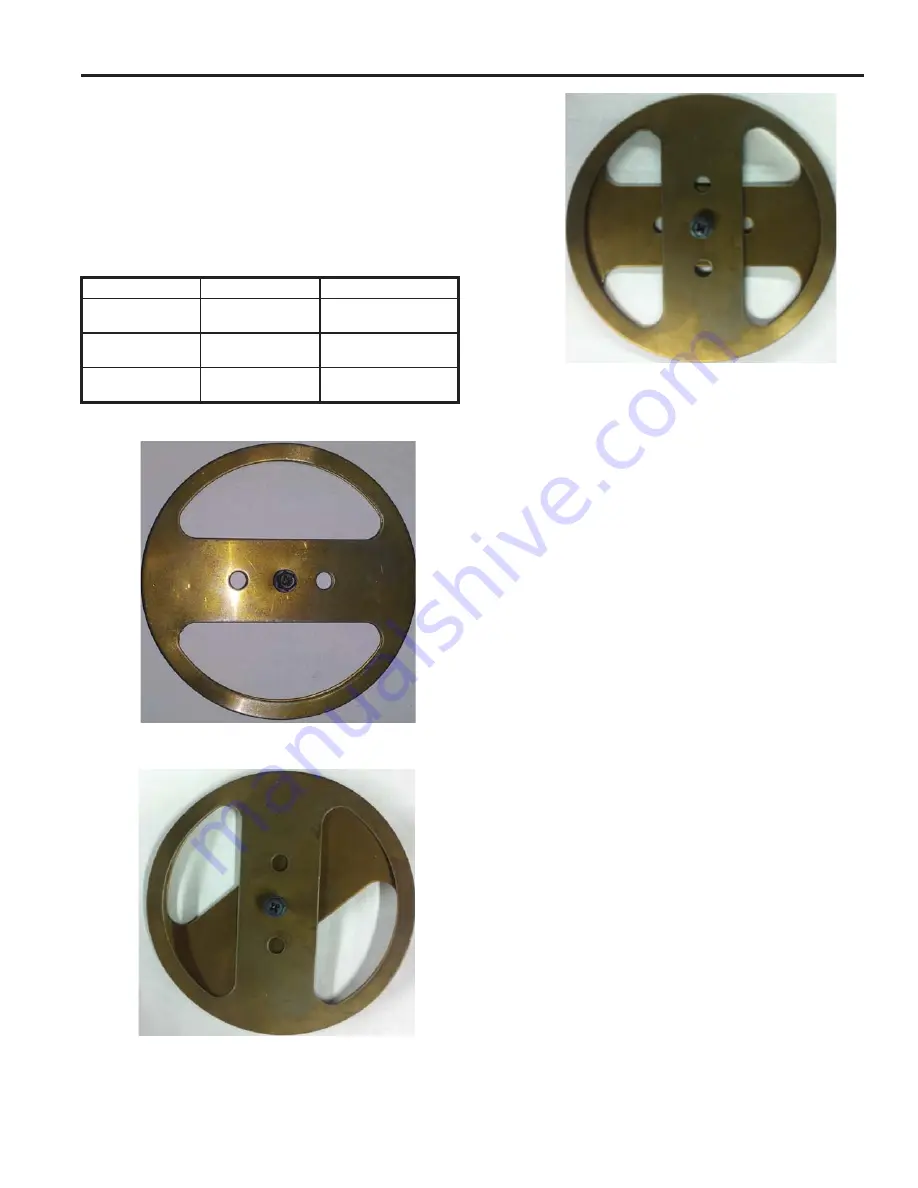
Flue Restrictor Setting Chart
Vertical Run
Horizontal Run
Restrictor Setting
0-8 feet of pipe
3-4 feet of pipe
Minimum restriction
(0 – 2.4 m)
(,9 – 1.2 m)
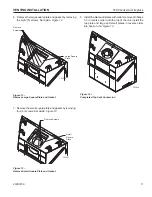
Figure 33
8-12 feet of pipe
4-6 feet of pipe
Medium restriction
(2.4 – 3.7 m)
(1.2 – 1.8 m)
Figure 34
12-20 feet of pipe
6-10 feet of pipe
Maximum restriction
(3.7 – 6 m)
(1.8 – 3 m)
Figure 35
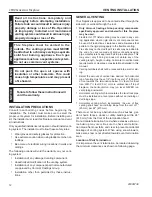
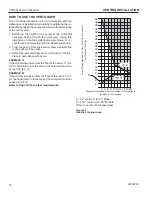
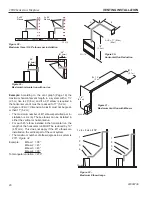
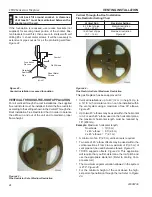
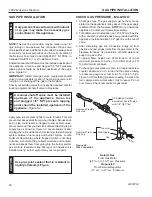
Figure 34 –
Flue Restrictor Set at Medium Restriction
FP3042
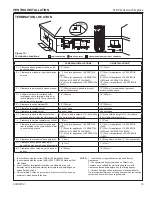
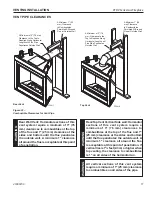
Figure 35 –
Flue Restrictor Set at Maximum Restriction
FP3043
VERTICAL SIDE WALL INSTALLATION –
TWIST LOCK PIPE
NOTE:
For all top vent vertical through-the-roof installa-
tions, install the supplied fl ue restrictors onto the top edge
of the fi rebox fl ue adapter according to the Vertical Side
wall Installation Flue Restrictor Chart.
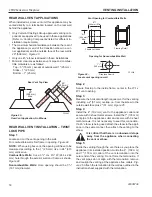
Step 1
Locate vent opening on the wall. It may be necessary to
fi rst position the fi replace and measure to obtain hole lo-
cation. Depending on whether the wall is combustible or
noncombustible, cut opening to size.
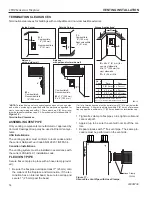
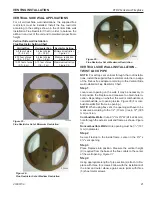
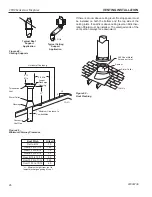
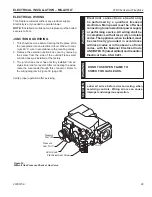
Figure 36
(For com-
bustible walls fi rst frame in opening.)
NOTE:
When using fl ex vent, the opening will have to be
measured according to the 1/2" (13 mm) rise in 12" (305
mm) vent run.
Combustible Walls:
Cut a 9
5
⁄
8
"H x 9
5
⁄
8
"W (244 x 244 mm)
hole through the exterior wall and frame as shown.
Figure
36
Noncombustible Walls:
Hole opening must be 7
1
⁄
2
" (191
mm) in diameter.
Step 2
Secure fi restop to the inside frame, center in the 9
5
⁄
8
" x
9
5
⁄
8
" vent opening.
Step 3
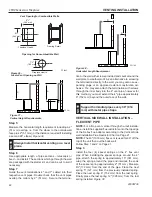
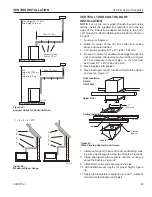
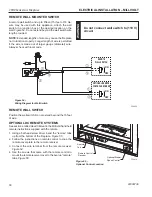
Place fi replace into position. Measure the vertical height
(X) required from the base of the fl ue collars to the center
of the wall opening.
Figure 37
Step 4
Using appropriate length of pipe section(s) attach to fi re-
place with three (3) screws. Follow with the installation of
the inner and outer elbow, again secure joints with three
(3) sheet metal screws.
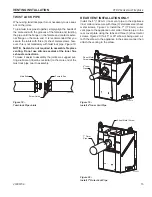
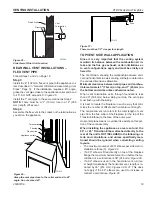
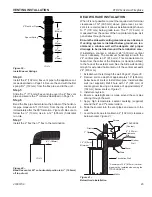
Figure 33 –
Flue Restrictor Set at Minimum Restriction
FP3044

