background image

33

Initial Setup

Before you can switch on the navigation
system for the first time, you must connect
the battery. This can be done by perform-
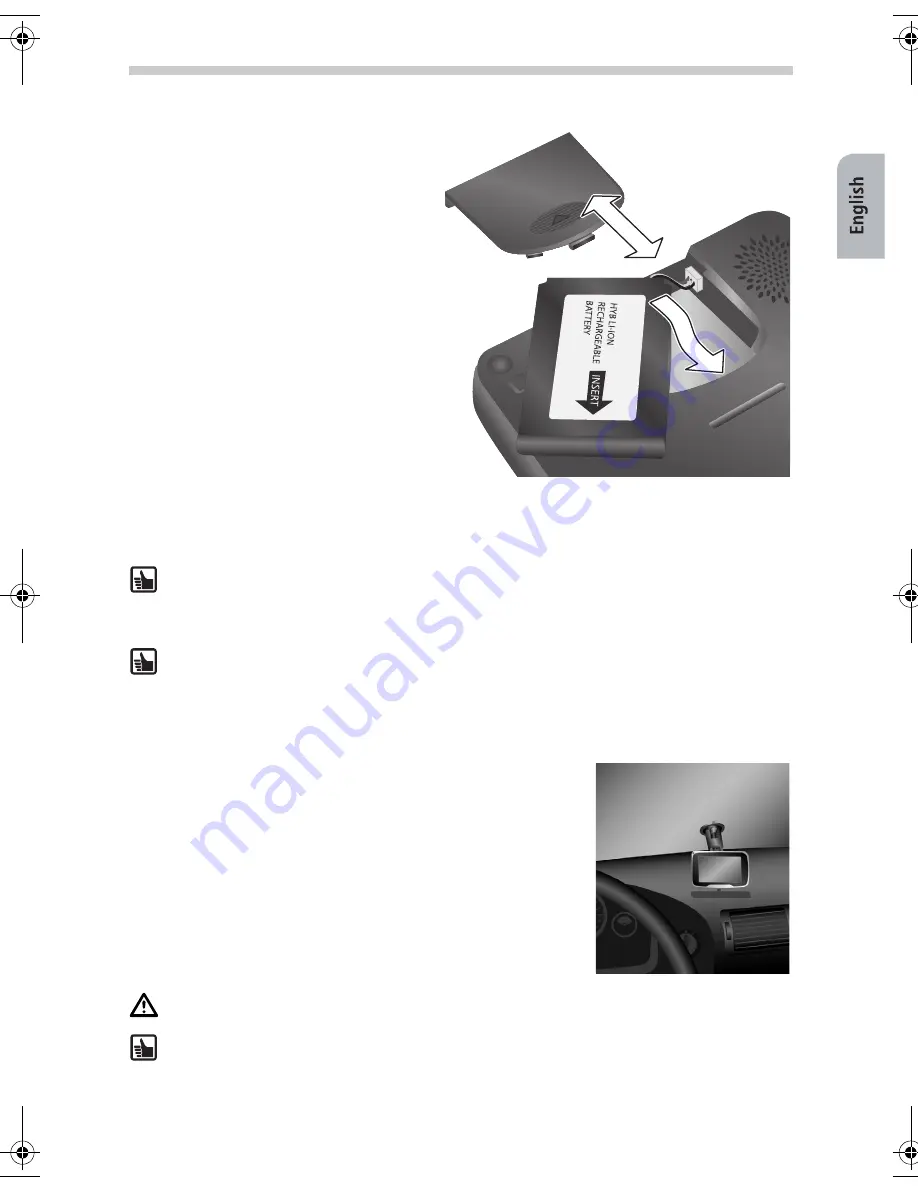
ing the following steps:

Open the battery compartment. 

Plug the battery connector into the 
battery socket as you can see on the 
picture. Be sure to have the connector 
in right orientation. Slide the battery 
into the battery compartment and 
place the cable into the small groove 
above. Now you can close the battery 
compartment.

Connect the navigation system to the 
12V/24V power supply in your vehicle. 
The battery will then start to charge. It 
takes approximately 5 hours to fully 
charge the battery. The battery life 
without an external power source is 
approx. 4 hours depending on appli-
cation and adjusted display brightness. 

When you have an active cradle you can use the car battery/keyswitch connection in 
combination with the optional car connectivity cable. By switching your car key the 
navigation device will automatically switch on or off. When the navigation device is 
mounted in the active cradle the battery will charge itself.

In case of the passive cradle:

you must use the power button to switch the navigation device on or off.

You can charge the battery by using the cigarette lighter cable.

Assembly and Mounting

To mount the device in the vehicle, proceed as follows:

Find a suitable place in the vehicle for mounting the mount. 
The screen be must be clearly visible from the driver's seat 
but the device should not obscure the driver's view. 

Please note the safety instructions when choosing the loca-
tion page 26. 

Press the suction cup against the glass in a free sky viewing 
position and move the pressure lever towards the glass un-
til it locks into place.

Attach the navigation system to the cradle.

On no account should the screen be adjusted by moving the device itself.

Dismounting:

 To detach the device, switch the pressure lever in the opposite direc-

tion and carefully pull the transparent rubber end of the suction cup to remove it from 
the window.

Setup and Mounting

QSG-PN2050-3000.book  Seite 33  Montag, 23. Oktober 2006  3:09 15

Содержание PN 2050 -

Страница 1: ......

Страница 2: ...Cleaning 27 Overview of Device 28 What s Included 28 Controls and Connection Ports 29 Setup and Mounting 33 Initial Setup 33 Assembly and Mounting 33 Configuration 34 Settings 35 GPS and TMC 37 Remote...

Страница 3: ...nt of emergency braking or a collision Only look at the screen when it is safe to do so If you need to look at the screen for a longer period of time stop the vehicle at an appropriate and safe place...

Страница 4: ...formation all around the world The system is operated and con trolled by the United States of America The USA is also responsible for the availability and accuracy of this system All changes to the GP...

Страница 5: ...TMC BT as an option depending on product version 6 SD Card with map data and navigation voices 7 DVD ROM with European map data optional depending on product version What you can get as an option Exte...

Страница 6: ...tically adapts the brightness of the screen according to the surround ing light This function can be switched on and off in the settings menu Front 3 Display touchscreen 4 Charging symbol This status...

Страница 7: ...30 Back 6 Compartment for lithium ion battery cover 7 Connection for external GPS antenna 8 Loud speaker 9 Grooves for cradle fixation 6 7 8 9 9 PN 2050 9 8 6 7 8 9 PN 3000 Overview of Device...

Страница 8: ...purposes 14 USB port for connecting to a PC 15 Reset button If the navigation systems stops responding to your actions you can reset the system by pressing this button e g with a straightened out pape...

Страница 9: ...e cradle optional 20 Active cradle optional 21 Connection for MA 3040 00 Car Connectivity Cable 22 Connection for 100V 240V power adapter optional or 12V 24V cigarette lighter cable 23 Line out 24 Con...

Страница 10: ...your car key the navigation device will automatically switch on or off When the navigation device is mounted in the active cradle the battery will charge itself In case of the passive cradle you must...

Страница 11: ...rom your present location to a specific destination Home Short cut After you defined Home you can navi gate to this address simply by tapping the Home button in the main selection menu Work Short cut...

Страница 12: ...hed Off the map is shown with north up the car travels in all directions Screen Tap this option to set e g Day or night Colour scheme and Brightness Status bar The status bar is visible on the bottom...

Страница 13: ...ge Channel TMC allows you to obtain traffic information During navigation the system regularly accesses the latest TMC traffic information in the background provided that this information is available...

Страница 14: ...sh the map items on screen This is due to the large number of roads and additional information e g hotels restaurants as well as the high density housing areas Fur thermore it may take longer to estab...

Страница 15: ...eceived When you set TMC On and there is no reception a red checkmark is shown When you re ceive TMC the name of the provider is shown green in the status bar If TMC is switched Off no provider is sho...

Страница 16: ...igate in the menus If in Map View Cursor left right will zoom the map 3 Mode switch Navigation N Audio A 4 By pressing this button you confirm a selection 5 Press this button briefly and you see the M...

Страница 17: ...u can enter an address Address or select an ad dress from your address list Address book from the list with your previous destinations History or from the list with special destinations POI e g res ta...

Страница 18: ...en you want to select POI tap the button Point of interest When you want to select a POI you must know where you want to search around Current Position or around Destination For example you want to fi...

Страница 19: ...displayed on the map You can now start driving and the navigation system will guide you to your specified destination By tapping the Map Display button in the Main Menu you directly enter the map dis...

Страница 20: ...usic player and listen to your desired title The song being played will be interrupted by the voice alerts for navigation From the music play er you can easily switch back to the navigation function E...

Страница 21: ...mes of the titles as well If you save your MP3 files without these complementary information the files will be dis played in the alphabetical order in the main list Current Playlist only The JPEG view...

Страница 22: ...the album selection Artist Switch to the list and the artist selection Genre Switch to the list and the genre selection Playlist Switch to the list and the selection of your individual list of titles...

Страница 23: ...the image is displayed in full screen mode By tapping the large picture you ll return to the small picture 1 Jump to next picture 2 Jump to previous picture 3 Switch to next folder 4 Switch to previou...

Страница 24: ...e cigarette lighter The system shuts itself down after a certain time in opera tion In the case of extremely low or high temperatures the sys tem will temporarily shut down to prevent itself from bein...

Страница 25: ...259 g Operating temperature 20 C to 60 C Short time storage temperature 30 C to 60 C Charging temperature for lithium ion battery 0 C to 45 C Support of SD cards up to 2 GB Imprint 2006 Siemens VDO T...

Страница 26: ......

Отзывы: