5.
The curves and direction of the slant must be the same as
the previous blade used.
6.
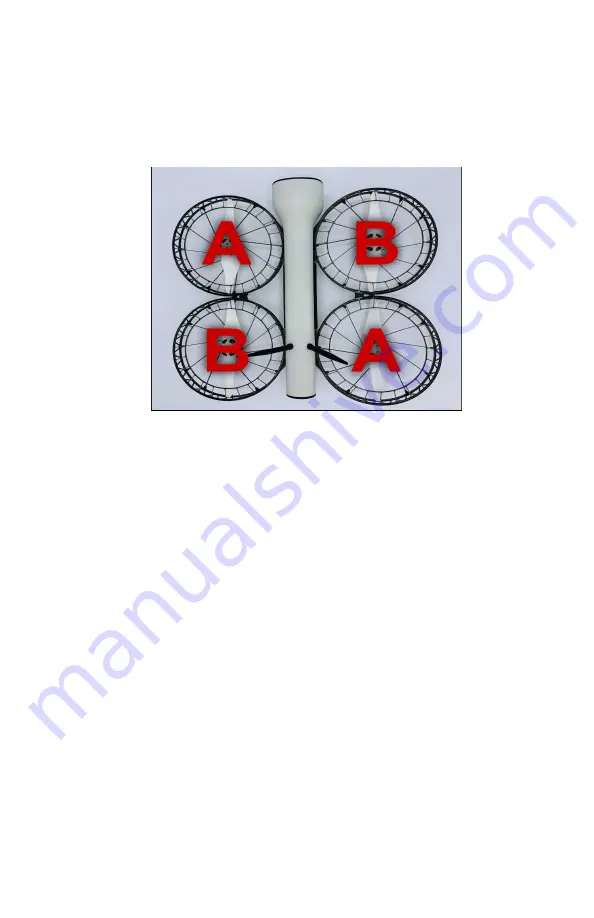
B blades move counter-clockwise & A blades clockwise
Note:
When oriented as the picture below, the layout is:
7.
Place the new propeller over the holes and attach with the
screws. Torque the screws to snug plus a quarter turn.
8.
Spin the blade with one finger to check that the new
propeller is attached correctly. The propeller should easily
make two full rotations.
73
Содержание Vesper UAS
Страница 1: ...Vesper UAS Vision GCS Operator s Manual v1 8...
Страница 4: ...I SYSTEM COMPONENTS CONTROLS VESPER VISION GROUND CONTROL SYSTEM VISION GCS 4...
Страница 12: ...12...
Страница 39: ...3 Click the PAIRING icon in the upper right of QGC 4 A Discovering indicator will appear 39...
Страница 56: ...Accessing Ubuntu System Settings 1 Tap the menu bar in the top right to access the quick settings menu 56...
Страница 59: ...6 Enter the default password Vantage1 and then enter a new password Tap Change to complete the change 59...


