5
The home screen
The home screen is the view shown whilst operating All
the information that it is important to monitor is shown
here, and all necessary settings can be made here too.
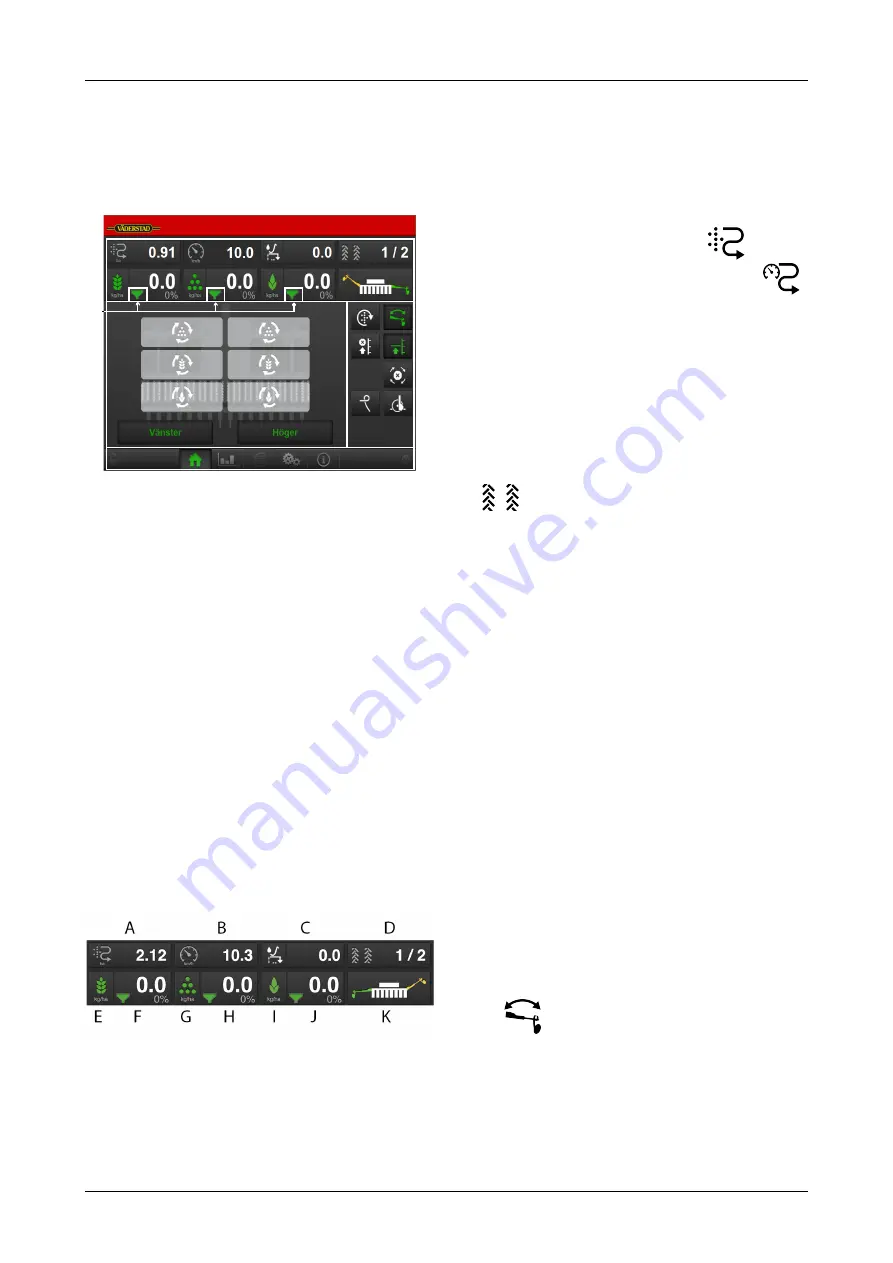
Figure 5.1 iPad home screen
Fields on the screen:
A. Display for control and monitoring.
See chapter
“5.1 Display for control and monitoring“
.
B. Function buttons
See chapter
.
C. Navigation buttons that open submenus for general
settings and alarms.
See chapter
.
D. Machine symbol (centre of the screen)
See chapter
.
E. The seed icon that is displayed in three different
versions
See chapter
.
5.1
Display for control and monitoring
Field A on the home screen. See figure
.
Figure 5.2 Work display iPad
The following information is available on the home
screen:
A.
Area meter
Press the field to select function. The
symbol
shows the area drilled after the latest reset; the
symbol shows the number of ha/hour being drilled at
the current speed.
B.
Driving speed
C.
Seeding Depth Assistance
(option) Displays the
drilling depth, which can be manually adjusted from
the cab, AutoCheck or automatic AutoPilot while
driving.
D.
Tramlining
See
and
.
Press the field in the work display to select the
function.
•
Green symbol = tramlining enabled
•
White symbol = tramlining disabled
•
Red symbol = indicates a problem with tramlining
E.
Seed
On/Off seed output. Green indicates that it is On.
F.
Seed application rate
Shows the amount of seeds
delivered per hectare. Pressing the seed rate field will
open a pop-up window for the variable rate. See
.
G.
Fertiliser
On/Off fertiliser output. Green indicates
that it is On.
H.
Fertiliser application rate
Shows the amount of
fertiliser delivered per hectare. Pressing the fertiliser
field will open a pop-up window for the variable rate.
See
.
I.
BioDrill (option)
On/Off BioDrill output. Green
indicates that it is On.
J.
BioDrill (option)
Shows the amount delivered per
hectare for BioDrill. Pressing the BioDrill field will
open a pop-up window for the variable rate. See
.
K.
Bout marker switching
Shows the current position of the bout marker arms;
left, right, both or none. Press the field to switch bout
marker. Bout marker switching takes place manually
or automatically depending on what is selected using
the
function button.
A
B
C
D
E
8
903099-en-gb; 19.01.2021
Содержание Rapid Series
Страница 1: ...903099 en gb 19 01 2021 07 Original instructions Instructions E services Rapid Version 1 6 3...
Страница 2: ...V derstad Holding AB V derstad Sweden 2018 903099 en gb 19 01 2021...
Страница 4: ......
Страница 33: ...Information Figure 11 3 WorkStation 1 outputs Figure 11 4 WorkStation 1 information 903099 en gb 19 01 2021 29...
Страница 34: ...Information Figure 11 5 Workstation 2 inputs Figure 11 6 Workstation 2 outputs 30 903099 en gb 19 01 2021...
Страница 35: ...Information Figure 11 7 WorkStation 2 information 903099 en gb 19 01 2021 31...
Страница 48: ...Where farming starts V derstad AB SE 590 21 V DERSTAD Sweden Phone 46 142 820 00 www vaderstad com...


