UIT2400 INSTRUMENTATION MANUAL REV A, May 2020
4 OF 18
3. Quick Reference Guide:
3A. Front:
The front panel of the UIT2400 is a full color 4.3" capacitive TFT touch screen
display. The display is a sensitive electronic device. It should not be exposed to sharp objects,
harsh environments, chemicals, liquids etc.
3B. Rear:
On the back of the UIT2400 is a stand which is opened by grasping at the two
finger slots and gently lifting the stand up. The stand has small posts that slide along the
housing to open and close. No force should be applied to the stand during opening and
closing. When the stand is in use, no pressure should be applied to the meter as this can bend
the small post holding the stand into the housing.
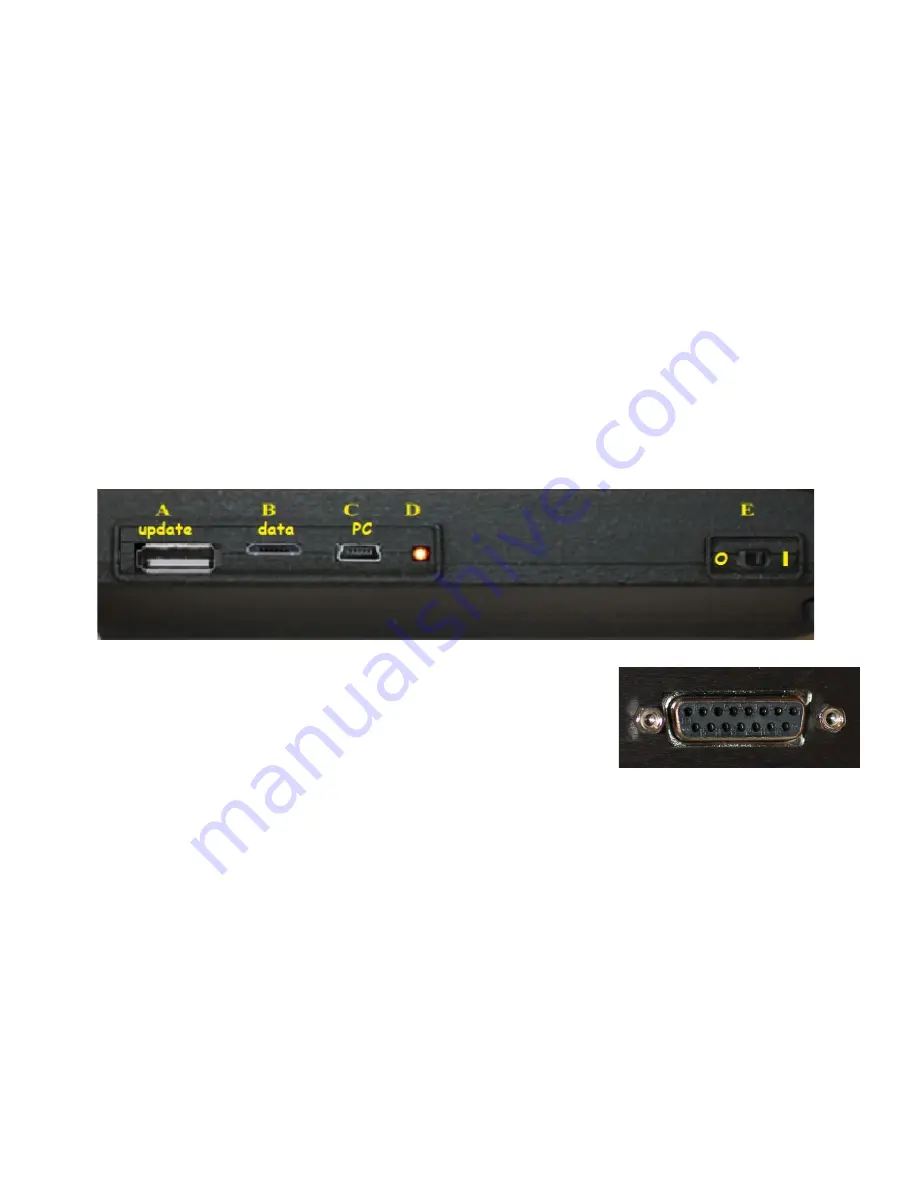
3C Side:
The right side of the meter includes:
A. USB A female port –
For firmware and system updates (requires a USB stick)
.
B. Micro USB female port –
For charging and extraction of saved data
.
C. Mini USB female port –
For charging the battery & running external Datalight II
software
.
D. Charging LED –
Light when device is charging (off when not charging)
E. On/Off – Fast Charge:
Turns meter on for use. Turn off to conserve battery or for faster
charging.
3D. Top:
Contains the sensor mount, a
15-Pin D-Sub connector
and posts for securing the sensor to the device. To connect the
sensor, align the sensor’s male 15 pin connector to the meter’s
female connector and apply slight pressure to insert. To assure
proper connection is maintained during testing, tighten screws on
each side of sensor connector.
3E. Quick Setting Guide:
Your meter and sensor were purchased together along with optical
calibrations, your device(s) will arrive with factory pre-programmed optical calibration factors.
1.
Plug in the sensor before turning on the UIT2400 to enable smart sensor
functionality.
2. Turn on the meter by pushing the On/Off button down into the (I) position.
3. After a short start up menu the Home Screen will appear.
4. Check the power monitor window in the upper right hand corner to assure batteries have
enough charge to complete testing. (see Section 4 for charging instructions)
5. Select your display style based on user preference (touch ICON to select)
Meter: Larger numerical values and no graph
Trend: Smaller control buttons with optional bar or line graph (see 15I for swap chart
type)
Tall: Portrait mode (USB ports and on/off switch on the right)
Wide: Landscape mode (USB ports and on/off switch on the top)
6. To change the display style, use the home button and touch the preferred display style


