


DS1097-010
29
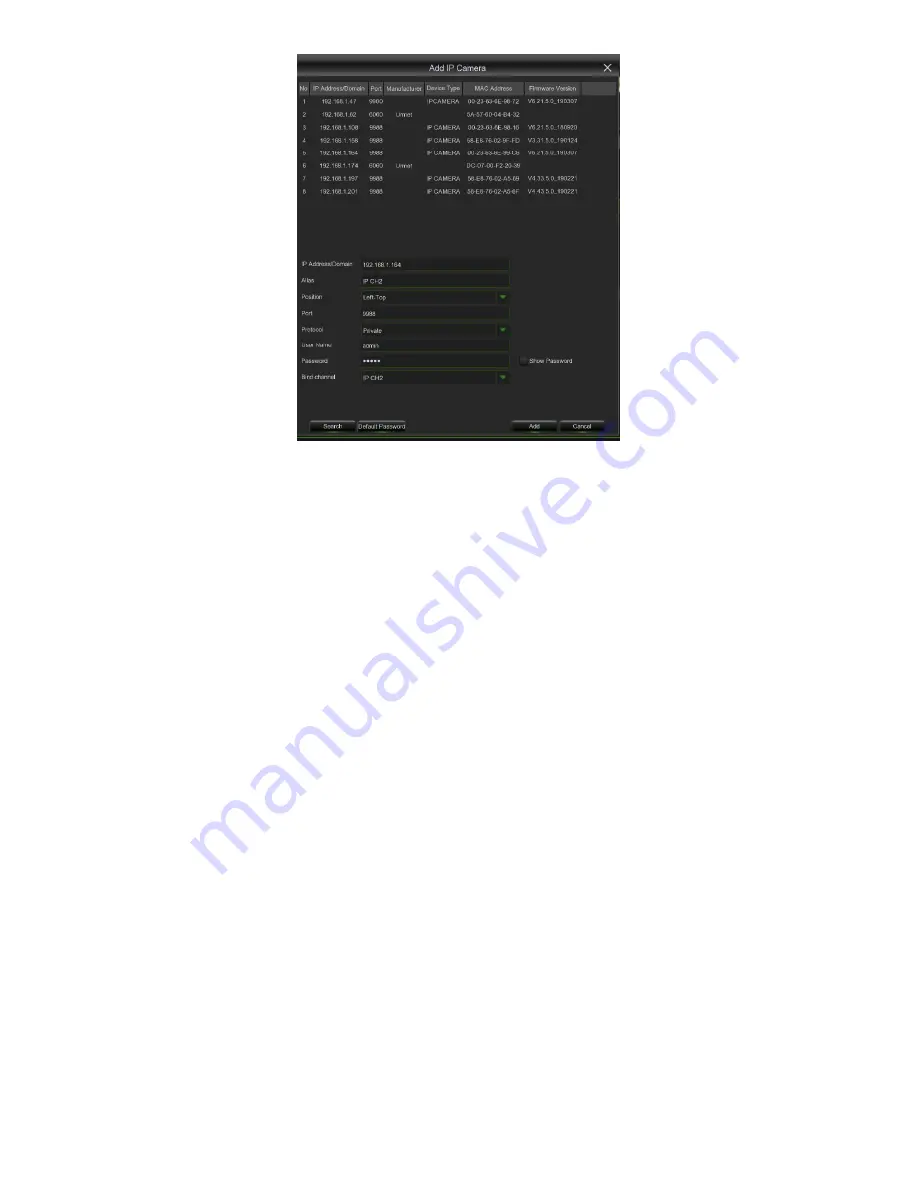
Click
Search
button to search IP cameras, and then click one of the IP camera in the device list.
•
IP Address/Domain:
IP address or domain name of the IP camera
•
Alias:
Name of the IP camera
•
Position:
Position to display the camera name on the screen.
•
Port:
Port of the IP camera
•
Protocol:
Choose the protocol of the IP camera from the drop down menu
•
User Name:
User Name of the IP camera
•
Password:
Password of the IP camera
•
Bind channel: Choose a channel of the HVR you want to attach to
•
Auto Assign IP to Camera(s):
The added IP camera would be not able to connect if its IP address is not in the
same network segment with HVR. With this function to reassign an IP address to all added IP cameras.
•
Channel Delete:
Choose one or more added IP cameras, and click this button to delete.
•
Manual Mode:
When set to Manual Mode, the user can delete or add the network IPC.
•
Auto Mode:
When set to Auto Mode, the channel automatically connects to the IPC on all POE interfaces of the
HVR. The user cannot delete or add the network IPC to the channel.
3.5.1.3
Protocol Manage
Press this button to access the page for manually selecting and configuring the IP cameras present in the local area
network (LAN); the HVR will run an automatic search and show the list of cameras in the list on the upper part of the page
(the search can be run manually at any time by pressing the Search button).
To add the required cameras, simply select them from the list and press the “Add Selected” button; the cameras will
appear in the list in the bottom right of the screen at the end of the operation.
Содержание 1097/564
Страница 95: ...DS1097 010 95 Capture Settings Set the format and the path to save snapshots...
Страница 150: ...DS1097 010 150...
Страница 151: ...DS1097 010 151...