


DS1093-095
31
Picture 7 Picture 8 Picture 9
2) Click the program “
ASee_AL_3rd _0723.sisx
” to start the installation shown as Picture 8
3) Choose Phone memory or SD card as an installation location shown as Picture 9.
4) Click [Continue] button to make sure the application program you installed may visit network or dial phone when popping-up
the dialog box shown as Picture 10.
5) After successful installation system will prompt you “
Installation finished
” shown as Picture 11.
6) If the program is installed into SD card, please enter into “
Application
” menu to find [Asee] icon shown as Picture 12.
Picture 10 Picture 11 Picture 12
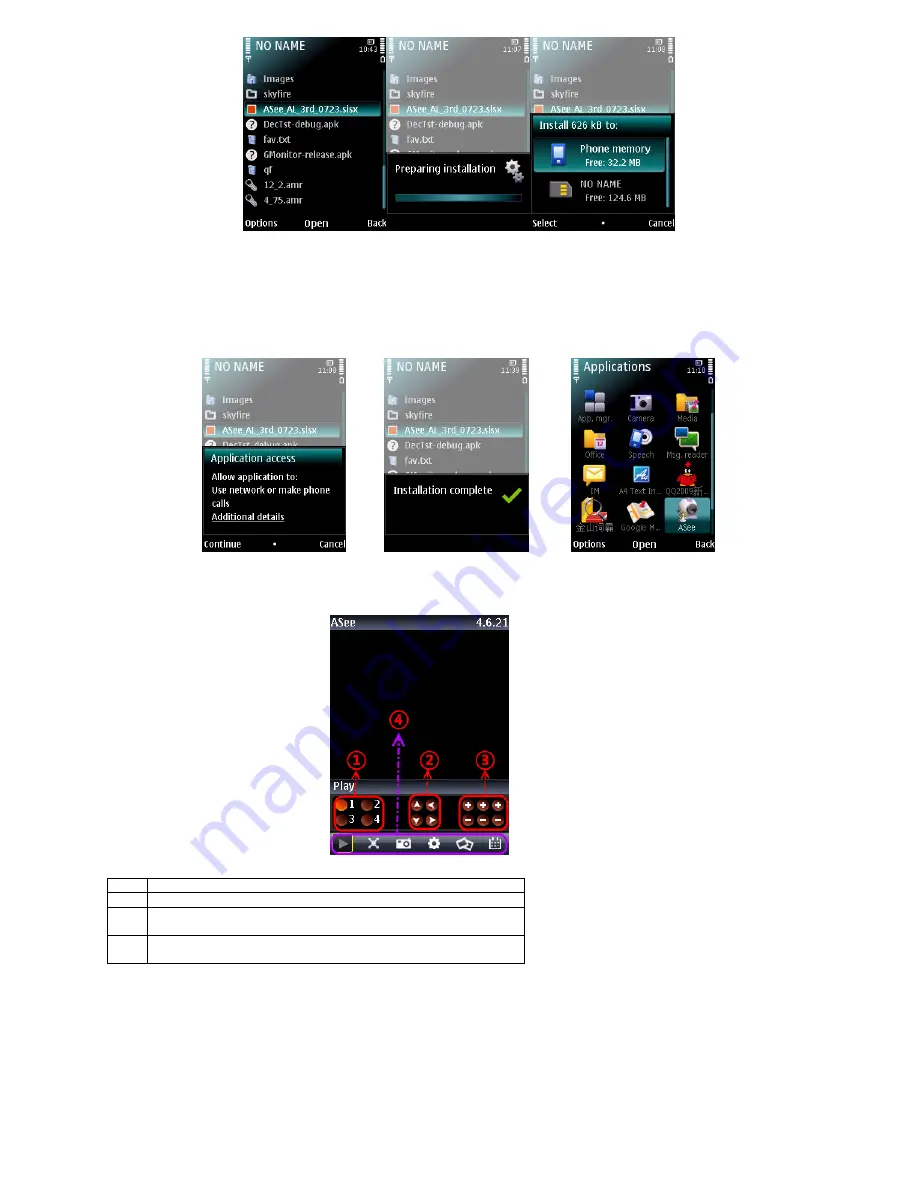
7) Click [Asee] icon to run the program, and then you will enter into the interface shown as Picture 13.
(Function buttons in the bottom in turn are:
1
CH 1, CH 2, CH3, CH 4
2
PTZ Direction :left, right, up, down
3
PTZ Lens control: Focus+/-, Zoom+/- and Iris+/- from left to right in
turn.
4
Play Bar: Play/Pause, Full screen, Snapshot, Setup, Next CHs
Group and Quit button from left to right in turn
Note:
The snapshot images will be saved to the defaulted path-“File manager\Images”.
8) For first time using or Need some change on the Parameters, click the [Setup] button and you will enter into the window
shown as Picture 14; or click [Play] button to enter into live display.
Picture 13


