52
NOTE!
You can set this parameter only when WDR is turned off.
Only some camera models support optical defog. When
Defog
is set to
On
, defog intensity level 6-9
represent optical defog, and images change from color to black/white when defog intensity is set from level
5 to 6; if
Defog
is set to Automatic and defog intensity level is somewhere between 6-9, images do not
automatically change to black/white in light fog conditions; the camera automatically switches to optical
defog only in heavy fog conditions.
(2)
Enable the defog function and then select a level for the scene. Level 9 achieves the maximum defog
effects, and level 1 achieves the minimum.
(3)
To restore the default settings, click
Default
.
2. OSD
On Screen Display (OSD) is the text displayed on the screen with video images and may include time and other
customized contents.
(1)
Click
Setup
>
Image
>
OSD
.
(2)
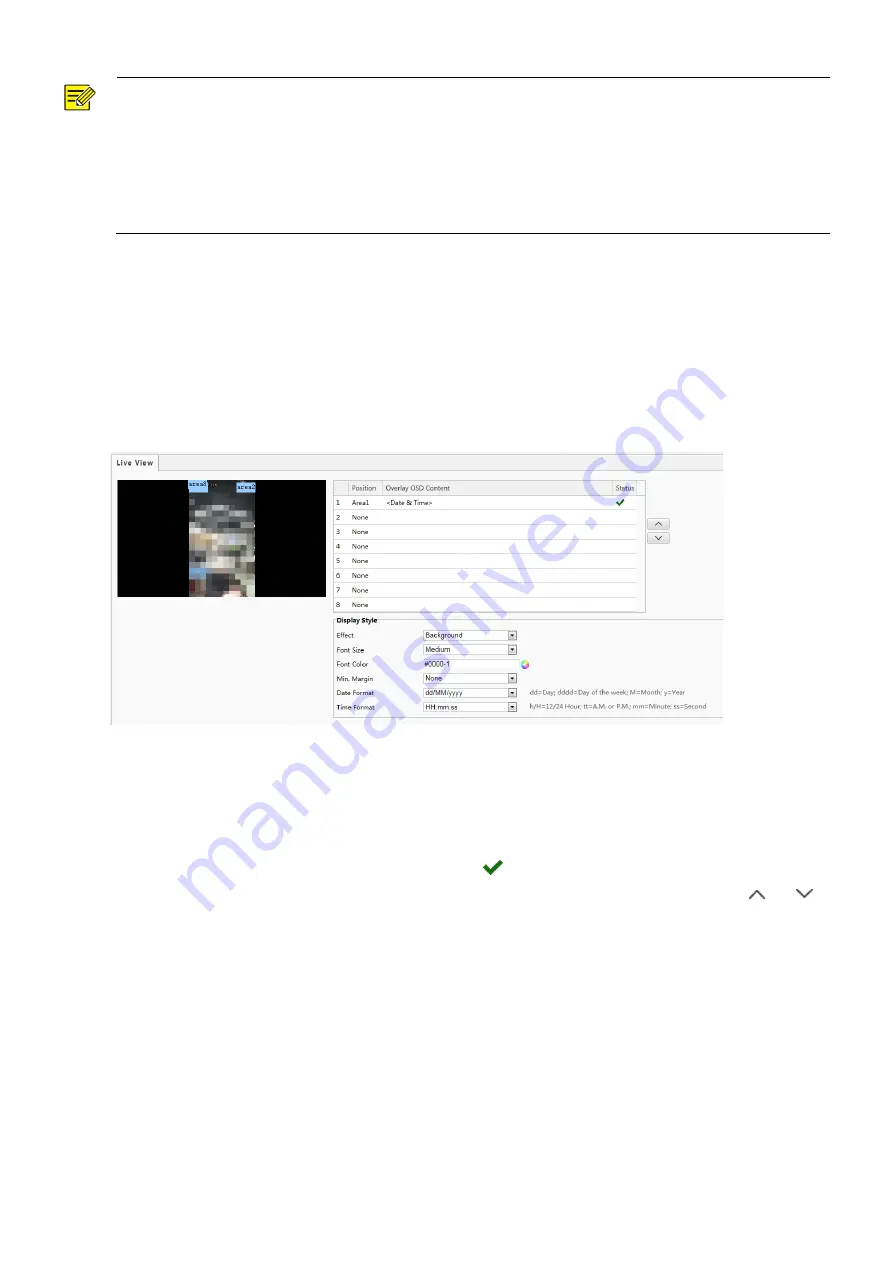
Select the position and content of the OSD.
Position: Click the box of an area on the preview screen. After the cursor changes to a movable status icon,
hold down and drag the mouse to select the position.
Overlay OSD Content: The drop-down list provides
Time
,
Preset
and
Serial Info
. You may also select
Custom
and enter the content you want.
After you have set the position and OSD content, the
symbol appears in the
Status
column, which means
that the OSD is set successfully. You may set multiple lines of contents for each area and use
and to
adjust the sequence of display.
(3)
After you have completed the settings, a message appears to indicate the successful settings.
To cancel OSD for an area, clear the OSD content in the
Overlay OSD Content
column or select
None
in the
Position
column.
The following shows an example time OSD.


