10
QUICK START
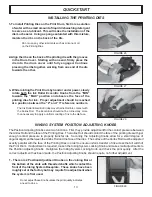
1 -Rotate both the Ink Roll Eccentric Knobs on the Inking
System Cover to the “MIN” position.
In this position, the ink roll will not touch the Anilox Roll
when the cover is reinstalled.
2 -While holding the Inking System Cover in one hand, slide
the Ink Roll onto the Ink Roll Axle.
INSTALLING THE INK ROLL
FIGURE 16
FIGURE 17
Use the round rod or screwdriver used during the ink roll
preparation procedure to position the roll and slide the
roll onto the ink roll axle.
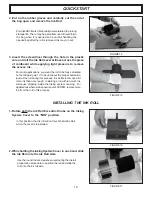
3 -Insert the screwdriver through the hole in the plastic
core and roll the Ink Roll several times across the piece
of cardboard while applying light pressure to remove
the excess ink.
For most applications, you want the roll to be fully saturated
but not dripping wet. If in doubt about the proper saturation
level of the roll during this process, it is better to remove a bit
more ink than not enough. Installing a roll with too much ink
will cause dripping inside the inking system housing. For
applications where web speed is over 400 RPM, remove more
ink from the roll in this process.
2 -Put on the rubber gloves and carefully cut the end of
the bag open and remove the Ink Roll.
Pre-Inked Rolls are intentionally oversaturated to prolong
storage life. There may be a small amount of liquid ink in
the bag when it is opened so be careful handling the
opened bag after the roll is removed. Ink may run out.
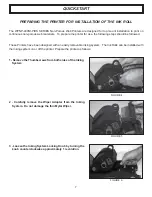
FIGURE 14
FIGURE 15
Содержание WPNP-400NI-PIDS
Страница 26: ...26 ...


