31
2.
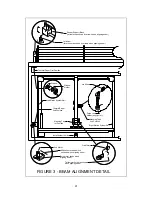
Close door and ensure it is flat against top cover. If hinges are too tight, the door will bow
at the hinges. Check for bow at front and back of the door and adjust front or back hinges
as necessary, so door lays flat.
3.
If adjustment is required to flatten door ,check at vertical again and repeat steps 1 and 2 to
fine tune.
CAUTIO:
Excessive bow in door will create openings for the beam to escape the enclosure.
This can invalidate the Class I rating and result in hazardous laser radiation
exposure.
4.5
SET SCREW REPLACEMET
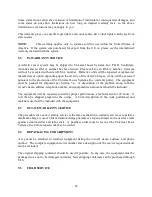
Set screws in the motion system will slowly wear with use and will eventually require
replacement. This is not a regular maintenance procedure and a ULS technician should be
consulted before proceeding to ensure that replacement is necessary. Typical symptoms of worn
set screws are:
•
corners of objects do not connect or overshoot
•
wiggly lines occur in either X, Y or diagonal movement.
To replace set screws (new set screws can be ordered from Universal Laser Systems):
1.
Y Axis
a.
Turn off system power.
b.
Remove the top cover as follows:
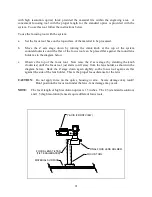
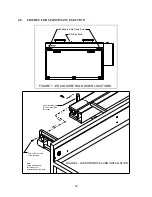
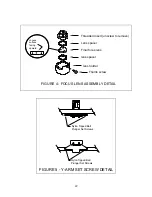
i. The cover is removed by loosening two screws that go up through the frame just
inside the front door at the left and right sides of the frame (reference Figure 1)
Also, remove knob for Z stage (table height adjustment)
ii. Ensure power cord is unplugged then tilt the front of the enclosure up
approximately two to three inches until the enclosure can be pulled forward
without obstruction.
iii. Carefully pull the enclosure forward and up until off of the machine. Set cover
out of the way being careful not to scratch it.
c.
Set engraving table to lowest position.
d.
Move optics carriage in both X and Y directions manually and center it in the top
opening.

