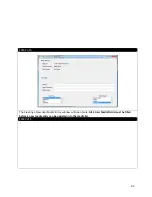


STEP 6 of 10
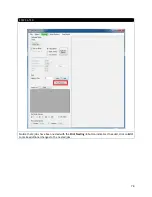
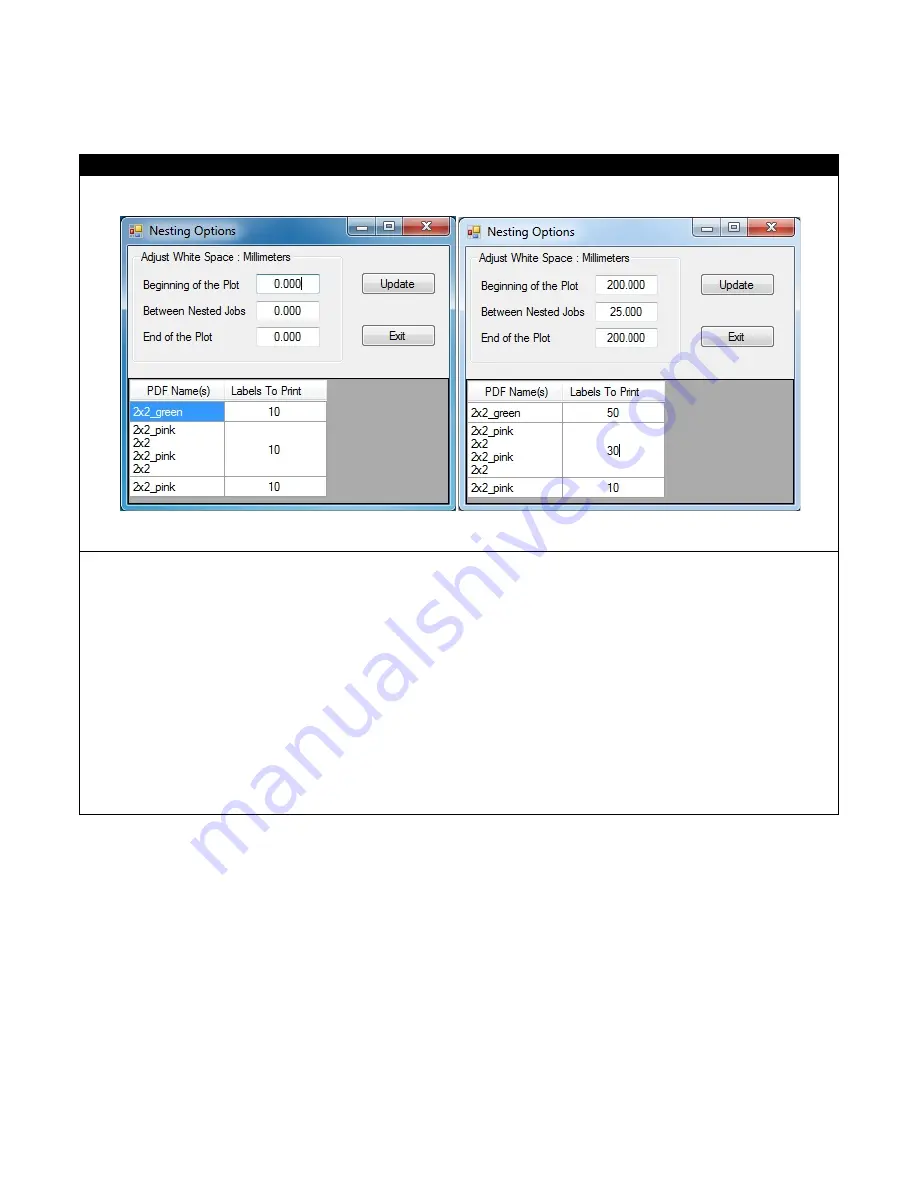
The Nesting Options Window will open. Notice that adjustments can be made to impact the white space of a
label, controlling where on the label that jobs are printed. The quantity of labels can also be adjusted across
each nested job. Once the necessary changes have been made click Update> Click Exit.
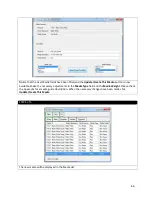
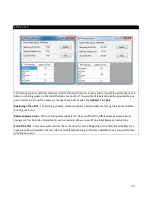
Beginning of the Plot - For finishing printers, media must pass a certain distance through the printer before
printing can occur.
Between Nested Jobs - When printing nested jobs it can be very difficult to differentiate between similar
images such as barcodes. Adjustments can be made to allow a space of one label between nested jobs.
End of the Plot - This value will remain as the same value from the Beginning of the Plot; this will allow for a
new job to be printed after the last job has completed resetting to the same distance that is required before
printing can occur.
79
Содержание iCOLOR 900
Страница 1: ...iCOLOR 900 APEX2Print Installation and User Guide ...
Страница 23: ...Navigate to the 2 Install RIP vR2 Folder Run the Prepare_Uninet_RIP_v2 1 exe file 23 ...
Страница 24: ...STEP 3 of 8 The KEYLOK and Sentinel Drivers will install 24 ...
Страница 26: ...STEP 5 of 8 Click Done STEP 6 of 8 26 ...
Страница 27: ...Navigate to the 3 Install APEX2Print folder Run the APEX2Print_Install msi file Click Next 27 ...
Страница 53: ...Appendix 53 ...
Страница 57: ...57 ...
Страница 59: ...PAGE 3 59 ...
Страница 68: ...STEP 2 of 4 The Creating a New User Media Entry window will display Click Edit STEP 3 of 4 68 ...
Страница 80: ...STEP 7 of 10 The job is ready for printing Click Print Nesting 80 ...
Страница 87: ...STEP 3 The Preview Screen will display the scaled object 87 ...
Страница 100: ...Example 2 Guide Arms Example 3 Cutter Blade Glue Residue Glue Residue 100 ...
Страница 104: ...Open the Guide Cover and Guide Channels Feed the paper under the orange Tension Swing as shown 104 ...
Страница 108: ...STEP 21 Close the Guide Door and the system is ready to print 108 ...


