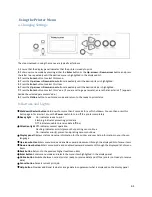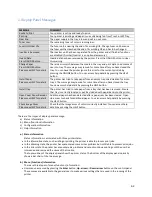
•
Administrator menu
: accessed by pressing the Enter button for more than 2 seconds while turning on the
printer power supply (including restart). Available to administrator level users. Restricts the changes that
general users can make via the user menus.
•
System maintenance menu
: accessed by pressing the Up-arrow and Down-arrow buttons together for
more than 2 seconds while turning on the printer power supply (including Restart). Available to support
staff to allow printer configurations and special functions to be set.
c.)
Configuration Information
Configuration information displays printer configuration information such as internal firmware versions.
Menu options at each level can be scrolled through by moving the highlight with the Up-arrow/Down-
arrow buttons and a highlighted option at that level can be selected by pressing the Enter button. When
the lowest level menu has been selected, you can change the setting for that menu by selecting the
required highlighted value from a list or by entering a numeric value. In other cases, you can display or
print configuration information.
d.)
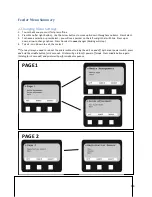
Help Mode
When an error has occurred, press the Help button. Information will be displayed that will help you correct
the error.
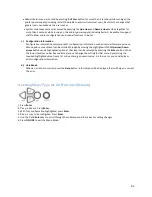
d. Setting Media Type for All Print Jobs (Defaults)
1. Press Enter.
2.
∇
key → Menus. Press Enter.
3. With Tray Configuration highlighted, press Enter.
4.
∇
key → tray to be configured. Press Enter.
5. Use the
∇
and Enter keys to scroll through the submenus and to make your setting changes.
6. Press ON LINE to exit the Menu Mode.
63
Содержание iCOLOR 900
Страница 1: ...iCOLOR 900 APEX2Print Installation and User Guide ...
Страница 23: ...Navigate to the 2 Install RIP vR2 Folder Run the Prepare_Uninet_RIP_v2 1 exe file 23 ...
Страница 24: ...STEP 3 of 8 The KEYLOK and Sentinel Drivers will install 24 ...
Страница 26: ...STEP 5 of 8 Click Done STEP 6 of 8 26 ...
Страница 27: ...Navigate to the 3 Install APEX2Print folder Run the APEX2Print_Install msi file Click Next 27 ...
Страница 53: ...Appendix 53 ...
Страница 57: ...57 ...
Страница 59: ...PAGE 3 59 ...
Страница 68: ...STEP 2 of 4 The Creating a New User Media Entry window will display Click Edit STEP 3 of 4 68 ...
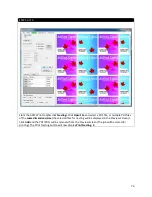
Страница 80: ...STEP 7 of 10 The job is ready for printing Click Print Nesting 80 ...
Страница 87: ...STEP 3 The Preview Screen will display the scaled object 87 ...
Страница 100: ...Example 2 Guide Arms Example 3 Cutter Blade Glue Residue Glue Residue 100 ...
Страница 104: ...Open the Guide Cover and Guide Channels Feed the paper under the orange Tension Swing as shown 104 ...
Страница 108: ...STEP 21 Close the Guide Door and the system is ready to print 108 ...

