background image

23

2.  Press 

CH+

 and 

CH-

 to select the camera for motion detection sensitivity 

adjustment.

3.  Press 

VoL+

 and 

VoL-

 to adjust sensitivity level – OFF (no box highlighted)/ 

LEVEL 1 (low) / LEVEL 2 (medium) / LEVEL 3 (high). 

4.  When you have finished setting the camera’s motion sensitivity levels, press 

esC


to accept the settings and press 

esC

 again to back out.

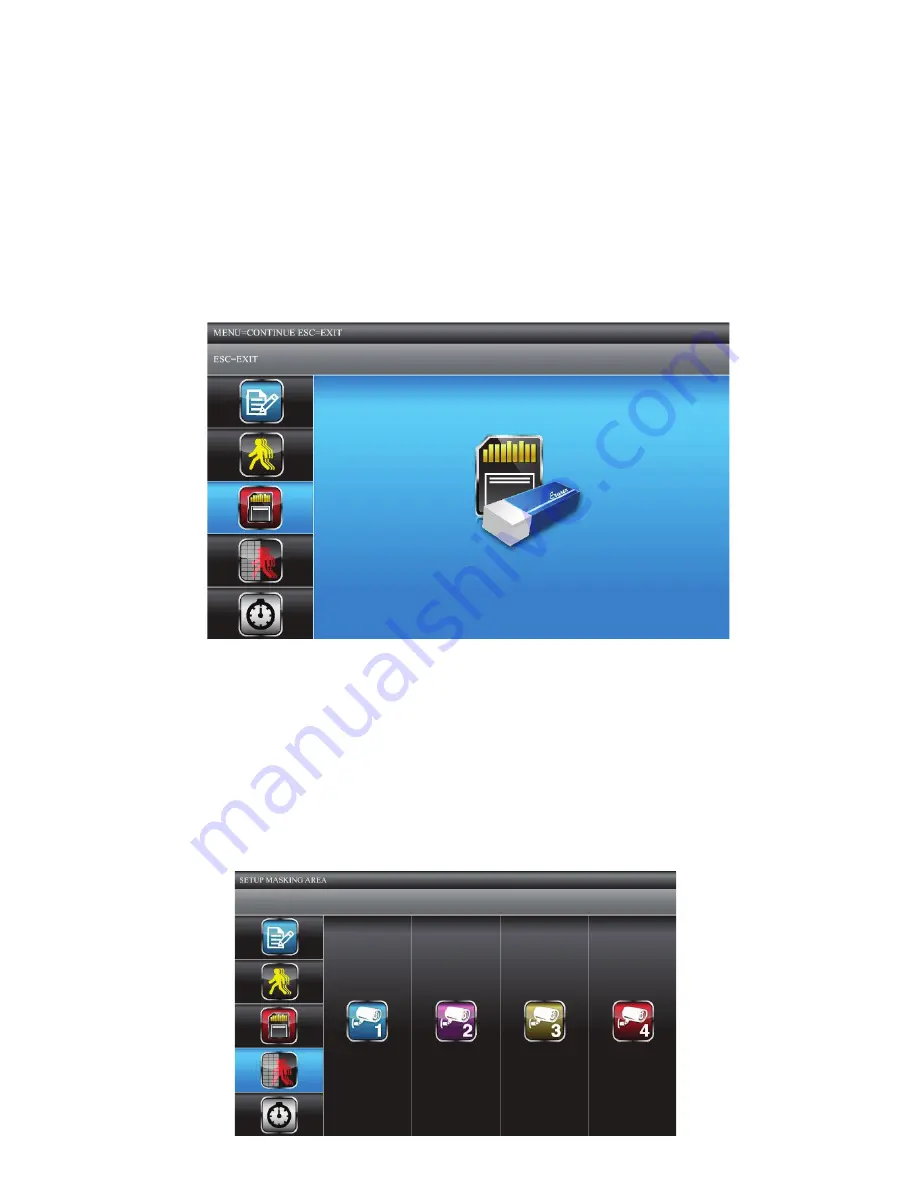
Format Storage

This feature will delete all data on the microSD card, including recorded files.
1.  From the 

reCorder Setup

 screen, use 

VoL+

 and 

VoL-

 to select 

FormAt 

StorAGe

; press 

M

 to select it. MENU : 

CoNtiNue FormAt 

heading displays. 


2.  Press 

esC

 to exit or 

M

 to initiate the memory card format process.

3. 

FormAt oK

 displays when complete. Press 

esC

 to back out.

Set up Masking Area

You can mask off areas in the camera’s view where movement in those areas could 

be normal, but also trigger recording (i. e., bushes and trees).
1.  From the 

reCorder Setup

 screen, use 

VoL+

 and 

VoL-

 to select 

Setup 

mASKiNG AreA

; press 

M

 to enter. The 

Setup mASKiNG AreA

 screen 

displays: 


Содержание G17 Series

Страница 1: ...1 G17xx Series For more exciting new products please visit our website Australia www uniden com au New Zealand www uniden co nz VIDEO SURVEILLANCE SYSTEM...

Страница 2: ...r a swimming pool To avoid any risk of electric shock from lightning avoid handling any electronic devices except battery powered ones during an electrical storm Use only the power cord and or batteri...

Страница 3: ...und or interfere with the normal flow of air Warning to Parents and Other Users To avoid damage to your equipment follow these simple precautions Do not drop puncture or disassemble any part of the eq...

Страница 4: ...in Menu Screen 16 Camera Setup 18 Recorder Setup 21 Event List 24 System Setup 26 Alarm Buzzer 28 Pan Tilt Zoom 29 Scan Activated Cameras 30 Memory Card Overwrite 30 special features 32 Remote Access...

Страница 5: ...5 MAINTAINING YOUR SYSTEM 44 Upgrading Your Uniden G17xx Series Firmware 44 Taking Care of Your Hardware 44 TROUBLESHOOTING 45 specification 47 ONE YEAR LIMITED WARRANTY 48...

Страница 6: ...20 1 2 2 x Camera Power Adaptors 1 x Monitor Power Adaptors G1740 1 4 4 x Camera Power Adaptors 1 x Monitor Power Adaptors Refer to the table below All trademarks are registered trademarks of their re...

Страница 7: ...ws allows better transmission Avoid having a direct light source in view of the camera This includes street lights ceiling or floor lamps spotlights in the driveway etc The cameras are equipped with b...

Страница 8: ...the base of the camera stand where you want to mount it and mark the location of the screw holes 2 Use the included screws to attach the base to the wall or ceiling You can also screw the base into a...

Страница 9: ...end of an AC adaptor to the camera s power pigtail and plug the other end into a 240 volt AC standard indoor power outlet If necessary connect the extension cord to the camera s pigtail and connect t...

Страница 10: ...input on the side of the monitor 4 Connect the other end of the adaptor to a 240 volt AC standard indoor power outlet 5 Press and hold the Power button on the top of the monitor for 1 2 seconds to pow...

Страница 11: ...h CH Cursor Left Change Camera 4 Volume VOL Cursor Down Skip Backward 5 Volume VOL Cursor Up Skip Forward 6 Channel Switch Cursor Right Change Camera 7 M Select Enter Pause Play 8 ESC ESC Exit Enter P...

Страница 12: ...nal Indicator 1 Channel Indicator Recording Indicator Red Quad Display Scan Display Camera Displayed There are seven audio levels Monitor Power Indicator YYYY MM DD AMhh mm ss Date and Time X1 In ZOOM...

Страница 13: ...ted in the multi channel idle display from any screen after the monitor is idle for two minutes in full screen The G17xx Series cannot begin recording if the memory card is not inserted After recordin...

Страница 14: ...Press REC DEL after the recording has been going for 15 seconds and quickly within 5 seconds press M The main menu displays Go to Recorder Setup Record Schedule and press M Select X MANUAL and press M...

Страница 15: ...the monitor s SD card to the computer Remove the memory card from the monitor and insert it in an adaptor Insert the SD adaptor into your PC Select a destination to store the files Watch live video o...

Страница 16: ...h to the screen being viewed and operation procedures for that screen Press M to enter the main menu Use CH CH VOL and VOL to scroll through the screen selectons the title of that screen dispays as yo...

Страница 17: ...day and time hour minute TV Output Sets TV output to PAL or NTSC format Default PAL Power Saving Sets the idle time required 5 or 10 minutes before the system changes to power saving mode ALWAYS ON bl...

Страница 18: ...more information on how to buy accessory cameras for this system When you add an accessory camera you have to pair it to the monitor that is you have introduce the camera and monitor so they can commu...

Страница 19: ...hen stays on to indicate that data transmission is in progress PAIRED displays on the screen if pairing is successful or PAIRING FAIL if it isn t If Pairing fails repeat these steps If Pairing fails a...

Страница 20: ...era so it won t be viewed on the monitor The camera is still powered on just not visible to the monitor This feature is useful for viewing a single camera in full screen mode constantly and to record...

Страница 21: ...ord from specific cameras turn off the other cameras During LIVE view audio is only available for 1 camera by default The Volume has to be turned on to record sound Recording options are Motion M Sele...

Страница 22: ...then press CH and CH to select MANUAL A blue bar displays at the top of the first hour block The blue bar indicates you can now navigate to different hour blocks 3 Press CH CH VOL and VOL to select th...

Страница 23: ...microSD card including recorded files 1 From the Recorder Setup screen use VOL and VOL to select Format Storage press M to select it MENU Continue Format heading displays 2 Press ESC to exit or M to...

Страница 24: ...e Use Record Time to set a specific length of time for motion recording Options are 2 5 or 10 minutes 1 From the Recorder Setup screen use VOL and VOL to select Record Time press M to select The Setup...

Страница 25: ...example Camera 1 was in Schedule mode Date screen Recorded block screen Recorded file details 3 Press M to begin playback By default video plays back in QUAD mode The icon represents quad mode To pla...

Страница 26: ...our and minute 2 Use VOL and VOL to scroll through the options for that selection then CH and CH to make another selection Press M to save the settings when you are finished Date and Time TV Output 1...

Страница 27: ...nd VOL to select Power Saving press M The Power Saving screen displays 2 Use CH and CH to choose between 5 min or 10 min the third option is Always On which keeps the system from entering Power Saving...

Страница 28: ...sh French Fran ais or Spanish Espanol 1 From the System Setup screen use VOL and VOL to select Default and press M The Default screen displays The language selected when setting the Default will be th...

Страница 29: ...Tilt Zoom and press M The first camera displays in single camera mode 2 Press ZOOM The camera zooms into Level 1 Press Zoom again to zoom into Level 2 3 Press CH and CH to pan the camera from left to...

Страница 30: ...creen refer to page 27 If a recording session started during SCAN mode Schedule or Motion recording the system resumes display in quad mode MEMORY CARD OVERWRITE Turning on Memory Card Overwrite allow...

Страница 31: ...he following SD card detail information SD card available storage space If no space is available 0 00GB displays Error indicator displays if SD card not present SD card is locked SD card is unformatte...

Страница 32: ...ew your recorded video files on any PC with Uniden Media Player installed The Uniden Remote System software CD in your kit provides the software you need to install You will also need to set up a Unid...

Страница 33: ...installation folder 4 The default folder is located at C Program Files If you want to store it in a different installation location click Browse When you have selected an installation location click...

Страница 34: ...bar displays 6 The Installation Complete screen displays when the software is installed Click Close to leave the Installation wizard 7 Turn on the G17xx Series monitor and connect it to the PC using...

Страница 35: ...USB 2 0 Camera from USB Video Device dropdown list DID Code located on the back of the monitor Security Code The default security code is 12345 You can set up a different security code at this time bu...

Страница 36: ...the Legal Agreement The ACCouNt Setup screen displays 4 Enter ACCouNt NAme 1 5 Enter a pASSWord 2 6 Enter it again to veriFy pASSWord 3 7 Complete all required fields 4 8 Click in the check box 5 to r...

Страница 37: ...ll capital letters 4 4 Click Continue 5 5 A Confirmation screen displays select View Now 6 The View Now screen displays At the bottom of the screen is a prompt to install the OCX plug in Install it on...

Страница 38: ...ou want to view your video remotely you must do the following 1 Verify that your PC is connected to the internet and that Uniden Remote Service software is installed 2 Use the USB cable to connect the...

Страница 39: ...n the box 1 Insert the G17xx Series Software CD into your PC 2 Install Uniden Media Player onto your PC It will post a shortcut icon to your desktop 3 Remove SD card from the G17xx Series Place it in...

Страница 40: ...vice search the Android Play for uNideN GuArdiAN 2 2 Download the Uniden Guardian 2 app This app has a black and gold icon 3 Launch the app select Add to add your system information to the app 4 Enter...

Страница 41: ...displays the app version number and the API version number Tap oK to exit If you have multiple systems scroll down and tap on the system image you want to view Follow these steps to view video 1 Selec...

Страница 42: ...GuArdiAN 2 2 Download the Uniden Guardian 2 app This app has the black and gold icon 3 Launch the app select SettiNGS then ADD to add your system information to theapp 4 Enter a name for your system...

Страница 43: ...e systems scroll down and tap on the system image you want to view Follow these steps to view video 1 Select a system 2 Select a camera from the drop down menu 3 View video 4 Tap returN to stop the vi...

Страница 44: ...mware to the SD card 4 Remove the SD card from your PC Remove the microSD card from the adapter and reinsert it into the monitor Plug the AC adapter into the monitor 5 Upgrade the system firmware by g...

Страница 45: ...ound on the CD included in the box I schedule a recording save the schedule and the recording does not happen at the scheduled time Ensure that the system time is set to the cur rent time Make sure th...

Страница 46: ...n I try to watch live video on the television Making sure the G17xx Series is turned on Making sure the AV plugs are inserted into the correct jacks on the television Making sure they are fully seated...

Страница 47: ...cation Range 150 ms in open space Monitor Resolution 800 x 480 Camera Resolution 640 x 480 Operating Temperature 10 C 50 C Operating Voltage DC 5V 1A Current Consumption 550mA max 860mA max Night Visi...

Страница 48: ...or New Zealand and will expire one 1 year from the date of the original retail sale If a warranty claim is made this warranty will not apply if the Product is found by Uniden to be A Damaged or not m...

Страница 49: ...NSUMER ACT 2010 Australia or the CONSUMER GUARANTEES ACT New Zealand as the case may be none of which can be excluded Procedure for Obtaining Warranty Service Depending on the country in which the Pro...

Страница 50: ...50...

Страница 51: ...51...

Страница 52: ...52 2013 Uniden Australia Pty Ltd Uniden New Zealand Limited Printed in PRC...

Отзывы: