14
PG-I Series | Version 1.03
Commissioning
8.1 Unpacking
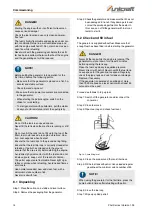
Step 1: Place the carton on a stable and level surface.
Step 2: Remove the packaging from the generator.
Step 3: Check the generator and make sure that it has not
been damaged in transit. If any damage is found,
contact the service department or the dealer. In
this case, do not fill the generator with fuel or at-
tempt to start it.
8.2 Check and fill in fuel
The generator is supplied without fuel. Make sure that
enough fuel has been filled in before starting the generator.
Proceed as follows to top up fuel:
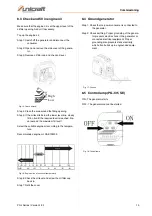
Step 1: Switch off the generator and disconnect the
consumer.
Step 2: Close fuel cock.
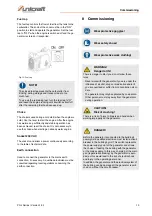
Step 3: Open fuel cap and check fuel level.
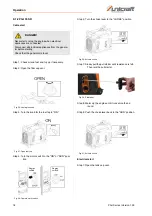
Fig. 14: Check filling level
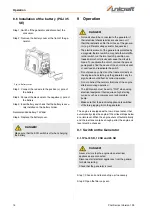
Step 4: Clean the area around the tank filler neck.
Step 5: Fill the fuel tank with petrol. Use unleaded regular
gasoline with a minimum octane number of 85.
Step 6: Close the fuel cap.
Step 7: Wipe up spilled petrol!
DANGER!
Starting the engine with an insufficient oil level can
cause serious damage!
Check the fuel level:and use only clean and water-
free fuel.
The fuel is highly flammable and explosive under cer-
tain conditions. Refuel in a well ventilated area and
with the engine switched off. Do not smoke or use an
open fire while refuelling.
Never work with the generating set before the air fil-
ter has been inserted, otherwise the life of the engine
and the generating set will be reduced.
NOTE!
Before putting the generator into operation for the
first time, observe the following points.
- Make sure that the generator is placed on a flat, ho-
rizontal and stable surface.
- Check fuel and engine oil.
- Make sure that no power consumers are connected
to the generator.
- When starting the petrol engine, switch on the
choke for cold starting.
- To start generators with pullstarters, pull the starter
slowly out until resistance is felt, then pull jerkily.
CAUTION!
Do not fill the tank in enclosed spaces.
Never fill the tank while the machine is running or still
hot.
Do not overfill the tank (do not fill up to the top of the
filler), fuel could leak due to engine vibrations. Cau-
tion: Fuel expands when heated!
Ensure that no fuel drips to the ground during filling.
Ensure that the fuel filler cap is correctly closed after
refuelling. If petrol has dripped onto the ground,
ensure that the area is dry before starting the engine.
Avoid direct physical contact with the fuel and do not
inhale vapours; keep out of the reach of children.
The petrol vapours are flammable. Never light ciga-
rettes or smoke when refuelling. Avoid naked flames
at all costs.
Use normal unleaded, new and clean fuel, with a
minimum octane number of 85.
Never mix oil with fuel.
DANGER!
Never fill the tank while the engine is running! The
generator must cool down for at least 2 minutes
before opening the tank cap.
Open the fuel cap slowly to equalize pressure.
Never mix oil with petrol! Never overfill the fuel tank.
Leave space for the gasoline to expand. Regularly
check the pipes, tank and cap for leaks or damage.
Replace if necessary.
If the generator is operated at an altitude of more
than 1500 m above sea level, petrol with at least 85
octane must be used.
NOTE!
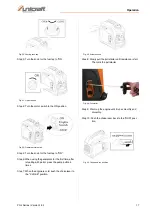
When using the generator for the first time, press the
pump button 6 times after refuelling with petrol.
Содержание PG-I 12 SR
Страница 1: ...Instruction Manual Generator PG I 8 SR PG I 12 SR PG I 20 SR PG I 35 SE PG I 12 SR PG I 35 SE...
Страница 35: ...Spare parts PG I Series Version 1 03 35 Spare parts drawing 14 Fig 68 Spare parts drawin 14 PG I 8 SR...
Страница 43: ...Spare parts PG I Series Version 1 03 43 Spare parts drawing 14 Fig 82 Spare parts drawing 14 PG I 12 SR...
Страница 51: ...Spare parts PG I Series Version 1 03 51 Spare parts drawing 14 Fig 96 Spare parts drawing 14 PG I 20 SR...
Страница 53: ...Spare parts PG I Series Version 1 03 53 Spare parts drawing 2 Fig 98 Spare parts drawing 2 PG I 35 SE...
Страница 61: ...Spare parts PG I Series Version 1 03 61 Spare parts drawing 17 Fig 113 Spare parts drawing 17 PG I 35 SE...
Страница 66: ...www unicraft de...


