


40 | SWIFT K33A ALL IN ONE FUSION SPLICER
americanilsintech.com | 41
BLADE REPLACEMENT
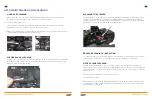
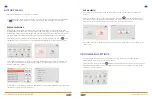
In order to replace blade, disassemble chip collector assembly and rear pusher. Open the
cover as shown picture and press the pusher pin to move slider to forward.
Remove blade pin completely using (-) driver.
Remove old blade with blade gear from body and replace new blade with blade gear.
In here reassembling should be done in a reverse order of disassembling. At this time,
especially be careful not to damage the blade. Check the blade operating condition with
cleaver cover.
A properly cleaned optical lens will have not streaks or lines visible.
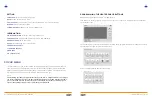
Reassemble the electrode.
Turn the power on; check whether there is any line or stain on the monitor and; navigate to
the menu and conduct a Self-test.
BLADE REPLACEMENT AND BLADE MODE (ROTATING/LOCKING)
BLADE CHANGE
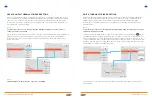
If the cleaver does not properly cleave the fi ber, rotate the blade as follow the instructions.
On the blade gear, the channel (cleaving position) from 1 to 24 is marked. When it does not
cleave the fi ber properly, clean the surface of rubber pad with the alcohol-soaked cotton
swab. (But when clean the rubber pad, do not use acetone or solvent.) And if cleaver still
does not cleave properly, it means the blade is fully used, operators are required to change
the cleaving position by the following order.
Rear Pusher