background image

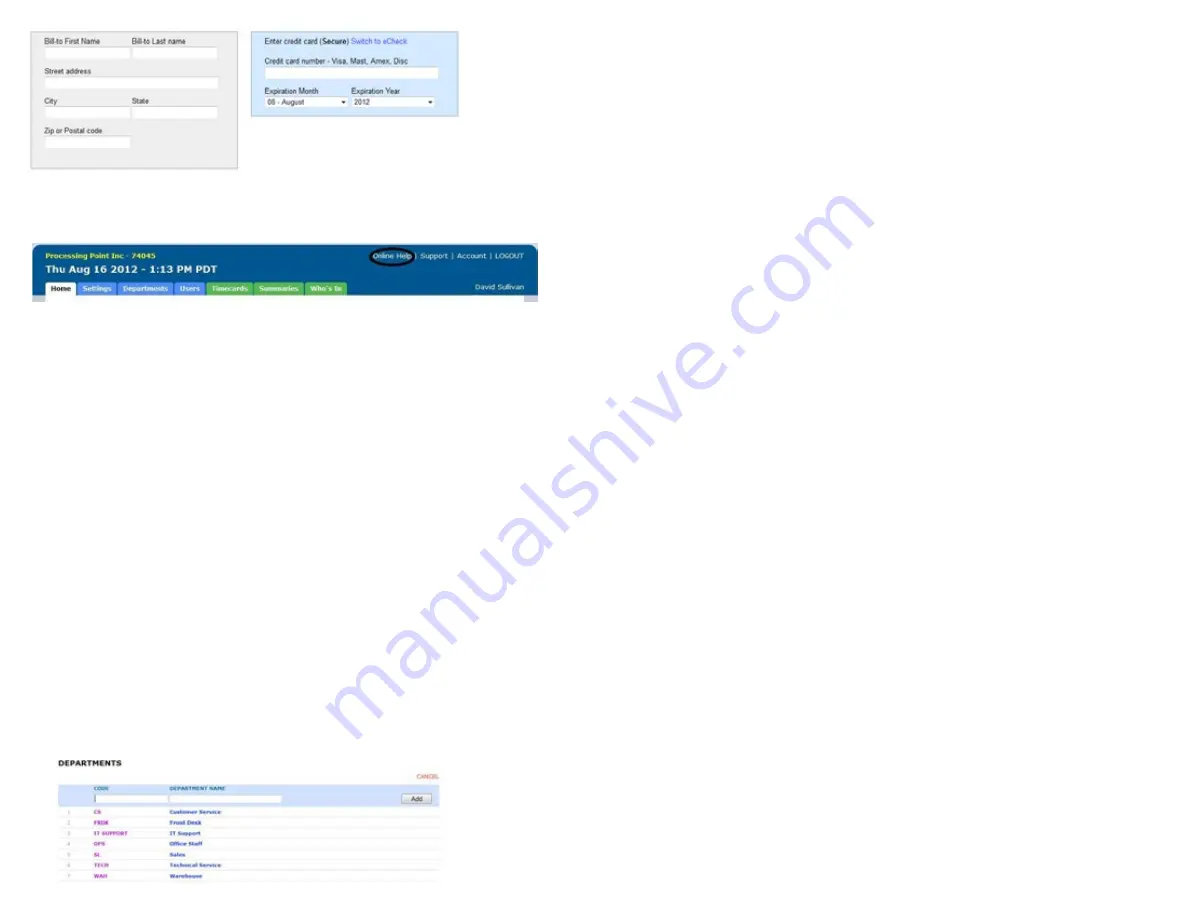
Once you have created your account, you will have access to the uAttend Online 
Help. The link is found in the upper-right corner of the uAttend screen.

2.2  Adding departments and employees 
After you have created your uAttend account, you will need to set up at least one 
department and one employee. There is no limit to the number of departments you 
can set up. However, the number of employees is limited based on the plan you 
selected. 
 
You can upgrade your plan to include more employees by clicking the Account link 
in the upper-right corner of the uAttend screen. 
 
2.2.1  Adding departments 
Follow these steps to add a department to your uAttend account:


1. click the departments tab on the main menu. 


2. click Add department. 


3. In the code field, enter a code for the department. 


A code can be up to 20 characters. The code is used as a reference  


to the department and will appear on timecards. 


4. In the department name field, enter a name for the department. 


5. click Add.

29

4

 
The device management menu offers the following options: 


update time—used to synchronize a new time if time settings in the uAttend  


account change. 


device Id—used to display the Device ID for the BN2500. 


upload logo—used to import a logo from a uAttend account to display on the  


BN2500. 


date Format—used to change the way that dates are displayed on the  


BN2500. 


reverify time—used to select the frequency that the BN2500 will update its 


time setting. 


Sounds—used to turn the BN2500 sounds on and off. 


time Format—used to change the way that time is displayed on the BN2500. 

 
The communications menu offers the following options: 


Set Ip—allows a user to set a static IP address in the BN2500. Turn off DHCP  


before setting a static IP. 


dhcp—used to turn DHCP on and off. 


network Settings—displays the BN2500 network settings. 


delete WIFI Settings—used to clear out the WIFI settings in the BN2500. 


View WIFI Settings—displays the network to which the BN2500 is connected. 


communicating Interface—allows users to select LAN or WIFI interface. 

 
The System management menu offers the following options: 


reset—resets the BN2500 to the factory default settings. 


help—displays the Customer Support telephone number. 


mAc Address—displays the BN2500’s MAC address. 


update Firmware—updates the firmware to the most updated version. 


Firmware Version—displays the firmware version.

Содержание CB1000

Страница 1: ...PROFESSIONAL SERIES PRODUCT GUIDE 2796 Loker Ave Suite 111 Carlsbad CA 92010 800 518 8925 Toll Free 877 730 3578 Fax www processingpoint com CB1000 CB2000 BN1500 BN2500...

Страница 2: ...oducts or parts are based upon tests believed to be reliable but do not constitute a guaranty or warranty PPOINT SHALL NOT UNDER ANY CIRCUMSTANCES WHATSOEVER BE LIABLE TO ANY PARTY FOR LOSS OF PROFITS...

Страница 3: ...0 Setting Up and Using the BN1500 15 5 1 Mounting Your BN1500 15 5 2 Linking the BN1500 to Your uAttend Account 16 5 3 Registering Fingerprint Templates 17 5 3 1 Transferring Fingerprint Templates to...

Страница 4: ...5 For information on the BN2500 see Section 6 0 beginning on page 22 2 0 Setting Up Your uAttend Account This section describes the steps you will take to create a new uAttend account and set up depar...

Страница 5: ...d on our system encrypted and secure for recurring monthly billing All plans come with a 30 day money back guarantee if you are not satisfied When you have entered all information click Create my acco...

Страница 6: ...w time if time settings in the uAttend account change Device ID used to display the Device ID for the BN2500 Upload Logo used to import a logo from a uAttend account to display on the BN2500 Date Form...

Страница 7: ...500 and BN2500 only you will register their fingerprints using the steps in Section 5 3 BN1500 or Section 6 3 BN2500 of this document Next you can skip to the timeclock section that pertains to you 5...

Страница 8: ...l timeclocks requires interaction with both the BN2500 and your uAttend account Follow these steps from your uAttend account 1 Click the Users tab on the main menu 2 Click Manage Fingerprint Templates...

Страница 9: ...12345678 7 26 6 The designated employee should press their finger firmly on the sensor until you hear a beeping sound The employee should then remove their finger from the sensor This process will be...

Страница 10: ...our uAttend account 6 2 2 Connecting via LAN Cable Follow these steps on your BN2500 to link the BN2500 to your uAttend account via a LAN cable to a router The timeclock should be turned on with the d...

Страница 11: ...e back of the timeclock If you cannot locate this sticker you can also find the Device ID in the timeclock To do this press the Menu key and enter the password default password is 53178 Scroll to Devi...

Страница 12: ...4 Place the metal back plate against the wall with prongs facing away from the wall and pointing upward and screw the back plate to the wall in all four locations 5 Affix the timeclock to the metal ba...

Страница 13: ...r the Device ID assigned to the CB2000 You can find the Device ID on a sticker on the back of the timeclock If you 6 0 Setting Up and Using the BN2500 Now that you have set up your uAttend account you...

Страница 14: ...he password and press OK To enter alpha characters press the key and follow the onscreen directions The timeclock will connect to your WIFI network using the credentials you supplied After the WIFI mo...

Страница 15: ...r PIN In all other modes this key is used to scroll down OK Used to accept key entries Used to switch between alpha and numeric during WIFI password entry and is otherwise used as a toggle button 5 4...

Страница 16: ...em Management menu offers the following options Reset resets the CB2000 to the factory default settings Help displays the Customer Support telephone number MAC Address displays the CB2000 s MAC addres...

Страница 17: ...ing sound The employee should then remove their finger from the sensor This process will be repeated two more times with the same finger NOTE If desired you may repeat the fingerprint scanning process...

Страница 18: ...n the timeclock To do this press the Menu key and enter the password default password is 53178 Scroll to Device Management and press OK then scroll to Device ID and press OK Be sure to enter the compl...

Страница 19: ...Any Changes or modifications not expressly approved by party responsible for compliance coulk void the user s authority to operate the equipment Radiation Exposure Statement This equipment complies wi...

Отзывы: