20
Operative Instructions
1
2
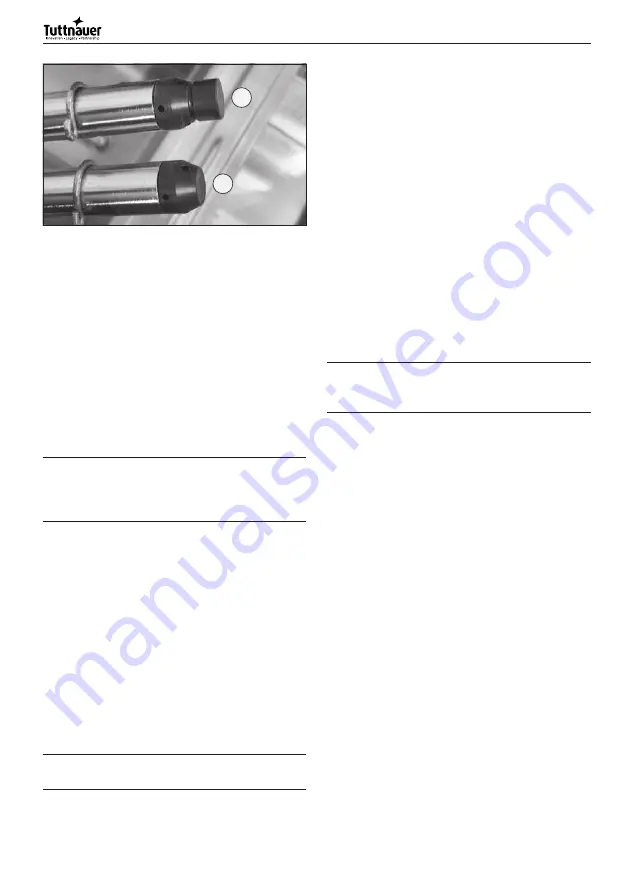
Fig. 12.2
Spray arm rotation identification (Fig. 12.2):
1) Spray arm without magnet for identification.
2) Spray arm equipped with magnet for identification.
After machine positioning, make sure nothing is
preventing the chamber door from being freely
opened. Make sure the machine is connected properly
to the electrical supply, to the water supply and to
the drain trap, then level it by adjusting its feet. After
installation remove the PVC protection layer covering
the panels, make sure the liquid tanks are full and the
suction nozzles are properly inserted into the right
tanks. A label next to the cap indicates the type of liquid
to be used for each suction tube.
Ö
WARNING! Spray arm assembly direction,
the water outlet holes must face towards the
inside of the chamber otherwise the spray
arms will NOT work.
5.6 Chemicals
The washer disinfector adopts as standard 2 pumps for
dosing detergent and neutralizer agents, on request it
can have up to a maximum of 4 dosing pumps for:
- Detergent agent.
- Neutralizer agent.
- Lubricant/Rinse aid.
- Additive.
Each dosing pump is monitored by a dosing volume
control. This electronic control checks the dosing
amount.
In the event of a lack of product, a message appears on
the display and the program stops.
a
WARNING! It is recommended to handle the
liquids with caution.
- Protect eyes, hands, clothes and metal surface from
contact with liquids, which contain partially irritating
agents and caustic substances.
- In case of contact with liquids, consult the instructions
provided with the product.
- Use only suitable liquids for cleaning equipment.
Carefully follow the manufacturer’s information.
- Keep chemicals out of the reach of children and
outsiders. Possibly locked away.
- Use on only the manufacturer’s approved products.
- Do not use liquids for household dishwashers.
5.6.1 Refill procedure
1) Set up a new tank with the chemical.
2) Remove the suction lance from the exhausted tank.
3) Insert the suction lance in the new tank.
4) With the door open, press and hold key P1 (1 Fig.
13) to refill DOS1 for the detergent; key P2 (2 Fig.
13) to refill DOS2 for the neutralizer; key P3 (3 Fig.
13) to refill DOS3 for the lubricant/rinse aid liquid;
key P+ to refill DOS4 (4 Fig. 13) for additive liquid.
Be careful not to reverse the position of the liquids.
a
WARNING! Failure to follow these
recommendations may damage the washer
disinfector.
- With regard to the maximum dosage for each
program, follow the instructions of the chemical
manufacturer.
- To ensure efficiency of the dosing system, it is
necessary to regularly carry out the maintenance
operations set out in the chapter "Maintenance" .
- The indications concerning the storage and disposal
of chemical substances are provided by the respective
manufacturers and must be observed.
- Do not place the chemical containers on the machine.
Completely empty the washer disinfector before
performing maintenance and before moving the
machine to avoid contact with the chemicals and to
protect the machine components.
5.6.2 Using and storing chemicals
Keep the containers tightly closed, stored in a dry place
and protected from the sun, out of reach of children
and outsiders. Possibly locked away. Optimal storage
temperature: check the chemicals datasheet. The
shelf life in the original containers is indicated on the
chemicals’ labels. The manufacturer recommends a
method for inventory management (first in - first out).
The washer disinfector can use up to 4 products for
dosing liquids.
The manufacturer recommends using cleaning agents
and chemical additives. The use of other products can
damage the machine.
Содержание TIVA8-MD
Страница 56: ...56 Operative Instructions Notes...
Страница 57: ...57 Operative Instructions Notes...
Страница 58: ...58 Operative Instructions Notes...
Страница 59: ...59 Operative Instructions...


