28
Chapter 7
USB Application
•
Before you physically disconnect a USB device from the router, safely remove it to avoid data damage: Go to
Advanced
>
USB
Settings
>
Device Settings
and click
Safety Remove
.
2.
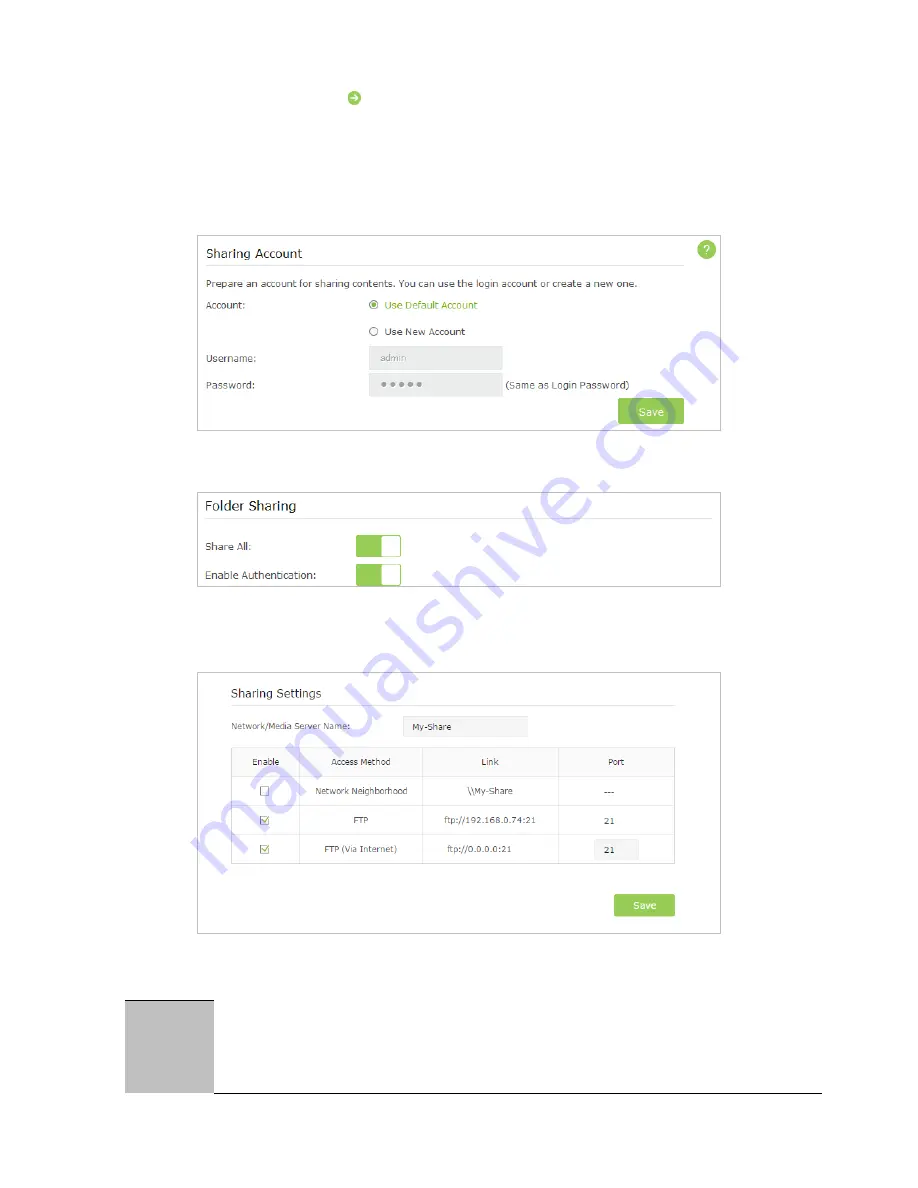
Enable Authentication for Data Security
It is strongly recommended that you set and apply a sharing account for data security.
1 ) Visit
http://tplinkwifi.net
, then log in with the username and password you set for the router.
2 ) Go to
Advanced
>
USB Settings
>
Sharing Access
.
3 ) Choose to use the default account (admin) or use a new account, and click
Save
.
4 ) Enable
Authentication
to apply the sharing account.
•
If you leave
Share All
enabled, click the button to enable
Authentication
for all folders.
•
If
Share All
is disabled, enable
Authentication
for specific folders.
3.
Enable the FTP (via Internet)
Select the check box to enable
FTP (via Internet)
, then click
Save
.
4.
Access Your USB Disk via Internet
Now different clients with Internet connection can access the USB disk:
computer
• To download, open a web browser and type the server address
ftp://<WAN IP address of the
router>:<port number>
(such as
ftp://59.40.2.243:21
)
,
or if you set up a domain name for your router
you can type the server address
ftp://<domain name of the router>:<port number>
(such as
ftp://
MyDomainName:21
) in the address bar, then press
Enter
on the keyboard.
• To upload, use a third-party app for network files management.


