6-21
Figure 6-21 Installing the LCD mask
6.11 Installing the Optional Memory Card
and Card Modem
1.
Turn the memory card upside down so that the word “insert” and an arrow pointing toward
the connecting edge are face up.
2.
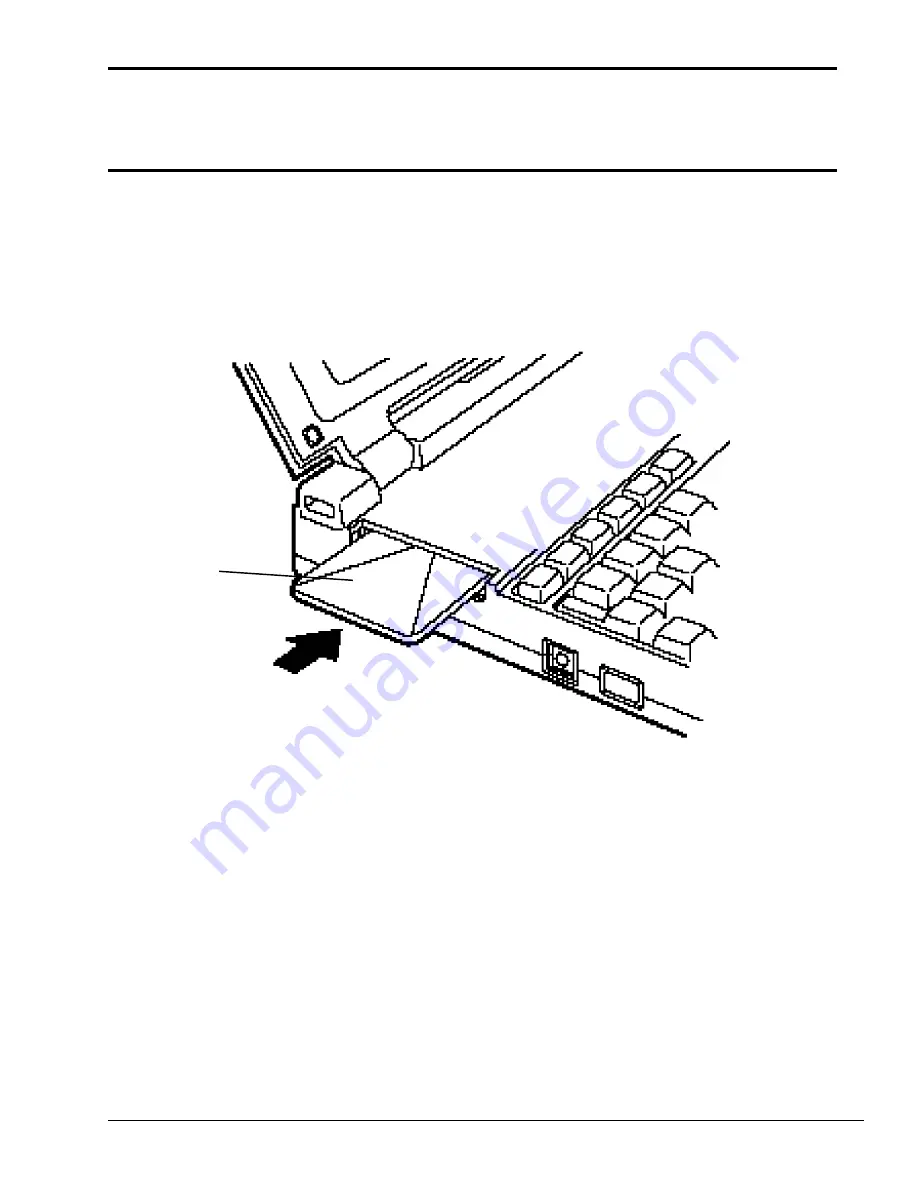
Carefully slide the memory card into the narrow slot and push gently to ensure a firm
connection (Figure 6-22). DO NOT force the memory card into place.
Figure 6-22 Inserting the optional memory card
3.
Slide the mylar pull tab into place.
4.
Replace the
EXP
memory slot cover; its latches should snap into place.
5.
Turn the card modem upside down so that the word “insert” and an arrow pointing toward
the connecting edge are face up.
6.
Carefully slide the card modem into the narrow slot and push gently to ensure a firm
connection. DO NOT force the card modem into place.
7.
Slide the mylar pull tab into place.
8.
Replace the modem slot cover; its latches should snap into place.
memory
card
Содержание T-Series T2200sx
Страница 1: ...1 1 Chapter 1 Hardware Overview ...
Страница 2: ...1 2 This page intentionally left blank ...
Страница 4: ...1 4 This page intentionally left blank ...
Страница 16: ...1 16 This page intentionally left blank ...
Страница 17: ...2 1 Chapter 2 Operational Overview ...
Страница 18: ...2 2 This page intentionally left blank ...
Страница 42: ...2 26 2 13 Connectors Appendix B contains the pin assignments for the connectors within the T2200SX ...
Страница 43: ...3 1 Chapter 3 Troubleshooting Procedures ...
Страница 44: ...3 2 This page intentionally left blank ...
Страница 46: ...3 4 This page intentionally left blank ...
Страница 82: ...3 40 This page intentionally left blank ...
Страница 83: ...4 1 Chapter 4 Tests and Diagnostics ...
Страница 84: ...4 2 This page intentionally left blank ...
Страница 141: ...5 1 Chapter 5 Disassembly Procedures ...
Страница 142: ...5 2 This page intentionally left blank ...
Страница 144: ...5 4 This page intentionally left blank ...
Страница 169: ...6 1 Chapter 6 Reassembly Procedures ...
Страница 170: ...6 2 This page intentionally left blank ...
Страница 172: ...6 4 This page intentionally left blank ...
Страница 191: ...App 1 Appendices ...
Страница 192: ...App 2 This page intentionally left blank ...
Страница 195: ...App 5 Appendix A System Board Layout A 1 System Board FSTFGx ICs Figure A 1 System board FSTFGx ICs front A D D C B ...
Страница 196: ...App 6 Figure A 2 System board FSTFGx ICs back G G G G E F J H I K ...
Страница 198: ...App 8 This page intentionally left blank ...
Страница 199: ...App 9 A 2 System Board FSTFGx Connectors Figure A 3 System board FSTFGx connectors front M G I D B R K L L H N J O C F ...
Страница 200: ...App 10 Figure A 4 System board FSTFGx connectors back E A P Q ...
Страница 202: ...App 12 This page intentionally left blank ...
Страница 203: ...App 13 A 3 System Board FSTFGx OSCs Figure A 5 System board FSTFGx OSCs front F G H E ...
Страница 204: ...App 14 Figure A 6 System board FSTFGx OSCs back A B C D ...
Страница 215: ...App 25 Appendix C ASCII Character Codes Table C 1 ASCII character codes ...
Страница 222: ...App 32 E 3 German Keyboard Figure E 3 German keyboard E 4 French Keyboard Figure E 4 French keyboard ...


