Toshiba Satellite P20 Скачать руководство пользователя страница 74


Learning The Basics 

User's Manual 

3-18 

Satellite P20

 Version 

1

 Last Saved on 30/05/2003 13:57 

ENGLISH using Euro_M.dot –– Printed on 30/05/2003 as T202014-EN 

Connecting your computer to a network 

To access a network: 

■ 

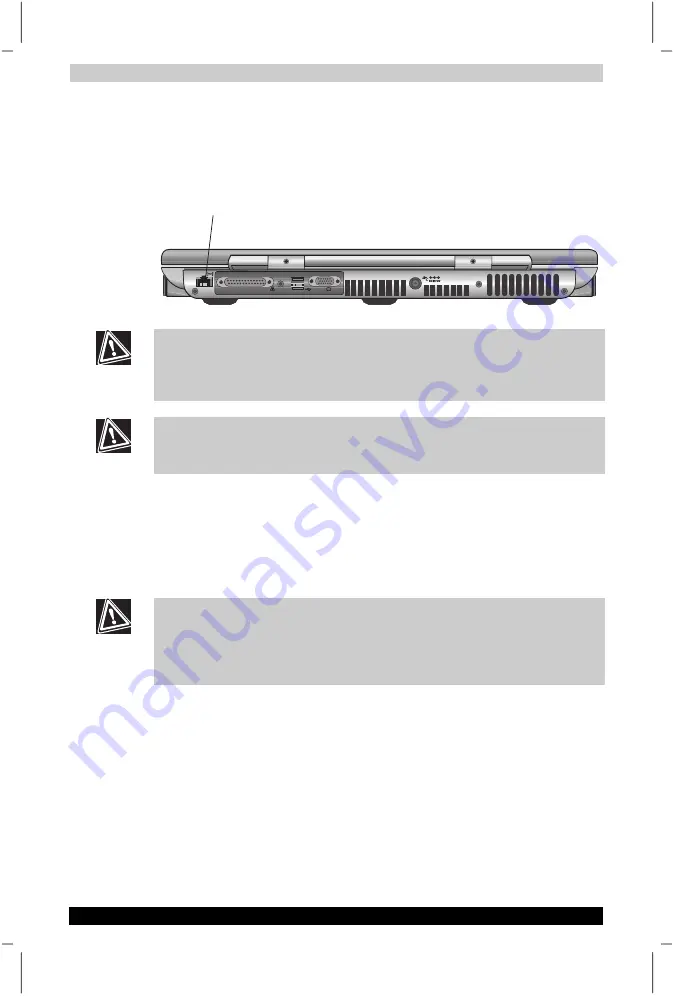
You need to connect a network cable with an RJ-45 connector to the 
LAN Jack. For specific information about connecting a LAN or WAN, 
consult your network administrator. 

LAN 

JACK 


The computer must be configured properly before connecting to a LAN. 
Logging onto a LAN using the computer’s default settings could cause a 
malfunction in LAN operation. Check with your LAN administrator 
regarding setup procedures. 

When the system is in the power saving mode (Hibernate), network 
devices such as the modem and LAN will not function and will not 
maintain network connection. 

■ 

You need a dial-up connection. Ask your network administrator for the 
telephone number of the network. 

To set up the connection, use the New Connection Wizard: 

1. 

Click 

Start 

and point to 

All Programs. 

2. 

Point to 

Accessories,

 then to

 Communications, 

and click 

New 

Connection Wizard. 

When you are connected to a network, disable your Microsoft

®

 Windows

®


operating system Standby command. The Standby command can disrupt 
your network connection. You can disable the Standby command in 
Power Options (in Control Panel) or the 

TOSHIBA

 Power Management 

Utility (click the icon on the taskbar). 

Connecting directly to a remote computer 

If you are connecting directly to a remote computer or a bulletin board 
service (BBS), you need a general-purpose communications program. 
In addition, there are two things you need to know before you can 
connect to another computer: 

■ 

The communications parameters. 

■ 

The file transfer protocol (only if you are downloading or uploading 
files). 


Содержание Satellite P20

Страница 1: ...ite SATELLITE P20 SATELLITE P20 SATELLITE P20 SATELLITE P20 SATELLITE P20 SATELLITE P20 P20 P20 T202014 EN User s Manual User s Manual Choose freedom Choose freedom computers toshiba europe com Choose freedom ...

Страница 2: ... a registered trademark and IBM PC OS 2 and PS 2 are trademarks of International Business Machines Corporation Celeron Intel Intel SpeedStep and Pentium are trademarks or registered trademarks of Intel Corporation or its subsidiaries in the United States and other countries MS DOS Microsoft Windows and DirectX are registered trademarks of Microsoft Corporation Centronics is a registered trademark ...

Страница 3: ...oor when you use it to run the computer or to charge the battery Do not cover the AC adapter with papers or other items that will reduce cooling also do not use the AC adapter while it is inside a carrying case Use only the AC adapter and batteries that are approved for use with this computer Use of another type of battery or AC adapter may risk fire or explosion Before you connect the computer to...

Страница 4: ...r battery and hard drive from environ mental hazards such as dirt dust food liquids temperature extremes and overexposure to sunlight When you move your computer between environments with very different temperature and or humidity ranges condensation may form on or within the computer To avoid damaging the computer allow sufficient time for the moisture to evaporate before using the computer When ...

Страница 5: ... Supplementary Information The product complies with the requirements of the Low Voltage Directive 73 23 EEC and the EMC Directive 89 336 EEC and or the R TTE Directive 1999 05 EEC This product is carrying the CE Mark in accordance with the related European Directives Responsible for CE Marking is TOSHIBA Europe Hammfelddamm 8 41460 Neuss Germany Canadian Regulatory Information Canada Only This di...

Страница 6: ...ase read this instruction manual carefully and retain for future reference Should the unit ever require maintenance contact an authorized service location Use of controls adjustments or the performance of procedures other than those specified may result in hazardous radiation exposure To prevent direct exposure to the laser beam do not try to open the enclosure Location of the required label Sampl...

Страница 7: ...ng Um einen direkten Kontakt mit dem Laserstrahl zu vermeiden darf das Gerät nicht geöffnet werden ADVARSEL Denne mærking er anbragt udvendigt på apparatet og indikerer at apparatet arbejder med laserstråler af klasse 1 hviket betyder at der anvendes laserstrlier af svageste klasse og at man ikke på apparatets yderside kan bilve udsat for utilladellg kraftig stråling APPARATET BOR KUN ÅBNES AF FAG...

Страница 8: ...SSE 1 KLASS 1 LASER APPARAT The drive with the above label is certified by the manufacturer that the drive complies with the requirement for laser product on the date of manufacturing pursuant to article 21 of Code of Federal Regulations by the United States of America Department of Health Human Services Food and Drug Administration In other countries the drive is certified to comply with the requ...

Страница 9: ...ment This product is designed to work with and is compatible with the following networks It has been tested to and found to conform with the additional requirements contained in EG 201 121 Germany ATAAB AN005 AN006 AN007 AN009 AN010 and DE03 04 05 08 09 12 14 17 Greece ATAAB AN005 AN006 and GR01 02 03 04 Portugal ATAAB AN001 005 006 007 011 and P03 04 08 10 Spain ATAAB AN005 007 012 and ES01 Switz...

Страница 10: ...ce in technical terms to run multiple task threads from a program which gives it a faster response time and better performance Not all models will come with HTT Bluetooth Technology Some models of the computer will come with Bluetooth technology built into it Bluetooth was developed jointly by Ericsson IBM Intel Nokia and TOSHIBA It uses a shortwave radio frequency to connect devices such as cell ...

Страница 11: ...t contact with the metal plate supporting the I O ports It can become hot The surface of the AC adaptor can become hot when in use This condition does not indicate a malfunction If you need to transport the AC adaptor disconnect it and let it cool before moving it Do not lay the AC adaptor on a material that is sensitive to heat The material could be damaged PC Card overheating Some PC cards can b...

Страница 12: ...side recommended conditions To avoid risk of lost data always make back up copies of data by periodically storing it on an external storage medium For optimum performance use your computer product only under recommended conditions Read additional restrictions in bundled documents Contact TOSHIBA Service and Support for more information LCD Display Small bright dots may appear on your TFT display w...

Страница 13: ... please refer to the paragraph Network connection Any consequences resulting from the use of this product in working environments that are not approved are not the responsibility of TOSHIBA Europe GmbH The consequences of the use of this product in non approved working environments may be Interference with other devices or machines in the near surrounding area Malfunction of or data loss from this...

Страница 14: ...es a successful storage always check if the data has been stored successfully About TOSHIBA Wireless Solution Wireless LAN Card Types The Wireless LAN Card is a wireless network card that complies with the IEEE 802 11 standard on wireless LANs Revision B The Wireless LAN Card supports data rates up to 11 Mbit s Wi Fi Wireless Fidelity certified by the Wireless Ethernet Compatibility Alliance WECA ...

Страница 15: ...e for use by consumers These standards and recommendations reflect the consensus of the scientific community and result from deliberations of panels and committees of scientists who continually review and interpret the extensive research literature In some situations or environments the use of Wireless LAN may be restricted by the proprietor of the building or responsible representatives of the or...

Страница 16: ...ion or hang up caused by use in combination with products not related to our company we do not take any responsibility Usage Restrictions Do not use the Wireless Products for controlling equipment Equipment directly linked with human life corresponds to the following Medical equipment such as life support systems equipment used in operations etc Exhaust systems for gases such as poisonous gas etc ...

Страница 17: ...rol equipment thereby causing an accident due to malfunction Do not turn ON the Wireless Communication switch in aircraft or in places that generate or can generate radio interference Radio waves can potentially affect them causing an accident due to malfunction Monitor possible radio interference or other troubles to other equipment while the product is used If any effect is caused turn OFF the W...

Страница 18: ...vice may not cause interference and 2 this device must accept any interference including interference that may cause undesired operation of this device L utilisation de ce dispositif est autorisée seulement aux conditions suivantes 1 il ne doit pas produire de brouillage et 2 l utilisateur du dispositif doit étre prét à accepter tout brouillage radioélectrique reçu même si ce brouillage est suscep...

Страница 19: ...een registratie bij BIPT IBPT nodig voor gebruik over afstand groter dan 300m is wel registratie bij BIPT IBPT nodig Voor publiek gebruik buiten gebouwen is licentie van BIPT IBPT verplicht Voor registratie of licentie kunt u contact opnemen met BIPT L utilisation en extérieur est autorisé sur le canal 10 2457 MHz et 11 2462 Mhz Dans le cas d une utilisation privée à l extérieur d un bâtiment au d...

Страница 20: ...er l uso interno Verificare con i rivenditori la procedura da seguire L uso per installazione in esterni non e permessa Nederland License required for outdoor installations Check with reseller for procedure to follow Licentie verplicht voor gebruik met buitenantennes Neem contact op met verkoper voor juiste procedure USA Federal Communications Commission FCC This device complies with Part 15 of FC...

Страница 21: ... in the documentation that comes with those products for additional information Relevant transmitters include FCC IDs CJ6PA3171WL CJ6PA3121BT Taiwan Article 14 Unless approved for any model accredited low power radio frequency electric machinery any company trader or user shall not change the frequency increase the power or change the features and functions of the original design Article 17 Any us...

Страница 22: ...wer radio station for mobile object identification system RF ID that is used in product line of factories Other Radio Stations are used 1 Please make sure before using this equipment that no Other Radio Stations are used in the neighbourhood 2 In case that RF interference occurs to Other Radio Stations from this equipment please change promptly the frequency for use place to use or stop emitting R...

Страница 23: ... belongs to the device class of radio equipment of low power data communication system radio station stipulated in the Radio Law and the Telecommunications Business Law of Japan The Name of the radio equipment MPCI3A 20 R JAPAN APPROVALS INSTITUTE FOR TELECOMMUNICATIONS EQUIPMENT Approval Number D01 1128JP TELECOM ENGINEERING CENTER Approval Number 01NY A1088 The following restrictions apply Do no...

Страница 24: ...m status indicators 1 3 Left Side 1 5 Right Side 1 6 Rear Side 1 7 Bottom Side 1 9 Front With The Display Open 1 10 Chapter 2 Getting Started 2 1 Selecting A Place To Work 2 1 Creating a computer friendly environment 2 1 Keeping yourself comfortable 2 2 Computer placement 2 2 Seating and posture 2 2 Lighting 2 3 Arms and wrists 2 3 Work habits 2 4 Other precautions 2 4 Setting Up Your Computer 2 5...

Страница 25: ...r control overlay 3 5 Starting A Program 3 5 Starting a Program from the Start menu 3 5 Starting a Program from Windows Explorer 3 5 Starting a Program from the Run Command 3 6 Saving Your Work 3 6 File Names 3 6 Printing Your Work 3 7 Backing Up Your Files 3 7 Copying to a diskette 3 7 Working with StickyKeys 3 8 Activating StickyKeys 3 8 User Defined Buttons 3 8 The Internet Button and the TOSHI...

Страница 26: ...Cleaning the computer 3 20 Moving the computer 3 20 Restoring the pre installed software 3 21 Restoring the complete system 3 21 TOSHIBA s Online Resources 3 21 Chapter 4 Mobile Computing 4 1 TOSHIBA s Energy Saving Design 4 1 Managing Power Usage 4 1 Running the computer on battery power 4 2 Using additional battery packs 4 2 Maximizing battery life 4 2 Charging Batteries 4 3 Charging the battery...

Страница 27: ...es With The Computer On Or Off 5 6 CD Mode 5 6 Digital Mode 5 7 Using The FIR Port 5 7 Using The TOSHIBA Remote Control 5 8 Using Wireless LAN 5 9 Using The TOSHIBA Power Management Utility 5 10 Chapter 6 Expanding Upgrading 6 1 Using External Peripherals 6 1 Connecting A USB Keyboard 6 2 Connecting An External USB Pointing Device 6 3 Connecting An External Monitor 6 4 Connecting A Television 6 5 ...

Страница 28: ...oblems 7 4 Keyboard Problems 7 5 Display Problems 7 6 Disk Drive Problems 7 7 CD ROM Drive Problems 7 9 Sound System Problems 7 9 PC Card Problems 7 10 Resolving PC Card Problems 7 10 Printer Problems 7 12 Modem Problems 7 13 Develop Good Computing Habits 7 14 If You Need Further Assistance 7 15 Appendix A Hot Keys A 1 Appendix B Features And Specifications B 1 Appendix C Power Cable Connectors C ...

Страница 29: ...s to find specific information If you are new to computers or have not used a notebook computer before read through the first couple of chapters to familiarize yourself with the parts of the computer and how to turn it on After that seek out whatever interests you most Your computer comes with the following documentation This User s Guide with information on how the computer works Safety Instructi...

Страница 30: ...e existence of a hazard that could result in bodily injury if the safety instruction is not observed CAUTION This icon indicates the existence of a hazard that could result in damage to equipment or property if the safety instruction is not observed NOTE This icon indicates information that relates to the safe operation of the equipment or related items You will also come across the following two ...

Страница 31: ...ceived everything If any items are missing or damaged notify your dealer immediately Front With The Display Closed CD DIGITAL MODE BUTTON DISPLAY LATCH 2ND MODULE BAY REMOTE CONTROL RECEIVER MAIN MODULE BAY The Display Latch keeps the display panel closed and locked To open the computer slide the display latch to the right and then lift the display panel The CD Digital Mode Button allows you to se...

Страница 32: ...L MODE INDICATOR LED STOP EJECT The CD Digital Mode button sets which audio playback mode to use either audio CD or digital music file such as MP3 or Windows Media Files Whether your computer is turned on or off the CD Digital control buttons are locked by default To unlock them press the CD Digital mode button for more than 3 seconds Press the CD Digital mode button again for over 3 seconds to lo...

Страница 33: ...tus indicators POWER DC IN BATTERY The DC IN LED indicates the computer is connected to the AC adapter and it is plugged into an AC power source The Power LED flashes amber while the system is in Standby mode The LED turns off when the computer is turned off or in hibernation mode The Battery LED indicates the battery s current charge discharge status It lights green when the battery is fully char...

Страница 34: ...ter runs a program opens a file or performs some other function in which it must access the HDD this light goes on The Module Bay LED indicates that the device in either the Main or 2nd Module Bay is being accessed The SD Card LED indicates the computer is accessing data from an SD Card The Wireless Communication LED indicates the wireless LAN or Bluetooth feature is active and that you may connec...

Страница 35: ...es such as external speakers Connecting headphones or other devices to this jack automatically disables the internal speakers The Line In Jack is a standard 3 5 mm mini line in jack that enables connection of a stereo device for audio input Not all models come fitted with a wireless communication or Blutetooth device The Wireless Communication Switch for Wireless LAN or Bluetooth turns on the wire...

Страница 36: ...uter The Modem Jack lets you connect to a standard telephone line through a Modem cable The two stacked CardBus ready PCMCIA compatible PC Card Slots allow you to install additional devices Each slot can accommodate one Type II PC Card Both slots are able to install one Type III PC Card Keep foreign objects out of the PC Card slots A staple or similar object that accidentally gets into a slot can ...

Страница 37: ...EL PORT EXTERNAL MONITOR PORT FAN VENTS LAN JACK USB PORTS DC IN The LAN Jack is an RJ 45 jack for using a standard LAN cable to connect to a Local Area Network ACTIVITY AMBER LIGHT LINK GREEN LIGHT There are two status indicator on the LAN Jack The right indicator turns green when the LAN Jack is linked with the cable and the left one flashes amber when the LAN is active ...

Страница 38: ...computer USB 2 0 is a peripheral expansion standard that supports a data transfer rate of up to 480 Mbps USB peripherals have a single standard for cables and connectors The USB standard allows you to install and remove USB devices while the computer is on Switching devices without turning off the computer is called Hot swapping The External Monitor Port is a standard 15 pin VGA port for connectin...

Страница 39: ...may not have it and the internal modem The Wireless LAN Card Module Cover protects the Wireless LAN Card some configurations may not have it The two Module Locks secure the modules in the Main and 2nd Module bays preventing them from accidentally falling out if the release latches are inadvertently pressed The two Module Release Latches disconnect the modules from their bays To remove the Main Mod...

Страница 40: ...age Never cover the fan inlets Front With The Display Open POWER BUTTON LCD SCREEN INTERNET BUTTON TOSHIBA CONSOLE BUTTON KEYBOARD TOUCH PAD TV OUT BUTTON The LCD Screen is the computer s primary display Your computer is equipped with a 17 TFT screen with WXGA 1440 x 900 resolution TFT Thin Film Transistor is a type of LCD flat panel display screen in which each pixel is controlled by from one to ...

Страница 41: ...ppendix A for more information The Caps Lock LED lights when you press the Caps Lock key When this light is on pressing a letter key on the keyboard produces an uppercase capital letter The Cursor Lock LED lights when the arrow control overlay is turned on by pressing the Fn and F10 keys simultaneously When this light is on pressing an overlay key moves the cursor in the direction of the reddish w...

Страница 42: ...M dot Printed on 30 05 2003 as T202014 EN TOUCH PAD TOUCH PAD CONTROL BUTTONS The Touch pad is a pressure sensitive pointing device which works like a mouse to position the cursor on the screen The two Touch pad Control Buttons have essentially the same functions as mouse buttons See chapter 2 for further information ...

Страница 43: ...4 EN INTERNET BUTTON TV OUT BUTTON TOSHIBA CONSOLE BUTTON The two User Defined buttons are pre configured as the Internet button which opens your default web browser and the TOSHIBA Console button which opens the TOSHIBA Console program Both can be assigned custom tasks which are then triggered when one of them is pressed The third button is for TV Out ...

Страница 44: ...e ventilation and prevent overheating To keep your computer in prime operating condition protect your work area from Dust moisture and direct sunlight Liquids and corrosive chemicals If you spill liquid into the computer turn it off unplug it from the AC power source remove the battery and let it dry out completely before turning it on again If the computer does not operate correctly after you tur...

Страница 45: ...ble height and distance You should be able to type without twisting your torso or neck and look at the screen without slouching If you are using an external monitor the top of the display should be no higher than eye level If you use a paper holder set it at about the same height and distance as the screen Seating and posture When using your computer maintain good posture with your body relaxed an...

Страница 46: ... you work Do not slump forward or lean back too far Lighting Proper lighting can improve the visibility of the display and reduce eyestrain Position the display panel or external monitor so that sunlight or bright indoor lighting does not reflect off the screen Use tinted windows or shades to reduce glare Avoid placing your computer in front of a bright light that could shine directly in your eyes...

Страница 47: ...s Other precautions Your Satellite computer is designed to optimise safety minimize strain and withstand the rigors of portability However you should observe certain precautions to further reduce the risk of personal injury or damage to the computer Avoid prolonged physical contact with the underside of the computer If the computer is used for long periods its case can become very warm While the t...

Страница 48: ...cting a printer Connecting an alternate pointing device Connecting the AC adapter Your computer contains a rechargeable battery pack which needs to be charged before you can use it the first time The AC adapter enables you to power the computer from an AC outlet and to charge the computer s battery Used with the AC adapter your Satellite computer can run on power supplies worldwide To connect AC p...

Страница 49: ...o liability for any damage in such cases Never pull directly on the power cable to unplug it Hold the power plug when removing the cable from the outlet Charging the battery Before you can use the battery to power the computer you must charge it Connect the computer to an AC power outlet using the AC adapter and power cable The DC IN LED on the system indicator panel on the front of the computer w...

Страница 50: ... which may come with your printer If not you can purchase one from a computer or electronics store Connecting the printer cable while the computer is on may damage the printer the computer or both If your printer is ECP or IEEE compliant make sure your printer cable is an IEEE 1284 cable The following instructions assume you have a printer that uses a parallel port connection which is the most com...

Страница 51: ...ernal pointing device to the computer Using a USB pointing device 1 Plug the device into one of the USB ports on the computer We recommend right handed users attach the device to the USB port on the right hand side of the computer left handed users may find it more convenient to use one of the USB ports on the rear RIGHT USB PORTS REAR USB PORTS 2 The device will probably require a driver and poss...

Страница 52: ...uter turn the printer on and wait until it indicates it is ready 4 Turn on the computer by momentarily pressing then releasing the power button When you release the power button the Power LED on the system indicator panel comes on When turning on the computer for the first time don t turn it off until the operating system has loaded completely Turning off the computer during its initial startup wi...

Страница 53: ...uttons makes selections drags object or performs a variety of other functions depending on the software To select an object first move the pointer to the object you want to select and then press the left button one time and release it The functionality of these buttons depends on your software Refer to your software user s manuals for specific information on the Touch pad mouse functions Double cl...

Страница 54: ... desired position release the button to drop the object in place You can change settings for the Touch pad such as how quickly you need to click twice for the computer to recognize a double click Go to Start Control Panel then in traditional view Mouse Adjusting brightness Use the following hot key combinations to adjust the screen brightness and perform other basic functions Hotkeys For a full li...

Страница 55: ... change and be displayed as an icon Cursor keypad on off This hot key enables disables the embedded cursor keypad Numeric lock state is logically disabled See chapter 3 for more information Numeric keypad on off This hot key enables disables the embedded numeric keypad Numeric lock state is logically enabled See chapter 3 for more information Scroll Lock on off Change Resolution Changes the curren...

Страница 56: ... Ctrl A combination can be accessed by pressing the Ctrl key followed by the A key You can adjust the settings for StickyKeys by clicking on Start then Control Panel then Accessibility Select the Keyboard tab Fn key also supports StickyKey function Registering your computer Registering your computer lets TOSHIBA keep you up to date with information about new products and upgrades and also provides...

Страница 57: ...from or writing to a disk may damage the disk the drive or both Keep the computer and disks away from objects that generate strong magnetic fields such as large stereo speakers Information on disks is stored magnetically Placing a magnet too close to a disk can erase important files Always use the Standby or Hibernate mode to power down your computer Important files may be damaged if the computer ...

Страница 58: ... them in a safe place It is easy to put off backing up because it takes time However if your hard disk suddenly fails you may lose all the data on it unless you have a separate backup copy Use Error checking and the Disk Defragmenter regularly to conserve disk space and help your computer perform at its optimal level To run Error checking 1 Click Start and open My Computer 2 Click the drive you wa...

Страница 59: ...ter keys to upper case the number and symbol keys are not affected The Caps Lock LED on the keyboard illuminates when you press Caps Lock Ctrl Fn and Alt keys The Ctrl Fn and Alt keys do different things depending on the program you are using For more information see your program documentation Function keys The function keys not to be confused with the Fn key are the 12 keys at the top of the keyb...

Страница 60: ...ontrol the cursor as you would use the ten key keypad on a desktop computer s keyboard Using the overlay to type numeric data To turn the numeric overlay on and off press Fn and F11 simultaneously The numeric mode light immediately below the F11 key glows when the numeric overlay is on You can still use the overlay keys to type alphabetic characters while the numeric overlay is on For lowercase le...

Страница 61: ...plays the Program menu which lists programs and program groups If your program is listed go to step 3 otherwise continue with step 2 2 Point to the program group containing the program that you want to start Microsoft Windows XP operating system displays the associated program menu 3 Click the program s icon to start the program To close the program click the Close button at the upper right corner...

Страница 62: ...u and click Save a common shortcut for this in many programs is to press the Ctrl key and the S key together Save your work at regular intervals as you work To save the current file with a new name choose Save As from the File menu type a name for the file choose a location to save it and click OK To make another copy of the file you are currently working with choose Save As from the File menu and...

Страница 63: ...ick the Print button Backing Up Your Files Backing up your files simply means copying individual files to a floppy disk or copying entire sections of your hard disk to another media such as a CD R or CD RW discs Copying to a diskette 1 Insert a formatted floppy disk into the FDD drive may not exist depending on the configuration of your computer 2 Double click the My Computer icon on the Windows d...

Страница 64: ...d Internet browser or whatever else you can think of doing with your software collection The Internet Button and the TOSHIBA Console Button By default the User Defined buttons are configured with Internet and TOSHIBA Console functionality The Internet button opens your default Internet web browser while the TOSHIBA Console button opens the TOSHIBA Console Configuring the Buttons 1 Right click the ...

Страница 65: ...e the colour for the OSD text 5 Use the Size menu to define the size of the on screen text and the Display box to set how long the text remains on the screen 6 The Enable option lets you turn OSD text on and off Using Compact Discs And DVDs The CD ROM drive lets you read CD ROM discs and play audio Compact Discs Your computer also includes a DVD ROM drive allowing you to play DVDs as well as CDs T...

Страница 66: ...til it locks on the spindle 5 Close the disc tray If the disc is not seated properly when you close the disc tray the disc might be damaged and the tray may not open fully when you press the eject button Removing discs from the drive 1 Press the eject button Do not press the eject button while the computer is accessing the CDROM DVD ROM drive the Module Bay LED on the left side of the keyboard fla...

Страница 67: ...ce of a disc can prevent the drive from reading the data properly Don t expose CDs or DVDs to direct sunlight or extreme heat or cold To clean a disc wipe it with a clean dry cloth starting from the centre of the disc and wiping toward the outward edge Do not wipe using a circular motion If necessary moisten the cloth with water or a neutral cleaner not benzene or rubbing alcohol Let the CD dry co...

Страница 68: ... manual for information An HDD or CD ROM connected to a 16 bit PC card might affect the performance of the computer s sound system and data transmission including slower transmission speeds and dialling errors 1 If your PC Card does not support hot swapping save your data and turn off the computer before inserting the PC Card For more information see Hot swapping later in this chapter 2 Hold the P...

Страница 69: ...The lower button will pop out a Type II or Type III card from the lower slot 6 Remove the PC Card and store it properly PC CARD EJECT BUTTONS Hot swapping You can replace one PC Card with another while the computer is on This is called hot swapping Hot swapping precautions Although you can insert a PC Card at any time to avoid data loss do not remove a card while it is in use Before removing a PC ...

Страница 70: ...video recorders MP3 players and others Your computer can support the following size of SD Cards 8 16 32 64 128 256 512MB Do not attach stickers or labels to the card or you may cause a malfunction when it is being read or ejected Inserting SD Cards Hold the SD Card with the gold contact area facing down and the notched corner on the right side Gently slide it into the SD Card slot until it clicks ...

Страница 71: ...again Click OK 4 A message The TOSHIBA SD Memory Card Drive device can now be safely removed from the system will appear 5 Push in the card and release it to pop the card out slightly 6 Grasp the card and remove it Make sure the SD Card indicator to the left of the keyboard is out before you remove the card or turn off the computer s power If you remove the card or turn off the power while the com...

Страница 72: ... external keyboard and pointing device connect to any of the three USB ports See chapter six for more details Using a computer lock You may want to secure your computer to a heavy object such as your desk The easiest way to do this is to purchase a computer cable lock pictured below 1 Feed the cable through or around some part of a heavy object Make sure there is no way for a potential thief to sl...

Страница 73: ...onnect the Modem jack to a digital line The high current of digital lines can damage the modem Connecting the modem to a telephone line Before you can use the modem you must connect it to a standard voice grade telephone line Disable Call Waiting before you connect through the modem Call Waiting interrupts data transmission If you use a storage device such as a CD ROM drive or HDD connected to a 1...

Страница 74: ...work connection You need a dial up connection Ask your network administrator for the telephone number of the network To set up the connection use the New Connection Wizard 1 Click Start and point to All Programs 2 Point to Accessories then to Communications and click New Connection Wizard When you are connected to a network disable your Microsoft Windows operating system Standby command The Standb...

Страница 75: ...data bits and two stop bits You set each of these parameters in your communications program Each parameter must be set the same on both computers or you will not be able to connect To check your modem s settings and communications parameters 1 Click the My Computer icon with the secondary button then click Properties Windows operating system displays the System Properties dialog box 2 Click the Ha...

Страница 76: ...be set to put your computer into Standby Click on Start Control Panel then Power Options and select Advanced to choose your preferred setting Caring For Your Computer This section gives tips on cleaning and moving your computer For information about taking care of your computer s battery see Running the computer on battery power in chapter 4 Cleaning the computer To keep your computer clean gently...

Страница 77: ...ry 1 Load the Product Recovery CD ROM in the drive and turn on the computer power 2 When In Touch with Tomorrow TOSHIBA appears press the F12 key The Boot Menu appears 3 Use your cursor keys to select the CD ROM DVD drive in the display menu 4 Follow the on screen directions 5 If your computer came with additional software installed this software can not be recovered from the Recovery CD Re instal...

Страница 78: ...e it for longer periods while travelling Managing Power Usage Your computer s power saving options increase the length of time you can use the computer before you need to recharge the battery To change the power usage mode click Start then click Control Panel In Control Panel double click the Power Option icon if in Category View then first click Performance and Maintenance to make the Power Optio...

Страница 79: ...f Using additional battery packs If you spend a lot of time travelling and need to work for many hours without an AC power source you may want to carry additional charged battery packs with you You can then replace a discharged battery and continue working A new battery pack should be fully discharged by running the computer solely on battery power and recharged three times when first used Maximiz...

Страница 80: ...full while the computer is on how long depends on what other operations the computer is performing The battery only can charge a small current while the computer is consuming full power The battery may not start charging immediately if The battery is extremely hot or cold To ensure that the battery charges to its full capacity wait until it reaches room temperature 5 C to 35 C 41 F to 95 F The bat...

Страница 81: ...in battery pack inserted for a long time In this event your computer displays the following error message ERROR 0271 Check data and time settings WARNING 0251 System CMOS checksum bad Default configuration used Press F1 to resume F2 to Setup It is seldom necessary to charge the RTC battery because it charges while the computer is on However if the RTC battery is low the real time clock and calenda...

Страница 82: ... the TOSHIBA Power Management Utility which can be found in the Windows Control Panel To access the panel 1 Click on the Start button then click the Control Panel 2 Double click the TOSHIBA Power Management Utility icon if in Windows XP Category View first click Performance and Maintenance to make the TOSHIBA Power Management Utility icon appear 3 Choose the Battery Power Meter tab to show the cur...

Страница 83: ...zing battery life What to do when the battery runs low When the battery runs low you have these options Plug the computer into a live AC outlet and recharge the battery Save your work and turn off the computer If you don t manage to do any of these things before the battery completely runs out of power the computer automatically enters Hibernate mode and keeps track of where you were so that when ...

Страница 84: ...u can also set how the alarm action occurs sound an alarm display a message both or none You can also set the computer to enter Standby when the alarm goes off To set the alarm levels 1 Click the Start button then click Control Panel 2 Double click the TOSHIBA Power Mangement icon if in Category View then first click Performance and Maintenance to make the TOSHIBA Power Mangement icon appear 3 Cli...

Страница 85: ...Connecting the AC adapter in chapter 2 Removing the battery 1 Save your work 2 Turn off the computer Never remove the battery while the computer is on 3 Close the display panel ensuring that it snaps in to place 4 Turn the computer upside down with the front of the computer facing towards you 5 Unlock the 2nd Module Bay Lock 6 Slide the 2nd Module Release Latch toward the right 7 Pull the battery ...

Страница 86: ...scard it immediately following the advice in the following section on Disposing of Used Batteries Safely The battery can only be inserted into the 2nd Module Bay Disposing Of Used Batteries Safely You can recharge a battery many times When the useful life of the battery expires or if the battery becomes damaged you must discard it responsibly Batteries should not be disposed of together with house...

Страница 87: ...of a car or place it where it could get wet or covered in dust Always travel with the computer in a carrying case TOSHIBA offers a choice of carrying cases for the computer They all provide plenty of extra space for manuals power cables CDROM discs and floppy disks etc See your dealer for more information When travelling by air you maybe required to put your notebook through airport security The X...

Страница 88: ... Settings then Display Settings Following the on screen display step by step panels you will be able to adjust the appearance of your desktop You will also be able to configure your computer to use more than one display Follow the instructions on the next two pages Using multiple displays Your computer can be simultaneously connected to a computer monitor and television display while also using th...

Страница 89: ...en you click Advanced turn first to the instruction on the next page 1 If you have more than one external display attached to your computer select the displays you want to use by right clicking on either of the pictures in the above window and selecting Select Output Device 2 Select the display mode you want to use You have the option of configuring both displays as clones so that the image on one...

Страница 90: ...splay Properties window you must adjust your settings before using nView Disable your existing dual monitor settings under the Settings tab by doing the following 1 Click on the monitor icon marked 2 Make sure that the Extend my Windows desktop onto this monitor box is not checked 2 Click on the monitor icon marked 1 and then click Apply When the new settings have taken effect make sure that monit...

Страница 91: ...ly the relative positioning of the two displays when they are configured as an extended desktop On the Display Properties window the two displays can be positioned horizontally vertically or in any diagonal configuration you wish as shown below If an external display will not be connected next time you use your computer you should cancel any extended desktop or clone display settings before shutti...

Страница 92: ...Studio You have to install the software by yourself First insert the disc into the drive then the setup dialog box shows up automatically You can then follow the onscreen display step by step method to install it For more Information on using Drag n Drop CD DVD software please consult the documentation that came with it When using the CD RW DVD RW or DVD Multi drive device do not copy data directl...

Страница 93: ...ck automatically after 2 minutes if Play is not pressed and no CD is playing CD DIGITAL MODE BUTTON PREVIOUS NEXT PLAY PAUSE CD MODE INDICATOR LED DIGITAL MODE INDICATOR LED STOP EJECT You can refer to chapter 1 for instruction on using the CD control buttons CD Mode Computer Power Off state You can use the CD controls to play an audio CD without turning on the computer Press the CD Digital Mode b...

Страница 94: ...r Off state If you push the play button while the computer is off and in Digital Mode the computer will power on launch Microsoft Windows Media Player and play by default from the digital playlist Computer Power On state If you push the play button while the computer is on and in Digital Mode Microsoft Windows Media Player will launch and start playing by default from the digital playlist Using Th...

Страница 95: ...rk To use simply point the controller towards the computer s front panel and press the appropriate button Not all models ship with the TOSHIBA Remote Control The remote control s features are Power On Off Turns the computer on and off TV Out Changes display to an external TV Maximize Restore Maximize the active window or restores it to its original size Switch Window Cycles through any open window...

Страница 96: ...icate with an Access Point transceiver that is physically connected to the network by cable The Atheros Client Utility which is the Wireless Networking driver utility has been pre installed and setup on the computer You may get detailed operating and setup information from its online Help This utility should be used only if you have an 802 11a b setup but not for 802 11b If you are using 802 11 b ...

Страница 97: ... Brightness Turn Off Monitor Turn Off Hard Disks System Stand By and System Hibernate at different battery power capacity 2 AC Mode There is one Power Scheme which is Full Power As with the various battery modes you can adjust the specifics for Full Power management 3 Alarm You can adjust the Low Battery Alarm and Critical Battery Alarm when the Battery Power reaches a certain level The Alarm Acti...

Страница 98: ...es to attach externally and installing more system memory Using External Peripherals Your computer is ideally suited for use as a desktop computer in the office or at home If you frequently use your computer at one location you might want to connect a number of peripheral devices such as a full size keyboard speakers a larger display device or speakers to boost your computer s capabilities and mak...

Страница 99: ...rd do as follows 1 Plug the keyboard into one of the USB ports on the computer We recommend that right handed users connect the keyboard to one of the rear ports keeping the port on the right side of the computer free for an external pointing device Left handed users may find it more convenient to reverse that arrangement 2 If the keyboard has advanced features that require a driver or other softw...

Страница 100: ...nterface RIGHT USB PORTS REAR USB PORTS To install an external USB pointing device do as follows 1 Plug the device into one of the USB ports on the computer We recommend right handed users attach the device to the USB port on the right hand side of the computer left handed users may find it more convenient to use one of the USB ports on the rear 2 The device may require a driver and possibly other...

Страница 101: ...TERNAL MONITOR PORT To connect a monitor to the external monitor port do as follows Make sure the computer is turned off before connecting an external monitor 1 Turn off the computer 2 Check the instructions that come with the monitor 3 Plug the 15 pin VGA connector from the monitor onto the external monitor port of the computer 4 Tighten the screws on the connector to secure the connector to the ...

Страница 102: ... using an S video cable in the TV Out port on the right side of the computer TV OUT PORT To connect a television to the TV Out port do as follows Make sure the computer is turned off before connecting an external television 1 Turn off the computer 2 Check the instructions that come with the television 3 Plug the connector from the television onto the TV Out port of the computer You can use the Dis...

Страница 103: ...ovide better sound reproduction than that from the built in speakers and save wear on them HEADPHONE JACK To connect self powered external speakers do as follows 1 Position the speakers where you want them 2 Plug the mini plug connector from the speakers into the Headphone Jack on the left side of the computer 3 Plug the speakers into a power source 4 Turn on the computer and adjust the volume fro...

Страница 104: ...hone you get is a standard computer microphone with a 3 5mm mini plug connector 2 Plug the microphone into the microphone jack on the computer 3 Adjust the microphone volume in the Windows Sounds and Audio Devices control panel s Audio panel section by clicking on the Volume button of Sound playback and Sound Recording Connecting A Line In The line in jack lets you connect a digital audio line to ...

Страница 105: ...s RIGHT USB PORTS REAR USB PORTS Alternatively you can purchase a TOSHIBA FDD module which can be inserted in the Main or 2nd Module Bay Module Bay Options A FDD Module floppy disk drive or a second hard disc drive HDD can be used in place of an Optical Media Drive such as DVD R RW The FDD goes into the Main Module Bay The Windows Operating System automatically detects it listing it in Explorer Al...

Страница 106: ...means it can take two 1 GB memory modules If you want to upgrade the system memory you should use only certified modules Ask your vendor or check the TOSHIBA web site for a list of approved memory products The basic specifications of the memory used are DDR 266 333 specification compliant 128MB 256MB 512MB or 1GB capacity Installing additional memory Unless you are familiar with computer upgrades ...

Страница 107: ... 05 2003 as T202014 EN 2 Place the computer on a static free surface and turn it over 3 Remove the memory module cover by removing the two retaining screws and lifting the cover panel out MEMORY MODULE COVER 4 Insert the SO DIMM module in the socket at about a 45º angle and then press it down into the socket until it snaps in place ...

Страница 108: ...nd turn it on The system should automatically recognize the new total memory capacity You can check this by clicking on My Computer with the right Mouse button clicking on the Properties item in the menu that appears and display the memory size in the General panel of the System Properties control panel If you install a memory module that is not compatible with the computer a beep will sound and t...

Страница 109: ...without shutting down the Microsoft Windows operating system or closing other programs To close a program that has stopped responding 1 Press Ctrl Alt and Del simultaneously once The operating system displays the Windows Task Manager box This lists all the programs and processes currently in operation Select the Applications tab If a program has stopped responding the words not responding appear b...

Страница 110: ...he details into Notepad 5 Add a paragraph break and type some notes describing what you were doing when you received the message 6 Save the file and refer to it when you contact the software manufacturer Hyper Threading Technology Incompatibility Some applications may not be compatible with Hyper Threading Technology HTT If an application does not work with HTT try disabling it as described below ...

Страница 111: ...k Start and then click Run In the Open box type drwtsn32 System Information Collects your system configuration information and provides a menu for displaying the associated system topics To open System Information click Start and then click Run In the Open box type msinfo32 Refer to your operating system documentation for more information on using these tools After diagnosing the problem read the ...

Страница 112: ... computer Turn off the computer remove the battery clean the contacts with a soft dry cloth if necessary and replace the battery The battery may be too hot or too cold to charge properly If you think this is the probable cause let the battery reach room temperature and try again If the battery has completely discharged it will not begin charging immediately Leave the AC adapter and power cable con...

Страница 113: ... of the keys You have connected an external keyboard and the operating system displays keyboard error messages If you have a second keyboard try it If it works the first keyboard may be defective or incompatible with your computer Nothing happens when you press the keys on the external keyboard If you plugged the external USB keyboard in while the computer was turned on your computer may have fail...

Страница 114: ...is firmly plugged into a working power outlet Check that the cable connecting the external monitor or television to the computer is firmly attached Try adjusting the contrast and brightness controls on the external monitor or television Press Fn and F5 simultaneously to make sure the display priority is not set for the built in screen If no image appears on the screen after switching displays pres...

Страница 115: ...isk or one or more files appear to be missing Make sure you are identifying the drive by its correct name A or C Run Error checking to check for file system errors and bad sectors on your hard disk To run Error checking 1 Click Start and open My Computer 2 Click the drive you want to test 3 On the File menu click Properties 4 On the Tools tab under Error checking click Check Now 5 Under Check disk...

Страница 116: ...e Make sure the drive is empty You may be inserting the diskette incorrectly Hold the label of the disk with the hub side facing down and insert it so that the metal head window cover goes into the drive first The metal cover or a loose label may be obstructing the path into the drive Carefully inspect the diskette If the metal cover is loose replace the diskette If the label is loose replace the ...

Страница 117: ...ROM drive eject mechanism requires power to operate If you need to remove a CD and cannot turn on the computer use a narrow object such as a straightened paper clip to press the manual eject button This button is in the small hole next to the CD ROM eject button on the right side of the computer Some CDs run correctly but others do not If the problem is with a data CD refer to the software s docum...

Страница 118: ...gh quality control If another PCMCIA equipped computer is available try the card in that machine If the card malfunctions again it may be defective Resolving PC Card Problems Here are some common problems and their solutions The slots appear to be dead and PC Cards that used to work no longer do Check the PC Card status 1 Click the My Computer icon with the secondary button then click Properties W...

Страница 119: ...ry with a fully charged one or charge the battery fully as follows 1 Make sure the computer is not in Standby 2 Turn off the computer 3 Connect the AC adapter and power cable 4 Keep the computer plugged in for about four hours with the power turned off If power is not the problem try removing the card inserting it again and reinstalling it using the procedure in Inserting PC Cards in chapter 3 The...

Страница 120: ...inters will not start printing when there are just two or three sheets of paper left in the tray Run the printer s self test to check for any problem with the printer itself Make sure you installed the proper printer driver Try printing another file For example you could create and attempt to print a short test file using Notepad If a Notepad file prints correctly the problem may be in your origin...

Страница 121: ...it at 300 1200 2400 4800 9600 14400 28800 33600 56000 bps bits per second or higher Refer to the program s documentation for information on how to change these settings To check the modem s settings and communications parameters 1 Click the My Computer icon with the secondary button then click Properties Windows operating system displays the System Properties dialog box 2 Click the Hardware Tab th...

Страница 122: ...ograms you should back up your programs as well as your data files If something goes wrong that requires you to format your hard disk and start again reloading all your programs and data files from a backup will save time Please check every three months to make sure the fan inlet is unobstructed and clean the inlet if necessary Read the user s guide It s very difficult to provide a fail safe set o...

Страница 123: ... to investigate other sources of assistance first Try the following before contacting TOSHIBA Review the troubleshooting information in your Microsoft Windows documentation If the problem occurs while you are running a program consult the program s documentation for troubleshooting suggestions Contact the software company s technical support group for their assistance Consult the dealer from whom ...

Страница 124: ...rd is set the screen is restored when you press any key or use the Touch pad Power save mode Changes the power save mode Press Fn F2 once to display the Power Save Mode in a window Press the hotkeys again to change the setting You can also change this setting through the AC Power or Battery Power items of the Power Save Modes tab in the TOSHIBA Power Management Utility Standby The computer enters ...

Страница 125: ...e Wireless Communication LED on the system indicator panel lets you know when the wireless devices are active Pressing this key combination lets you select a device mode Touch pad Enables or disables the Touch pad function When you press these hotkeys the current setting is changed and displayed as an icon Cursor keypad on off Pressing this hot key can enable disable the embedded cursor keypad Num...

Страница 126: ...3 0 GHz 3 0C GHz with 800 MHz system bus and Hyper Threading Technology Other processors may be introduced in the future Chip Set Intel 865 PE Intel 82801 EB I O Controller HUB PC87591L for Keyboard Controller Battery Management Unit and RTC T7L58XB for Card Bus PCMCIA controller and SD controller nVIDIA GeForce FX Go5200 graphics controller ALC202 for AC97 CODEC OZ168 for Direct CD play controlle...

Страница 127: ... smart battery Pack with 14 8V x 6450 mAh capacity 12 hours or longer charge time to 100 capacity on Li Ion Battery when the system is on Approximately 4 hours charge time to 100 capacity on Li Ion Battery when the system is off One 2 5 9 5mm Hard Disk support with 30GB 40GB 60GB 80GB Bus Master IDE 9 5mm 2 5 HDD Support Support Ultra DMA100 Storage Devices HDD FDD Optical disk drives depending on...

Страница 128: ...ireless LAN card 802 11b Wireless LAN card 802 11a b AC Adaptor Battery Pack Bluetooth SD Card Remote Control Touch pad Point Device Left Button Right Button I O Ports Depending on the model bought One 25 pin parallel port EPP ECP capability One 15 pin external monitor port supports DDC 2B One TV out port One Microphone Jack One Line In Jack One Headphone Jack One DC IN One SD Card Slot Four USB p...

Страница 129: ... Disk mode by time out or by hot key HDD Local Stand By mode by time out LCD Local Stand By mode by time out Low battery alarm by beep Auto backlight off when LCD cover closed Full ACPI 1 0b supported LCD Auto DIM mode by time out Switches Power Button One Internet Button One TOSHIBA Console Button One TV Out Button CD Digital Mode Button Eject Stop Button Play Pause Button Forward Button Reverse ...

Страница 130: ...Power Cable Connectors The Satellite computer features a universal power supply you can use worldwide This appendix shows the configuration of typical AC power cord plugs and sockets in various parts of the world USA and Canada United Kingdom UL approved CSA approved BS approved Australia Europe AS approved VDE approved NEMKO approved Satellite P20 User s Manual C 1 ...

Страница 131: ...dia Graphics Controller when display device is set to an external monitor CRT Display Resolution Colour Depth Refresh Rate Hz 800x600 16 32 60 70 72 75 85 60 70 72 75 85 1024x768 16 32 60 70 72 75 85 60 70 72 75 85 1280x1024 16 32 60 70 72 75 85 60 70 72 75 85 1440x1050 16 32 60 70 72 75 85 60 70 72 75 85 1600x1200 16 32 60 70 72 75 85 60 70 72 75 85 1920x1440 16bpp 32bpp 60 70 72 75 60 2048x1536 ...

Страница 132: ...eries modems memory expansion kits and other TOSHIBA branded options as well as third party expansion boards are NOT covered by this warranty For information concerning warranties for these products please consult your dealer If you would like to use the international warranty please register for this warranty at the following Internet website http www toshiba europe com computers warranty Once yo...

Страница 133: ...470 3500 Fax 1 905 470 3487 http www toshiba ca Czech Republic CHG Service s r o Videnska 102 619 00 Brno Tel 420 5 4742 6581 Fax 420 5 4742 6590 http www chgservice cz Denmark Scribona TOSHIBA Digital Media Hovedvejen 9 DK 2600 Glostrup Tel 45 3823 7600 Fax 45 3823 7601 www toshiba dm com Egypt El Araby Co for Trading and Manufactoring P O Box 1224 Off Beirut St 10 Mohammed Sabry Abolaalm Street ...

Страница 134: ...ic Medical Supplies Co Jabal Amman 1st Circle Al Hayyek Street Opposite to Housing Bank 11118 Amman Tel 962 6 4624907 Fax 962 6 462858 Kuwait Arabian Business Machines Co Salhiya Sulaiman AL Laheeb Building 3 P O Box 29961 13160 Safat Tel 965 242 9154 244 5373 5369 Fax 965 241 4399 www abm kuwait com Latvia Servicenet LV Bullu Str 9 LV1055 Riga Tel 371 7052079 Tel 371 7460399 Fax 371 7460299 http ...

Страница 135: ... 441 2555 Fax 974 444 5413 Qatar Jarir Bookstore Qatar Al Maha Center Ramada Crossing Salwa Road P O Box 24824 Doha Tel 974 444 0212 Fax 974 444 04 32 www jarirbookstore com Romania Scop Computers SRL 162 Barbu Vacarescu St Sector 2 71424 Bucharest Tel 40 1 231 4602 Fax 40 1 231 4606 http www scop ro Russia AC SERSO Sovetskoi Armii st 5 127018 Moscow Tel 7 095 284 5577 Tel 7 095 105 8161 Fax 7 095...

Страница 136: ...eset Bey Sok No 7 USKUDAR ISTANBUL Tel 90 216 422 40 50 Fax 90 216 422 55 20 http www toshibatr com Ukraine DKT SERSO Lesya Ukrainka blv 26 01133 Kiev Tel 380 44 573 9627 Fax 380 44 254 4646 http www dkt cepco com ua United Arab Emirates Al Futtaim Electronics P O Box 5866 Bin Ham Building Mezzanine Floor Adjacent to BurJuman Centre Trade Centre Road Dubai Tel 971 4 351 5004 Fax 971 4 351 4254 htt...

Страница 137: ...ed on 30 05 2003 13 57 ENGLISH using Euro_M dot Printed on 30 05 2003 as T202014 EN TOSHIBA addresses for the Internet World Wide Web TOSHIBA Europe http www toshiba europe com TOSHIBA Japan http www toshiba co jp TOSHIBA America http www toshiba com TOSHIBA Canada http www toshiba ca ...

Страница 138: ...ase also keep the receipt of the computer you purchased Should your computer be stolen however we ll help you try to find it Before contacting TOSHIBA please prepare the following information which is necessary to uniquely identify your computer In which country was your computer stolen What type of machine do you have What was the model number PA number What was the serial number 8 digits When wa...

Страница 139: ...IBA Theft Registration Send to TOSHIBA Europe GmbH Technical Service and Support Leibnizstr 2 93055 Regensburg Germany Fax number 49 0 941 7807 925 Country stolen Machine type e g Satellite P20 Model number e g PSA10 YXT Serial number e g 70123456E Date stolen Warranty seal e g 9813 123456 049 Owner s details Name Company Street Postal Code City Country Phone Fax ...

Страница 140: ... Internet 1 13 3 8 TOSHIBA Console 1 13 3 8 TV Out 1 13 C CD inserting 3 10 Mode 5 6 playing 3 10 5 5 removing 3 10 CD Digital Mode Button 1 1 1 2 CD ROM drive problems 7 9 Character keys 3 3 Communications setting up 3 17 computer caring 3 20 lock 3 16 registering 2 13 turning off 3 20 turning on 2 9 Computing Tips 3 2 Covers Bluetooth Modem Module 1 9 Memory Module 1 9 Wireless LAN Card Module 1...

Страница 141: ...phone connecting 6 7 Jack 1 5 Mode CD 5 6 Digital 5 7 modem problems 7 13 Modem Jack 1 6 Module Lock 1 9 Release Latches 1 9 Module Bay LED 1 4 Mouse connecting 2 8 USB 6 3 Multiple displays 5 1 O Optical drives 3 10 using 3 9 Overlay keys 3 4 P Parallel port 1 8 PC Card hot swapping 3 13 inserting 3 12 problems 7 10 removing 3 13 using 3 11 PC Card Slots 1 6 Peripherals 6 1 Playing compact discs ...

Страница 142: ...serting 3 14 LED 1 4 removing 3 15 Slot 1 6 using 3 14 Security Lock Slot 1 5 Setting Up Communications 3 17 Setting Up Your Computer 2 5 sound system problems 7 9 Starting A Program 3 5 StickyKeys 2 13 3 8 System status indicators 1 3 T Television connecting 6 5 TOSHIBA Console button 1 13 3 8 TOSHIBA s Online Resources 3 21 Touch pad 1 12 Control Buttons 1 12 using 2 10 TV Out button 1 13 port 1...

Отзывы: