1
2
3
4
5
6
7
8
9
10
11
12
5-9
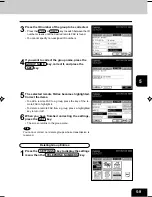
3
Press the ID number of the group to be corrected.
• Press the PRE or NEXT key to switch between the ID
number screens until the desired remote FAX is found.
• You cannot specify non-assigned ID numbers.
4
If you want to correct the group name, press the
GROUP NAME key, correct it, and press the
SET key.
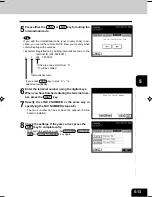
5
The selected remote FAXes becomes highlighted.
Correct the items.
• To add a remote FAX to a group, press the key of the re-
mote FAX to highlight it.
• To delete a remote FAX from a group, press a highlighted
key to turn it off.
6
When you have finished correcting the settings,
press the SET key.
• The screen returns to the group menu.
Tip
You cannot correct nor delete groups whose transmission is
reserved.
Deleting Group Entries
1
Press the SETTINGS key to display the settings
menu, then the TELEPHONE NUMBERS key.
#05-01_Entering and Setting.p65
10/2/00, 2:18 PM
9
Содержание e-STUDIO35
Страница 1: ......
Страница 17: ...1 2 3 4 5 6 7 8 9 10 11 12 1 8 DESCRIPTION OF THE DIGITAL COPIER ...
Страница 47: ...1 2 3 4 5 6 7 8 9 10 11 12 2 30 SENDING A FAX BASIC ...
Страница 73: ...1 2 3 4 5 6 7 8 9 10 11 12 4 8 RECEIVING A FAX ...
Страница 117: ...1 2 3 4 5 6 7 8 9 10 11 12 5 44 ENTERING AND SETTING ITEMS ...
Страница 122: ...1 2 3 4 5 6 7 8 9 10 11 12 7 1 7 SPECIFICATIONS Using the telephone 7 2 Main specifications 7 3 ...


