1
2
3
4
5
6
7
8
9
10
11
12
3-11
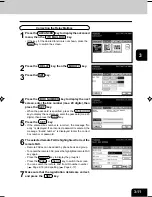
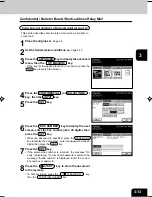
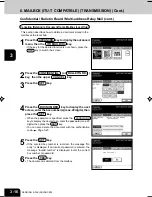
Correcting the Relay Mailbox
1
Press the ADVANCED key to display the advanced
menu, then the ITU MAILBOX key.
• If the key for the desired function is not shown, press the
Next key to switch the screen.
2
Press the RELAY key, then the MODIFY key.
3
Press the SET key.
4
Press the BOX NUMBER key to display the next
screen, enter the box number (max. 20 digits), then
press the SET key.
• When the password is specified, press the PASSWORD
key to display the next screen, enter the password (max. 20
digits), then press the SET key.
5
Press the SET key.
• If the entered box number is incorrect, the message “No
entry” is displayed. If an incorrect password is entered, the
message “Invalid number” is displayed. Enter the correct
box number or password.
6
The selected remote FAX is highlighted. Correct the
remote FAX.
• Remote FAXes can be added by phone book and group.
• To cancel the remote FAX, press the highlighted remote FAX
key again.
• Press the GROUP key to display the group list.
• Press the PRE or NEXT key to switch the screen.
• You can search the remote FAX from ID number number
(
Page 2-16) and spelling (
Page 2-17).
7
Make sure that the registration details are correct,
and press the SET key.
#03-01_Fax Advanced.p65
9/30/00, 1:40 PM
11
Содержание e-STUDIO35
Страница 1: ......
Страница 17: ...1 2 3 4 5 6 7 8 9 10 11 12 1 8 DESCRIPTION OF THE DIGITAL COPIER ...
Страница 47: ...1 2 3 4 5 6 7 8 9 10 11 12 2 30 SENDING A FAX BASIC ...
Страница 73: ...1 2 3 4 5 6 7 8 9 10 11 12 4 8 RECEIVING A FAX ...
Страница 117: ...1 2 3 4 5 6 7 8 9 10 11 12 5 44 ENTERING AND SETTING ITEMS ...
Страница 122: ...1 2 3 4 5 6 7 8 9 10 11 12 7 1 7 SPECIFICATIONS Using the telephone 7 2 Main specifications 7 3 ...


