88
3.SETTING OF BASIC COPY MODES
3
1. Paper Selection
Automatic Paper Selection (APS)
When you place standard size originals on the original glass or the Reversing Automatic Document
Feeder (optional), the size of the originals is automatically detected, which helps the equipment select
paper that is the same size as the originals.
•
The automatic paper selection may not work correctly depending on the type of the originals. In that
case, select the paper size manually.(
P.90 “Manual paper selection”)
•
For original sizes available for automatic paper selection, see
P.60 “Acceptable originals”.
1
Place paper in the drawer(s).
2
Place the original(s).
3
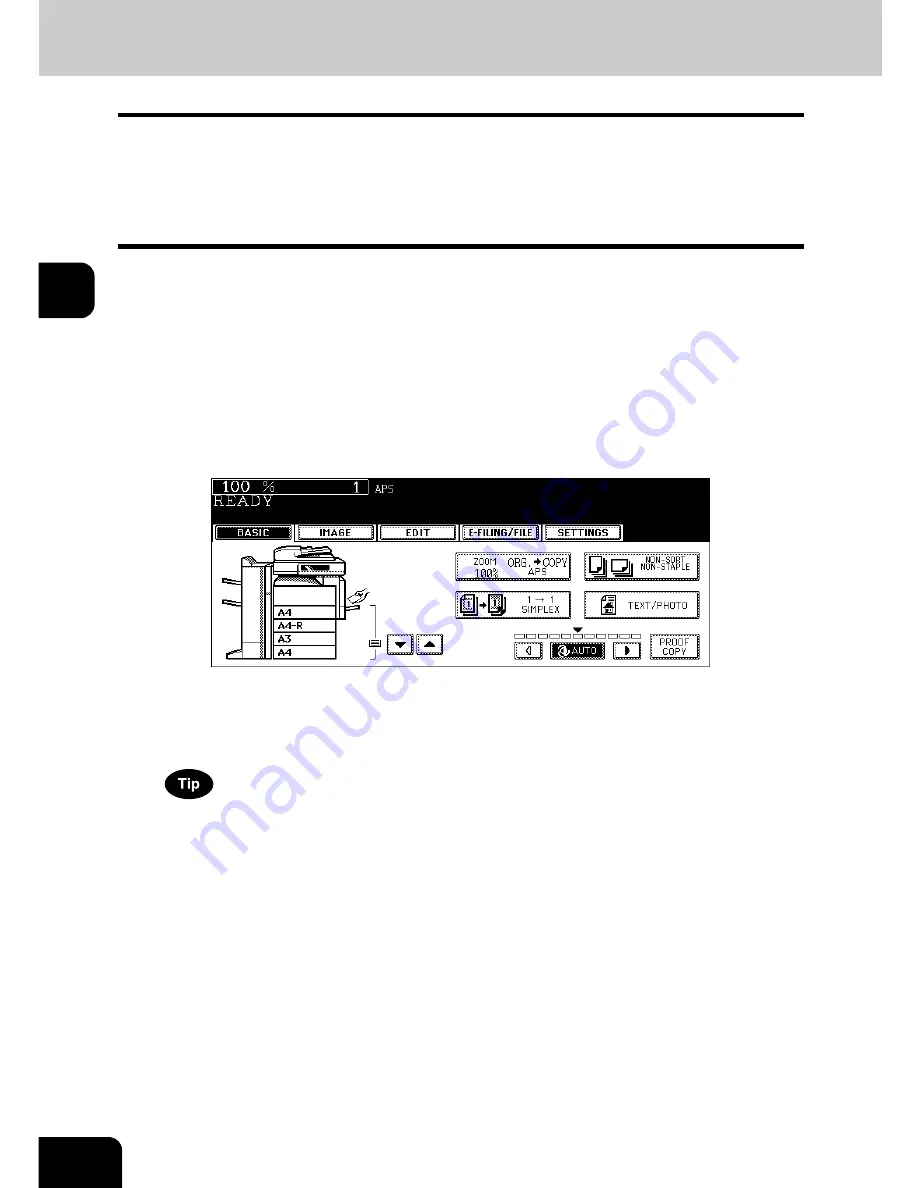
Confirm that automatic paper selection has been selected on the
basic menu. (“APS” is displayed at the top of the screen as shown
below.)
• Automatic paper selection is selected by default at the installation of the equipment.
• If “Change direction of original” or “CHANGE DRAWER TO CORRECT PAPER SIZE” appears, perform the
action accordingly.
• Set other copy modes as required.
Even if the direction of the paper set in the selected drawer differs from that of the original, the equipment rotates
the data of the original by 90 degrees to make copies as long as their sizes are the same. (This works on A4
paper only.) For example, when an A4 original is set in a portrait direction and A4-R paper is placed in the drawer,
the data of A4 original will be rotated and copied correctly on A4-R paper.
Содержание e-STUDIO 352
Страница 1: ...MULTIFUNCTIONAL DIGITAL SYSTEMS Operator s Manual for Basic Function ...
Страница 2: ......
Страница 6: ...4 CONTENTS Cont ...
Страница 10: ...8 Toshiba Quality is Second to None Cont For e STUDIO353 453 ...
Страница 24: ...22 Environmental Information Cont ...
Страница 88: ...86 2 HOW TO MAKE COPIES 4 Proof Copy Cont 2 ...
Страница 103: ...101 3 Name of each Inner Finisher optional MJ 5004 MJ 5005 1 2 1 ...
Страница 105: ...103 3 4 Press the SORT or GROUP button Set other copy modes as required 5 Press the START button ...
Страница 127: ...125 4 4 IMAGE ADJUSTMENT 1 Background Adjustment 126 2 Sharpness 127 ...
Страница 130: ...128 4 IMAGE ADJUSTMENT 2 Sharpness Cont 4 ...
Страница 135: ...133 5 6 Press the ENTER button Select other copy modes as required 7 Press the START button ...
Страница 137: ...135 5 4 Press the ENTER button Set Book type original 2 sided copy P 118 in duplex copying as well ...
Страница 182: ...180 6 e FILING 3 Changing Data of User Boxes Cont 6 7 Press the ENTER button The box settings are updated ...
Страница 200: ...198 6 e FILING 8 Appendix Cont 6 ...
Страница 270: ...268 8 JOB STATUS 6 Error Code Cont 8 ...
Страница 335: ...333 11 11 MAINTENANCE 1 Daily Inspection 334 2 Simple Troubleshooting 336 ...
Страница 342: ...340 11 MAINTENANCE 2 Simple Troubleshooting Cont 11 ...
Страница 358: ...356 12 SPECIFICATIONS OPTIONS 4 Copying Function Combination Matrix Cont 12 ...
Страница 362: ...360 INDEX Cont Z Zoom buttons 97 ...
Страница 363: ...DP 3540 4540 OME050098E0 ...


