112
3.SETTING OF BASIC COPY MODES
3.Selecting Finishing Modes (Cont.)
3
2
Press the [Stapling position] button to switch the stapling position.
Stapling positions are the front and the other end.
The stapling position lamp corresponding to the selected stapling position lights in green.
3
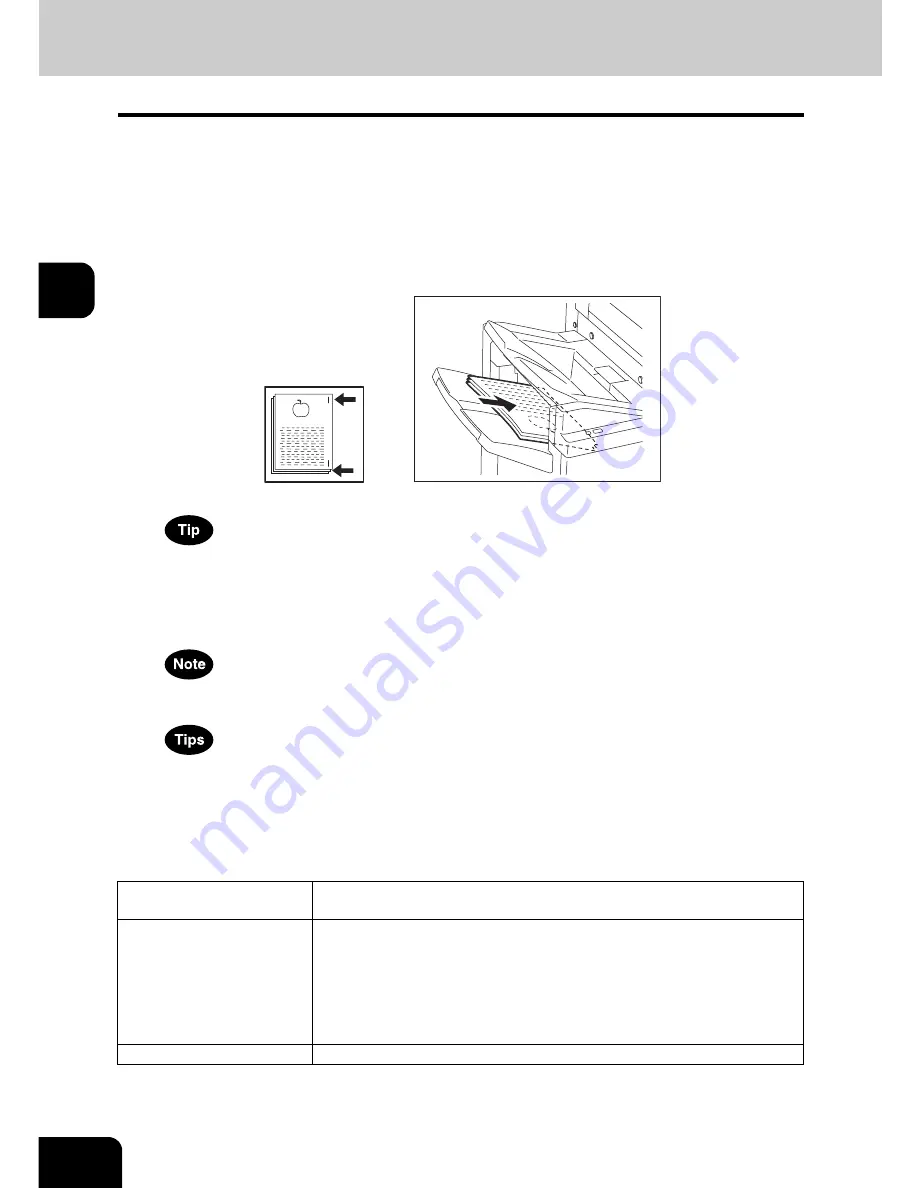
Place paper in the lower tray of the finisher.
Jog the paper well and place it with its face down.
Place the paper in front to have it stapled in the front, and in the other end to have it stapled in the
other end.
Check that the manual-stapling lamp lights in green. If not, place the paper again.
4
Release the paper and press the [Manual-stapling] button.
The stapling position lamp blinks when the stapling is completed. Remove the paper.
Be sure to release the paper before the manual stapling.
• Operation can be continued while the manual-stapling lamp lights. If no operation is performed for approx. 15
min., the manual stapling operation is stopped.
• If you want to stop the manual stapling operation during setting, remove paper and press the [Manual-stapling]
button. The shutter in the paper exit area is closed and the operation of the manual stapling is finished.
Specification
Acceptable paper size
LD, LG, LT, LT-R, COMP, 13 LG, 8.5” SQ, 8K, 16K, A3, A4, A4-R, B4,
FOLIO
Maximum number of sheets
for stapling
50 sheets (LT, 8.5” SQ, 16K, A4: 64 - 80 g/m
2
)
30 sheets (LD, LG, LT-R, COMP, 13 LG, 8K, A3, A4-R, B4, FOLIO: 64 - 80
g/m
2
)
30 sheets (LT, 8.5” SQ, 16K, A4: 81 - 105 g/m
2
)
15 sheets (LD, LG, LT-R, COMP, 13 LG, 8K, A3, A4-R, B4, FOLIO: 81 -
105 g/m
2
)
Stapling position
Front, Rear
Содержание e-STUDIO 352
Страница 1: ...MULTIFUNCTIONAL DIGITAL SYSTEMS Operator s Manual for Basic Function ...
Страница 2: ......
Страница 6: ...4 CONTENTS Cont ...
Страница 10: ...8 Toshiba Quality is Second to None Cont For e STUDIO353 453 ...
Страница 24: ...22 Environmental Information Cont ...
Страница 88: ...86 2 HOW TO MAKE COPIES 4 Proof Copy Cont 2 ...
Страница 103: ...101 3 Name of each Inner Finisher optional MJ 5004 MJ 5005 1 2 1 ...
Страница 105: ...103 3 4 Press the SORT or GROUP button Set other copy modes as required 5 Press the START button ...
Страница 127: ...125 4 4 IMAGE ADJUSTMENT 1 Background Adjustment 126 2 Sharpness 127 ...
Страница 130: ...128 4 IMAGE ADJUSTMENT 2 Sharpness Cont 4 ...
Страница 135: ...133 5 6 Press the ENTER button Select other copy modes as required 7 Press the START button ...
Страница 137: ...135 5 4 Press the ENTER button Set Book type original 2 sided copy P 118 in duplex copying as well ...
Страница 182: ...180 6 e FILING 3 Changing Data of User Boxes Cont 6 7 Press the ENTER button The box settings are updated ...
Страница 200: ...198 6 e FILING 8 Appendix Cont 6 ...
Страница 270: ...268 8 JOB STATUS 6 Error Code Cont 8 ...
Страница 335: ...333 11 11 MAINTENANCE 1 Daily Inspection 334 2 Simple Troubleshooting 336 ...
Страница 342: ...340 11 MAINTENANCE 2 Simple Troubleshooting Cont 11 ...
Страница 358: ...356 12 SPECIFICATIONS OPTIONS 4 Copying Function Combination Matrix Cont 12 ...
Страница 362: ...360 INDEX Cont Z Zoom buttons 97 ...
Страница 363: ...DP 3540 4540 OME050098E0 ...


