20
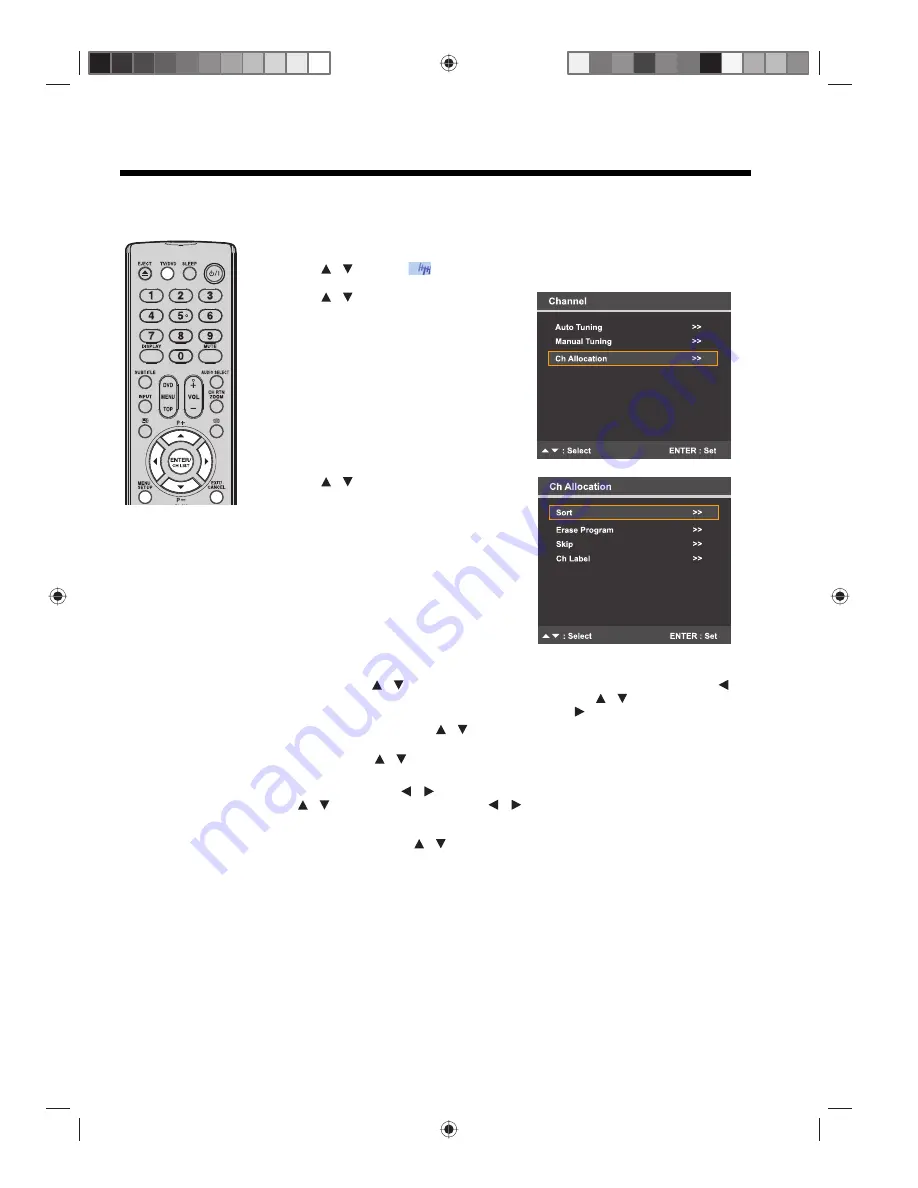
Channel allocation
The automatic station presetting stores channels in the order that they have been detected. Use the “Ch Allocation”
menu to change this channel sequence. The “Ch Allocation” have other options that lets you skip (hide) or erase
channels. You can also change the channel label for easier identification.
1
Press
TV/DVD
to switch to TV mode, then press
MENU
.
2
Press
to select
“Channel”, then press
ENTER
.
3
Press
to select “Ch Allocation”,
then press
ENTER
.
4
Press
to select a channel
allocation option, then press
ENTER
.
There are several ways to customize your channel allocation settings.
•
Sort
– Press
to select the channel that you want to move, then press
to
move the channel label to the left side of the list. Press
to select the position
that you want to move the channel to, then press
to confirm the move.
•
Erase Program
– Press
to select the channel that you want to erase, then
press
ENTER
.
•
Skip
– Press
to select the channel that you want to skip, then press
ENTER
. The (
*
) mark appears next to the skipped channel.
•
Ch Label
– Press
to select channel that you want to rename, then press
to select “Ch Label”. Press
repeatedly until the character you want
appears in the first space. When the character you want appears, press
ENTER
.
Repeat this step to enter the rest of the characters. If you want to remove the
channel label, press
to select “Label Clear”, then press
ENTER
.
5
After configuring the channel allocation options, press
EXIT
to return to the normal
screen.
Note:
When configuring
the channel allocation
options, it is
recommended to start
with CH 1 then continue
with the other channels
afterwards.
/
/
/
/
/
/
/
/
/
/
/


