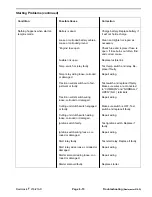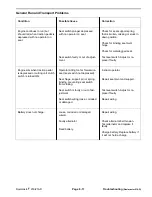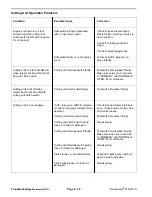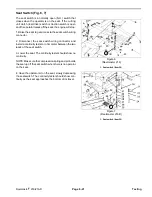
Gauges and Indicator Lights
Oil Pressure Light
(Reelmaster 216-D only)
Oil pressure lamp should come on when the ignition key
switch is in the RUN position with the engine not running
or if the oil pressure switch closes during operation - oil
pressure below 7 psi (0.5 kg/cm
2
).
Test the lamp by disconnecting the wire from oil pres
sure switch and grounding it against the engine. The
light should come on when the wire is grounded with the
ignition switch in the ON position.
Amp Light
(Reelmaster 216-D only)
The amp light should come on when the ignition key
switch is in the RUN position with the engine not running
or if the charging circuit is not operating properly during
operation.
Test the lamp by disconnecting the wires and applying
12 V.D.C. between the lamp wiring terminals.
Glow Light
(Reelmaster 216-D only)
The glow light should come on for 5 to 12 seconds after
the ignition key switch is turned ON.
Test the lamp by disconnecting the wires and applying
12 V.D.C. between the lamp wiring terminals.
Temperature Light
(Reelmaster 216-D only)
The temperature light should come on only if the high
temperature shut-down switch and relay has stopped
the engine - coolant temperature above 221
o
F (105
o
C).
Test the lamp and relay by disconnecting the wire from
high temperature shut-down switch and grounding it
against the engine. The light should come on when the
wire is grounded with the ignition switch in the ON
position.
Reels Turning light
The reels turning light should come on when the cutting
unit drive switch is engaged and the cutting units are
lowered.
Test the lamp by disconnecting the wires and applying
12 V.D.C. between the lamp wiring terminals.
Hourmeter
Test the hourmeter by connecting a 12 volt battery so
the positive (+) battery terminal is connected to the
positive terminal on the hourmeter. Connect the nega
tive (–) battery terminal to the negative (–) terminal on
the alternator. The hourmeter should operate as
12 V.D.C. is applied between the terminals.
Engine Coolant Temperature Gauge
(Reelmaster 216-D only)
To test a gauge, use a commercial gauge tester. If a
commercial gauge tester is not available, substitute a
new gauge or test the sending unit.
Reelmaster
®
216/216-D
Page 6 - 27
Testing
Содержание reelmaster 216
Страница 2: ...This page is blank ...
Страница 4: ...This page is blank ...
Страница 8: ...Safety Instructions Page 1 4 Reelmaster 216 216 D ...
Страница 12: ...Torque Specifications Page 2 4 Rev B Reelmaster 216 216 D ...
Страница 26: ...Adjustments Page 4 4 Reelmaster 216 216 D ...
Страница 40: ...Troubleshooting Page 5 14 Reelmaster 216 216 D ...
Страница 42: ...Troubleshooting Page 5 16 Reelmaster 216 216 D ...
Страница 72: ...Repairs Page 5 46 Reelmaster 216 216 D ...
Страница 74: ...Wiring Schematics Reelmaster 216 S N 99999 Below Wiring Schematics Page 6 2 Reelmaster 216 216 D ...
Страница 75: ...Reelmaster 216 S N 10001 19999 Reelmaster 216 216 D Page 6 3 Wiring Schematics ...
Страница 76: ...Reelmaster 216 S N 20001 Up Wiring Schematics Page 6 4 Reelmaster 216 216 D ...
Страница 77: ...Reelmaster 216 D Reelmaster 216 216 D Page 6 5 Wiring Schematics ...
Страница 114: ...Repairs Page 7 8 Reelmaster 216 216 D ...
Страница 124: ...Repairs Page 8 10 Reelmaster 216 216 D ...
Страница 143: ...This page is blank ...
Страница 144: ...Commercial Products The Toro Company ...


