


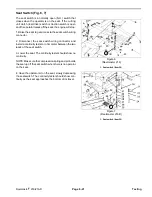


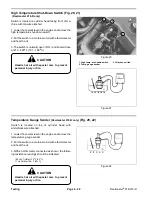
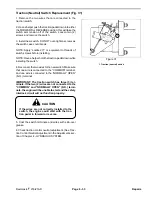


Traction (Neutral) Switch (Fig. 8)
The traction switch is normally open and closes when
traction pedal is in neutral.
IMPORTANT: The traction switch has three (3) ter
minals. Make sure the wires are connected to the
“COMMON” and “N.O.” terminals.
Test switch by disconnecting wires from switch termi
nals and connecting a continuity tester across COM-
MON and N.O. terminals. With engine off, slowly push
traction pedal in forward and reverse direction while
watching continuity tester. There should be indications
that traction switch is opening and closing. Allow traction
pedal to return to neutral. There should be continuity
across the terminals. (See Replacing Traction Switch in
Repairs section of this chapter for replacement and
adjustment procedures.)
NOTE: Apply “Loctite 271” or equivalent to threads of
switch screws before installing.
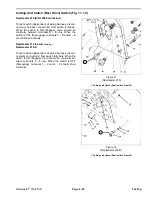
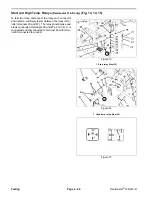
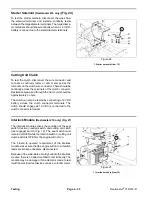
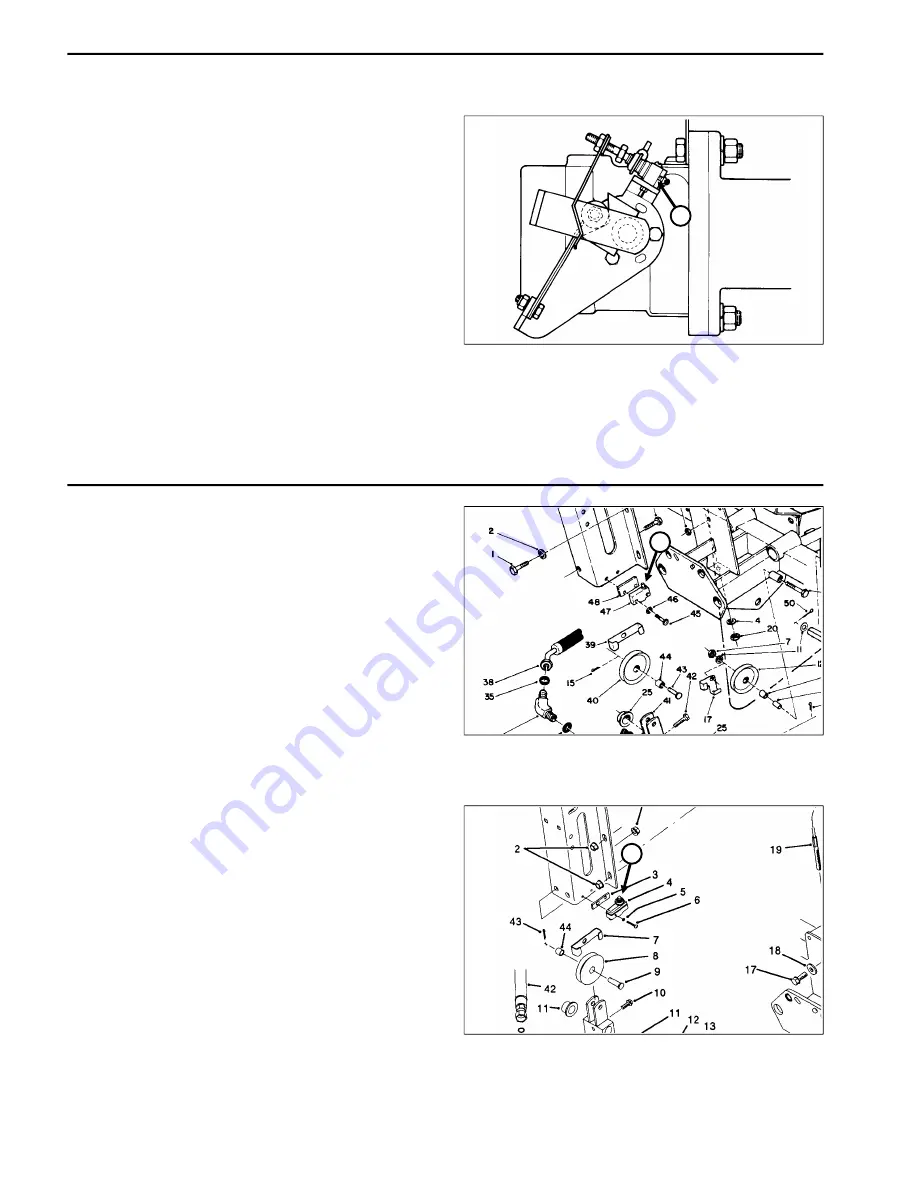
Cutting Unit Interlock Switch (Fig. 9, 10)
The cutting unit interlock switch is normally open and
closes with the lift cylinder is retracted (cutting units
lowered).
IMPORTANT: The traction switch has three (3) ter
minals. Make sure the wires are connected to the
“COMMON” and “N.O.” terminals.
Test the switch by disconnecting the wires from the
switch terminals and connecting a continuity tester
across the COMMON and N.O. terminals. With the
cutting units lowered and lift cylinder fully retracted,
there should be continuity across the terminals. With the
cutting units raised and lift cylinder extended there
should be no continuity across the terminals. (See Re
placing the Cutting Unit Interlock Switch in the Repairs
section of this chapter for replacement procedures).
NOTE: Apply “Loctite 271” or equivalent to threads of
switch screws before installing.
1
Figure 8
1. Traction (neutral) switch
1
Figure 9
(Reelmaster 216)
1. Cutting unit interlock switch (Item 47)
1
Figure 10
(Reelmaster 216-D)
1. Cutting unit interlock switch (Item 4)
Testing
Page 6 - 22
Reelmaster
®
216/216-D
Содержание reelmaster 216
Страница 2: ...This page is blank ...
Страница 4: ...This page is blank ...
Страница 8: ...Safety Instructions Page 1 4 Reelmaster 216 216 D ...
Страница 12: ...Torque Specifications Page 2 4 Rev B Reelmaster 216 216 D ...
Страница 26: ...Adjustments Page 4 4 Reelmaster 216 216 D ...
Страница 40: ...Troubleshooting Page 5 14 Reelmaster 216 216 D ...
Страница 42: ...Troubleshooting Page 5 16 Reelmaster 216 216 D ...
Страница 72: ...Repairs Page 5 46 Reelmaster 216 216 D ...
Страница 74: ...Wiring Schematics Reelmaster 216 S N 99999 Below Wiring Schematics Page 6 2 Reelmaster 216 216 D ...
Страница 75: ...Reelmaster 216 S N 10001 19999 Reelmaster 216 216 D Page 6 3 Wiring Schematics ...
Страница 76: ...Reelmaster 216 S N 20001 Up Wiring Schematics Page 6 4 Reelmaster 216 216 D ...
Страница 77: ...Reelmaster 216 D Reelmaster 216 216 D Page 6 5 Wiring Schematics ...
Страница 114: ...Repairs Page 7 8 Reelmaster 216 216 D ...
Страница 124: ...Repairs Page 8 10 Reelmaster 216 216 D ...
Страница 143: ...This page is blank ...
Страница 144: ...Commercial Products The Toro Company ...


