background image

Содержание 138.37671

Страница 1: ...his product _1 ADMERTENCIA Para reducir el riesgo de tesiones el usuario debe leer y comprender el manual det operador antes de usar este producto Customer Help Line 1 888 266 7096 Tel_fonode atenci6n al consumidor 1 888 266 7096 Sears Brands Management Corporation Hoffman Estates IL 60179 USA Visit the Craftsman web page www craftsman com Visite et sitio web de Craftsman www craftsman com Save th...

Страница 2: ...tates IL 60179 GARANT A DE CUATRO AltOS CRAFTSMAN DURANTE CUATRO ANOS a partir de la fecha de adquisici6n esta herramienta electrica cuenta con garantfa frente a defectos de material o mano de obra Adjuntando la prueba de compra se reemplazara gratuitamente el producto defectuoso Para detalles sobre la cobertura de la garantfa para el reemplazo gratuito visite la pagina web www craftsman com warra...

Страница 3: ...earing sandals Walk behind never run while using reel mower Always make sure of your footing when using this reel mower Never intentionally strike or hit trees fences etc This can cause injuries or severely damage the reel mower mechanisms Make sure your reel mower is in a safe operating condition Do not attempt to operate this reel mower if damaged Contact customer service or have the reel mower ...

Страница 4: ...on activities contains chemicals known to the state of California to cause cancer birth defects or other reproductive harm Some examples of these chemicals are Lead from lead based paints Crystalline silica from bricks and cement and other masonry products and Arsenic and chromium from chemically treated lumber Your risk from these exposures varies depending on how often you do this type of work T...

Страница 5: ... must read and understand operator s manual before using this product Eye and Head Protection Always wear eye protection with side shields that are marked to comply with ANSI Z87 1 _ _I_ Ricochet Thrown objects can ricochet and result in personal injury or property damage Sharp Blade Danger Keep hands and feet away from blade _MAX _s Operating on a slope Do not mow a slope that has an angle of gre...

Страница 6: ...t Symbol Indicates a situation that may result in property damage PRODUCT SPECIFICATIONS Cutting path 18 45 cm Height adjustments 1 3 8 2 1 2 3 5 6 4 cm Number of blades 5 Helical blades Weight 28 Ibs 12 7 kg KNOW YOUR LAWN MOWER See Figure 1 The safe use of this product requires an understanding of the information on the product and in this operator s manual as well as a knowledge of the project ...

Страница 7: ...t The use of attachments or accessories not recommended can result in serious personal injury ASSEMBLING THE HANDLE See Figure 3 4 NOTE Do not completely tighten bolts until assembly is complete Insert the two center handle pieces 2 into the left and right side of the top handle 1 and secure with two carriage bolts 5 and knobs 6 provided Fig 3 Attach the top handle subassembly previously assembled...

Страница 8: ... NOTE Blades are factory adjusted Misalignment can occur often caused by blades being too loose or too tight This can cause an uneven cut or difficulty pushing the mower Each end of the cutting bar is adjusted separately To move the cutting bar closer to the blades turn the adjustment screw clockwise To move the cutting bar away from the blades turn the adjustment screw counterclockwise In order t...

Страница 9: ...e has light but firm contact across the full width of the cutting bar Turn the reel blades until the front edge of the cutting bar blade is polished _ CAUTION Do not overtighten the adjusting screws as this could damage the cutting bar Tighten both screws during final adjustment NOTE Clean any grinding compound or debris from the cutting bar blade reel blade pinions and pawls NOTE Use industrial o...

Страница 10: ..._ _ CRAFTSMAN 18in REEL MOWER MODEL NUMBER 138 37671 _ _ The model number will be found on a label attached to the motor housing 1 TO PURCHASE REPLACEMENT PARTS CALL 1 800 469 4663 i 10 English ...

Страница 11: ...N 12 Rear bracket 2 13 N 13 Adjustment handle L 1 14 N 14 Rear wheel 2 15 N 15 C clip 2 16 N 16 Wave spring 2 17 N 17 Washer 6 18 N 18 Bolt 2 19 N 19 Cutting bar assy 1 20 N 20 Blade adjustment nut 2 21 N 21 Blade adjustment spring 2 22 N 22 Spring washer 4 23 N 23 Blade adjustment bolt 2 24 N 24 Supporting plate L 1 25 N 25 Wheel cover 2 26 N 26 C clip 2 27 N 27 Washer 2 28 N 28 Wheel assy 2 29 N...

Страница 12: ...otor housing 1 TO PURCHASE REPLACEMENT PARTS CALL 1 800 469 4663 ITEM NO PART NO DESCRIPTION QTY 39 N 39 Cover assy 1 40 N 40 Supporting assy R 1 41 N 41 Wheel shaft 2 42 N 42 Bolt 2 43 N 43 Nut M8 2 44 N 44 Supporting plate R 1 45 N 45 Adjustment bracket 2 46 N 46 Adjustment handle R 1 47 N 47 Grass bag 1 12 English ...

Страница 13: ...ace referencia en el manual del operador Fig 1 B C F A H E G D A Upperhandle Agarraderasuperior B Middlehandle Agarraderacentral C Lowerhandle Agarraderainferior D Rear bag Bolsa trasera E Adjustmentlever Ajustede la altura F Front wheel Ruedafrontal G Rear wheel Ruedaposterior H Housing Carcasa I Bagsupport belt Bolsa con cintade sujeci6n ...

Страница 14: ...er handle pieces Piezascentralesde la agarradera C Lowerhandle Agarradera inferior D Foamgrip Asiderodeespuma E Carriage bolts Pernosde soporte F Knobs Perilla G Reet mower body Cuerpode la podadora de carrete H Rear bag Bolsatrasera Fig 3 Fig 4 ...

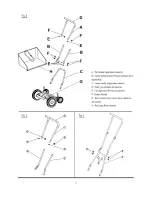
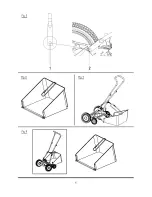
Страница 15: ...Fig 5 Fig 6 Fig 7 Fig 8 ...

Страница 16: ...Fig 9 Fig 10 A A Heightadjustmentlever Ajuste de la altura A A Adjustmentscrew Tornillode ajuste Fig 11 o o A Paper Papel B Cutting bar Barra de corte B ...

Страница 17: ...icies resbaladizas Nunca coloque las manos los dedos o los pies dentro del cilindro AOn cuando esta podadora no tiene un motor que la accione cuando las ruedas dan vueltas el cilindro gira y puede co tar Nunca siegue cuando el cesped este mojado ya que puede estar resbaloso No use la podadora de cilindro mientras usted tenga los pies descalzos o cuando este usando sandalias Mientras este usando la...

Страница 18: ...a hacia atras Nunca deje de supervisar una maquina en funcionamiento Use la maquina s61amente con luz de dia o una buena luz artificial _kADVERTENCIA PROPUESTA 65 Algo del polvo provocado por las lijas sierras trituradoras y taladros electricos y otras actividades de construcci6n Contiene quimicos reconocidos como causantes de cancer y defectos congenitos u otros dafios en el aparato reproductivo ...

Страница 19: ...l manual del operador antes de usar este producto O Protecci6n ocular Siempre use protecci6n ocular con protecci6n lateral con la marca de cumplimiento de la norma ANSI Z87 1 _ Rebote Cualquier objeto lanzado puede rebotar y producir lesiones personales o da_os fisicos Hoja Afilada Peligro Para evitar una lesion grave no toque la hoja que corta la cuerda Ax_5 uncionamiento en terrenos No corte la ...

Страница 20: ... evita causara la muerte o lesiones serias ESPEClFICACIONES DEL PRODUCTO Senda de corte 18 pulg 45 cm Ajustadores de altura 1 3 8 2 1 2 pulg 3 5 6 4 cm NQmero de cuchillas 5 helicoidales Peso 28 Ibs 12 7 kg FAMILIARiCESE CON SU PODADORA DE PASTO BOLSA TRASERA Vea la flgura 1 La bolsa trasera impide que los recortes de cesped se Para usar este producto con la debida seguridad se dispersen pot el pa...

Страница 21: ...sorios no recomendandos podda causar lesiones serias ENSAMBLE DE LA MANIJA Consulte las flguras 3 4 NOTA No apriete completamente los pernos hasta terminar de ensamblar Introduzca las dos piezas del mango centrales 2 a la izquierda y a la derecha del mango superior 1 y aseglL_relas con los dos pernos con cabeza de hongo 5 y las perillas 6 suministrados Fig 3 Acople el subconjunto del mango superio...

Страница 22: ...oducir desalineamiento Esto puede originar un corte desparejo o que la podadora sea dificil de empujar Cada extremo de la barra de corte puede ser ajustado porseparado La hoja en la barra de corte ubicada debajo del carrete se puede hacer oscilar Las dos tuercas de ajuste en la parte superior alejan la barra de corte si se les da vuelta en sentido anti horatio o la aproximan se les da vuelta en se...

Страница 23: ... forma tal que la cuchilla haga un contacto leve pero firme a todo Io ancho de a barra de corte De vueltas hacia atras a as cuchilias de cilindro hasta que el eje delantero de la cuchilla de la barra cortadora este pulido _k PRI CAUCi _ N No apriete demasiado los tornilios de ajuste ya que eso podria da_ar la barra cortadora Apriete firmemente ambos tornilios durante el ajuste final NOTA Limpie cu...

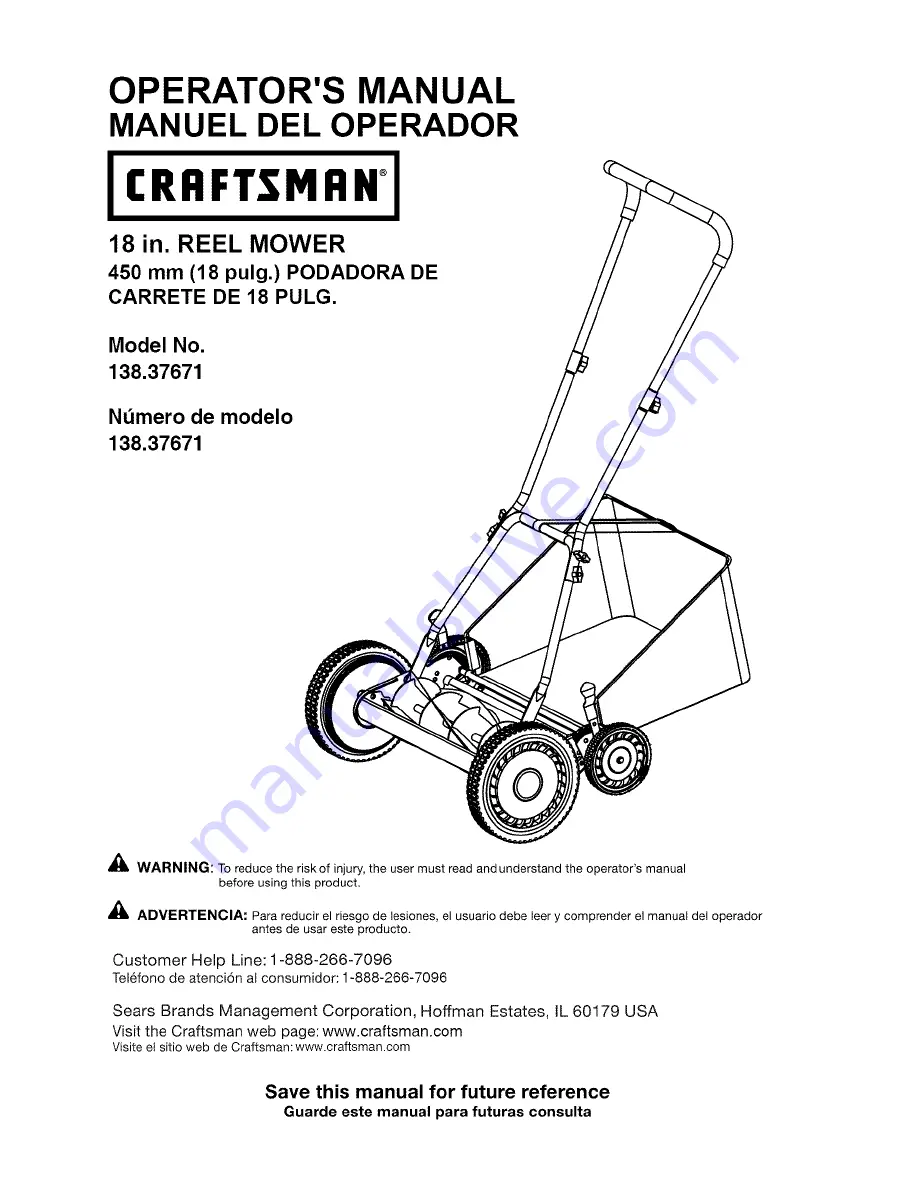
Страница 24: ...CRAFTSMAN ...

Отзывы: