29
Maintaining the Road Wheels
Check and grease the road wheels every 250 operating
hours or yearly.
1.
Remove the tracks; refer to Replacing the Tracks,
page 28.
2.
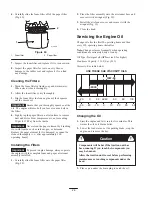
Remove the 4 bolts securing each lower track guide
which contains the road wheels, and remove them
(Fig. 47).
1
3
2
3
m–7575
Figure 47
1. Road wheels
2. Lower track guide
3. Track guide bolts (only
two shown)
3.
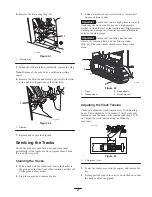
Remove the snap ring and cap from a road wheel
(Fig 48).
m–6776
1
2
3
5
4
6
Figure 48
1. Road wheel
2. Gasket
3. Bolt
4. Road wheel cap
5. Snap ring
6. Add grease under the cap
4.
Check the grease under the cap and around the gasket
(Fig 48). If it is dirty, gritty, or depleted, clean out all
of the grease, replace the gasket, and add new grease.
5.
Ensure that the road wheel turns smoothly on the
bearing. If it is frozen, replace the road wheel as
described in the
Road Wheel Kit Installation
Instructions
or contact your Authorized Service Dealer
for repair.
6.
Place the greased road wheel cap over the bolt head
(Fig 48).
7.
Secure the road wheel cap with the snap ring (Fig 48).
8.
Repeat steps 3 through 7 for the other road wheels.
9.
Install each track guide to the traction unit frame using
the fasteners you removed previously. Torque the bolts
to 67 to 83 ft-lb (91 to 112 N
⋅
m).
10.
Install the tracks; refer to Replacing the Tracks,
page 28.
Servicing the Spark Plugs
Check the spark plug after every 100 operating hours.
Ensure that the air gap between the center and side
electrodes is correct before installing the spark plug. Use a
spark plug wrench for removing and installing the spark
plug and a gapping tool/feeler gauge to check and adjust
the air gap.
Install a new spark plug every 300 operating hours.
Type: NGK BPR6ES, Denso W20EPR–U, or equivalent.
Air Gap: 0.030 inch (0.76 mm)
Removing the Spark Plug
1.
Lower the loader arm, stop the engine, and remove the
key.
2.
Open the hood; refer to Opening the Hood, page 23.
3.
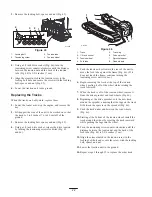
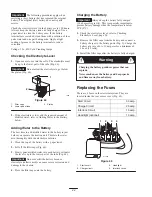
Pull the wire off of the spark plug (Fig. 49).
m–7477
1
2
Figure 49
1. Spark plug wire (removed)
2. Spark plug
4.
Clean around the spark plug.
5.
Remove the spark plug and metal washer.
Содержание 22308
Страница 6: ...6 Slope Chart Note This page may be copied for personal use only M 4402...
Страница 37: ...37 Schematics Electrical Schematic...
Страница 38: ...38 Hydraulic Schematic...


