


Control
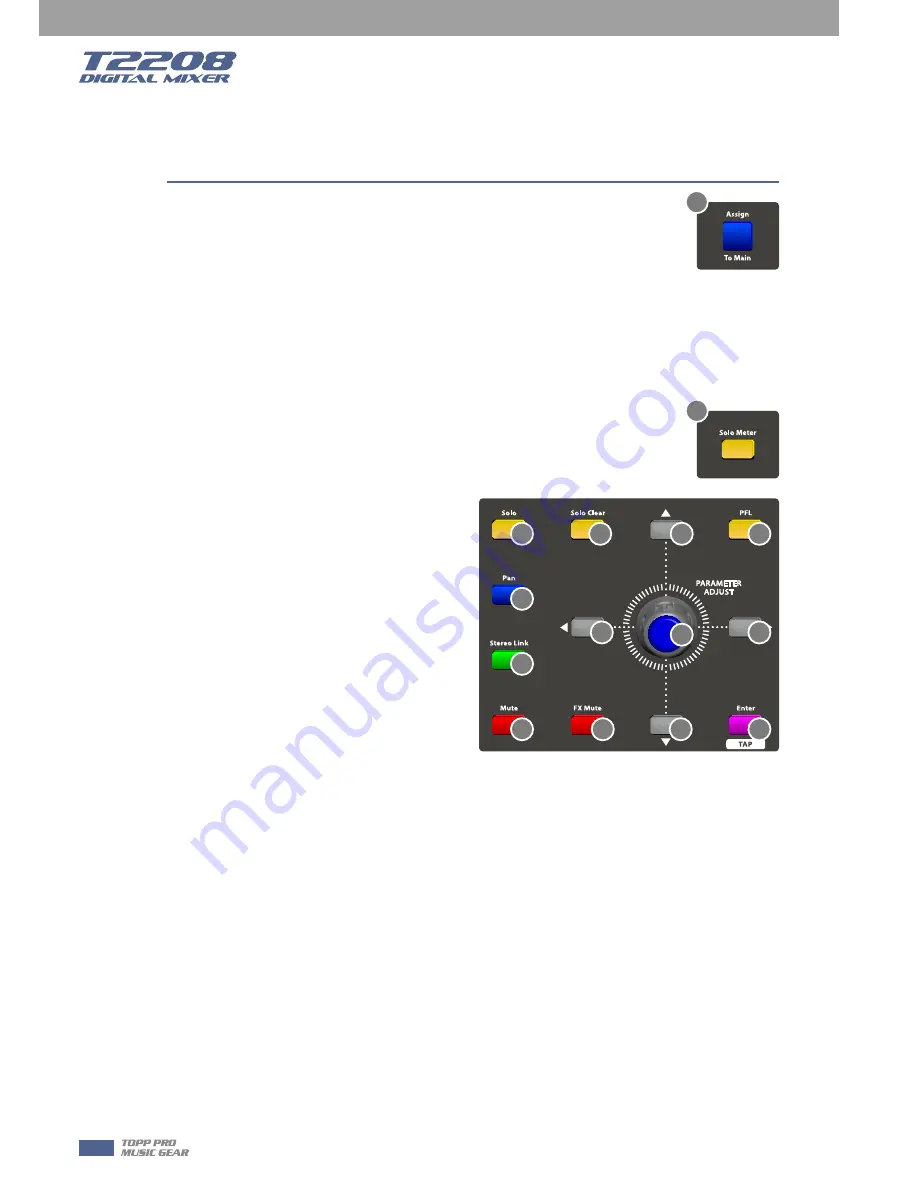
16. Assign to Main button
Press the input channel button, then press this button, can quickly assign the
input channel to main.
17. Solo button
Press this button will send its channels or buses to the control room outputs. It will illuminate as
has been pressed and enabled.
18. Solo clear button
Press this button to clear the solo function for all of the soloed buses or channels.
19. Solo Meter button
When the button is off, meters above it indicate input level of main, while
illuminated indicate input level of Solo.
20. PFL button
The default setting for the Solo bus is
After-Fader Listen (AFL); by pressing PFL,
Pre-Fader Listening is enabled. In either mode,
press Solo on any channel or bus to route that
channel to the Solo bus and has no effect on
the main.
21. Pan button
Press this button to select the Pan function,
then rotate Parameter Adjust encoder to
control signal level from left to right for the
selected input or output bus. If you have
adjusted a channel pan, please just touch 2
times on the screen and make it back to the
centre position.
The LCD display shows the setting in real time. If two channels have been linked as stereo pair,
the LCD display will automatically change to stereo pan.
22. Link button
Input channels, aux buses, can be linked as a stereo pair. It will illuminate if the stereo link button
has been pressed and enabled. The stereo pairs are predefined and cannot be changed. They are
as follows:
Channels 1 and 2 Channels 13 and 14
Channels 3 and 4 Channels 15 and 16
Channels 5 and 6 Aux 1 and Aux 2
Channels 7 and 8 Aux 3 and Aux 4
Channels 9 and 10 Aux 5 and Aux 6
Channels 11 and 12 Aux 7 and Aux 8
A stereo link can be enabled when either channel in the pair is selected by pressing the Link
button. When the Link button is illuminated which indicates the Stereo Link function enabled, all
DSP setting, solo status and main assignments are passed to the other channel in the pair.
16
19
17
18
21
22
23
24
32
32
32
32
34
20
33
14
5
Содержание T2208
Страница 1: ...16 mic preamplifiers with dedicated trim control T2208 Volume...
Страница 2: ...2...
Страница 44: ...Hookup Diagram 44 7...
Страница 45: ...Technical information 45 8...
Страница 46: ...Block Diagram 46 9...
Страница 47: ...Guarantee 47 10...
Страница 48: ...Notes 11 48...
Страница 49: ...Notes 49 11...
Страница 50: ...Notes 11 50...
Страница 51: ...Notes 51 11...
Страница 52: ......