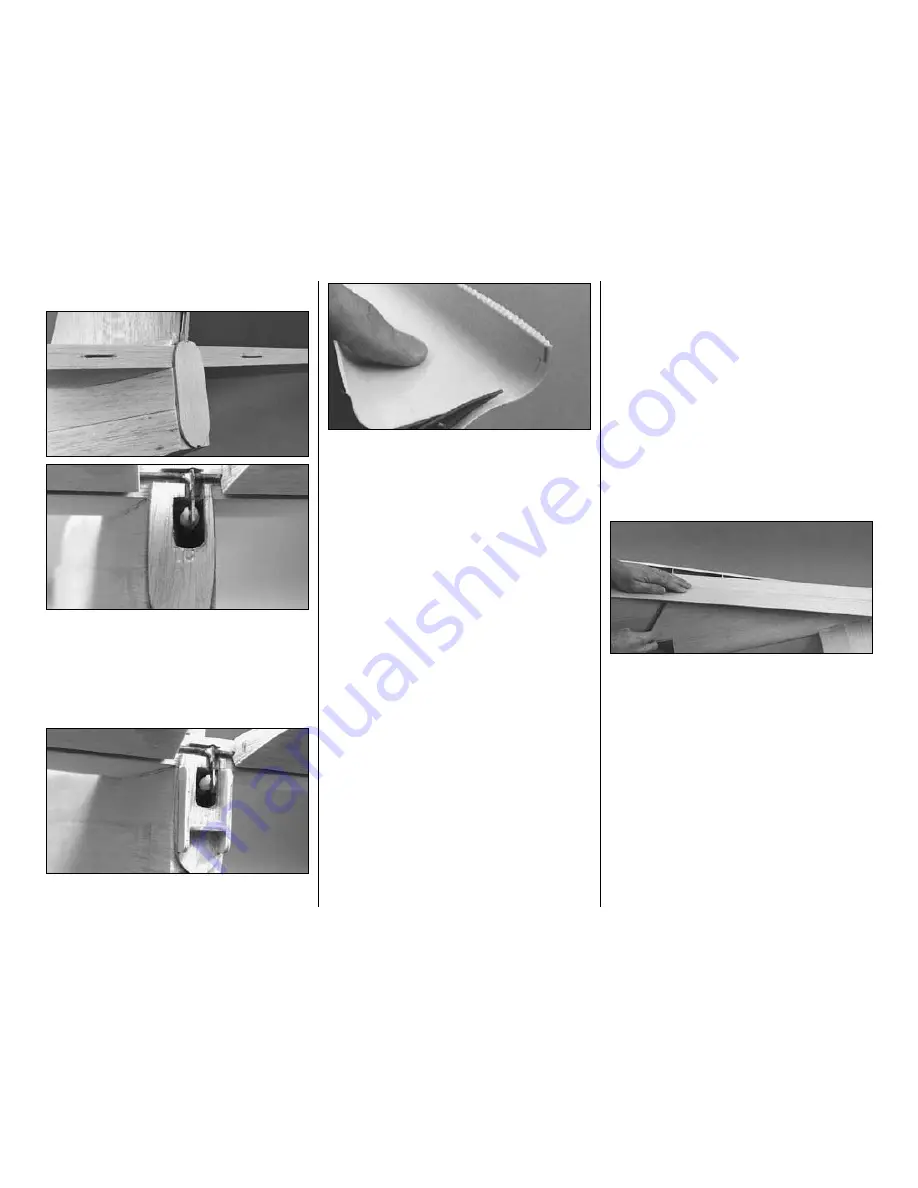
FIT THE TAIL CONE
❏
1. Fit the die-cut 1/8” balsa
tail cone former
(F11TC)
on the aft end of the fuselage. Shape
F11TC as needed to fit the end of the fuselage,
allowing for the thickness of the ABS tail cone.
Remove material as needed to clear the torque rods
and pushrods. Glue F11TC into place.
There must
be no possibility of binding here.
❏
2. Glue the die-cut 1/8” [3.2mm] plywood
tail cone
mounts
to the tail cone former.
❏
3. Cut both formed ABS
tail cone halves
along
the cutlines. The cutlines can be most easily seen
from the inside. We highly recommend a pair of
Hobbico curved tip Canopy Scissors (HCAR0667)
because you can cut straight lines or small tight
curves easily and accurately. You could also use a
small pair of regular scissors or
score
the plastic
along the cutlines with a hobby knife and flex the
plastic until the excess breaks free.
❏
4. True the edges of both tail cone halves with coarse
sandpaper and a bar sander. Thoroughly rough up the
mating surfaces so glue will stick. Fit the tail cone
halves together and check the fit on the tail cone former.
Make any adjustments needed for a good fit. Carefully
glue the tail cone halves together with thin CA. Use just
a few drops at a time.
Note:
Do not use CA accelerator
on any of the ABS plastic. Accelerator may cause the
plastic to develop cracks over time and prevent some
types of paint from sticking.
❏
5. Trim the clear plastic
tail lens
to fit on the end
of the tail cone. Do not glue the tail lens in place until
after you paint the tail cone.
❏
6. Cut round notches in the sides of the tail cone
to clear the elevator joiner wire. Fit the tail cone on
the aft end of the fuselage and drill two 1/16” holes
on each side. Remove the tail cone and enlarge the
holes in the tail cone only with a 3/32” drill bit. Harden
the holes in the tail cone mount with some thin CA.
Fasten the tail cone to the mount with four #2 x 3/8”
[9.5mm] screws.
Make sure the screws do not
interfere with the elevator torque rod
.
SHEET THE FUSELAGE BOTTOM
❏
1. If you are going to hook up working lights, now
is a convenient time to route the wire for the light in
the tail. Route the wire through the formers. Glue the
wire to the formers with rubber cement or a drop of
CA so they don’t rattle around. Allow enough wire to
extend past former F11 so it will reach the back of
the tail cone.
❏
2. Cut a 3/32” x 3” x 30” [2.4 x 76.2 x 762mm]
balsa sheet to a length of 28” [711mm]. True both
edges of the sheet with a hobby knife and a
straightedge. Pin the sheet to the bottom of the
fuselage in the center so the end butts against the
front edge of the tail cone.
❏
3. True both edges of another 3/16” x 3” x 30” [2.4
x 76.2 x 762mm] balsa sheet. Position the sheet on
the bottom of the fuselage next to the center sheet.
Use a ballpoint pen to mark the side of the fuselage
onto the sheet. Cut the sheet along the line you drew.
Do the same with the remainder of the sheet on the
other side of the fuselage.
❏
4. Glue the three bottom sheets together. After the
glue dries, sand the fuselage bottom sheet so it is flat
and the edges are even. Sand the bottom at the formers
and stringers so that they are even and flat. Glue the
fuselage bottom sheet to the bottom of the fuselage.
❏
5. Shape the bottom corners of the fuselage with
a long bar sander as shown in the cross sections on
the plan so they blend with the tail cone at the rear.
-44-
Содержание T-34B MENTOR
Страница 7: ...7 DIE CUT PATTERNS...


