❏
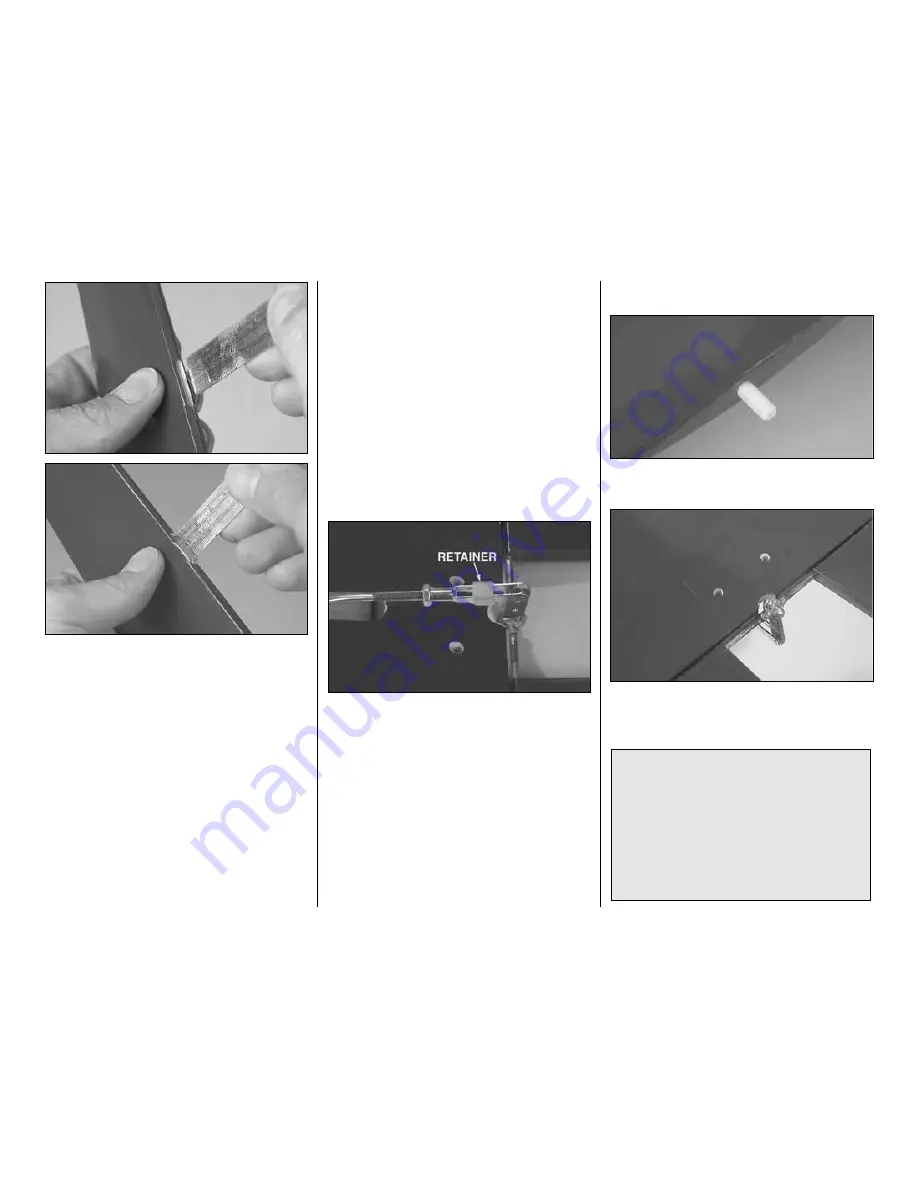
3. Mix a small batch of 30-minute epoxy. Use a
thin, metal ruler or something similar to force epoxy
into the hinge slots in one of the flaps and in the
hinge slots in the matching half of the wing. Proceed
immediately to the next step.
❏
4. One at a time, lightly coat the top and bottom of
one half of four hinges with epoxy, then insert the
coated end of the hinges into the flap. Working
carefully not to get any epoxy into the hinge pins, use
small scraps of balsa or something similar to wipe off
excess epoxy as it is forced back out of the hinge
slots. Proceed immediately to the next step.
❏
5. Use a piece of wire or a toothpick to apply epoxy
in the hole and groove in the flap for the joiner wire.
Coat the matching half of the control horn with epoxy,
and then insert it into the flap. Coat the other side of
hinges protruding from the flap with epoxy, and then
join the flap to the wing with the joiner wire. Wipe
away excess epoxy as it squeezes out.
❏
6. Without using any glue, temporarily join the
other flap to the wing and the joiner wire. This will
align the joiner wire while the epoxy on the other side
is hardening. Do not disturb the wing until the epoxy
hardens.
❏
7. After the epoxy on the first flap has hardened,
glue the other flap to the wing the same way. Allow
the epoxy on both flaps to fully harden for at least a
few hours before moving them. After the epoxy has
hardened, “break” the flaps free by rapidly moving
them up and down several times. Use a hobby knife
to pick any bits of epoxy from the hinge pins.
❏
8. Adjust the clevis on the flap pushrod so the flaps
will be centered when the bellcrank is neutral. Slip a
silicone clevis retainer over the clevis, then connect
the clevis to the top hole in the control horn. Slip the
retainer over the clevis, and then tighten the 4-40 nut.
Finish the Wing
❏
1. Cut the covering from the hole in the front of the
wing and glue in the wing dowel.
❏
2. Cut the covering from the top and bottom of the
wing over the holes near the trailing edge for the
wing bolts.
Note: The Nobler includes bolts for mounting the
wing to the fuselage. However, the wing bolts are
intended for alignment and assembly only. Later,
the wing will be permanently glued to the
fuselage. If considering modifying your Nobler to
make the wing removable, keep in mind that
disengaging the elevator pushrod from the flap
control horn in order to remove the wing would
be cumbersome. Further, the Nobler has not
been flight tested with a removable wing.
- 9 -


