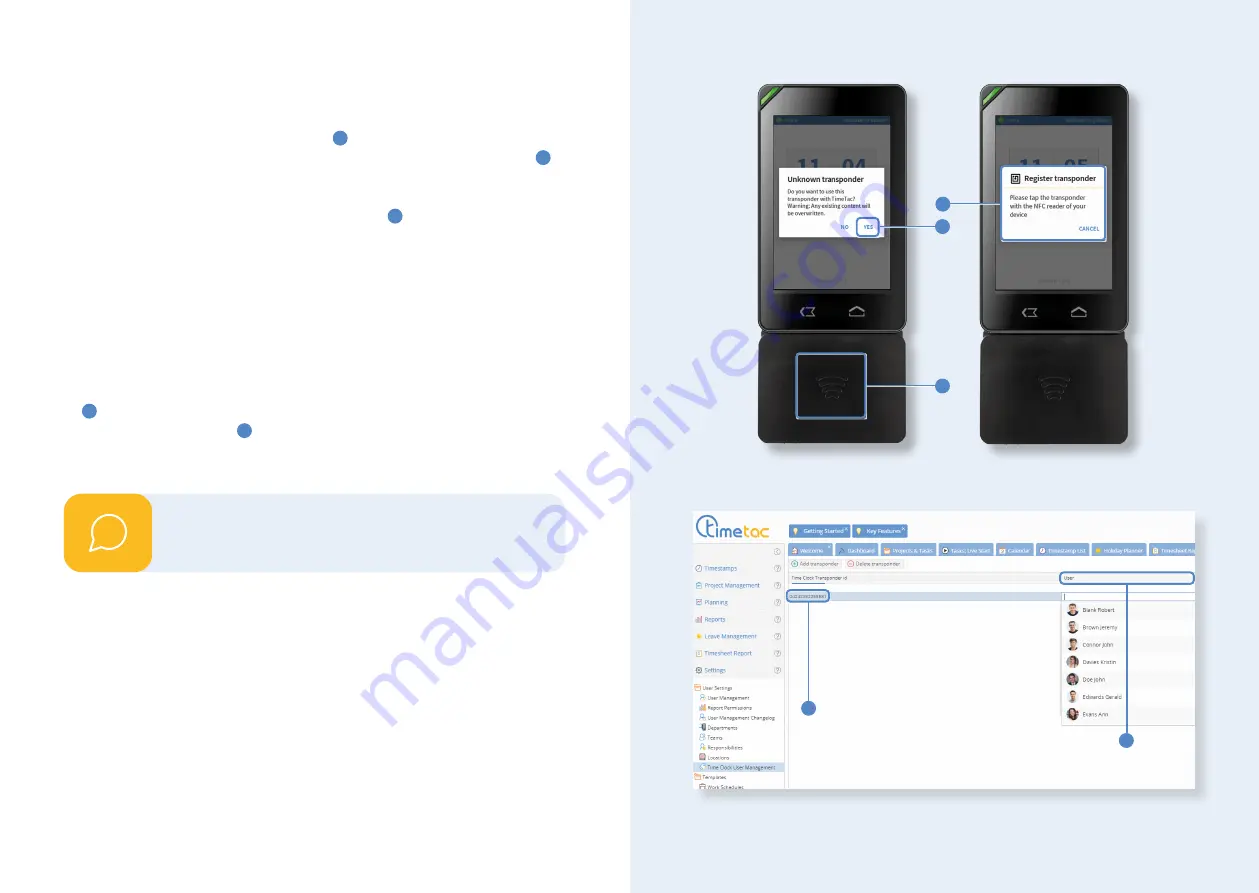
Bring a new transponder to the reader unit
1
on the lower end of the time clock.
The notification "Unknown Transponder" appears on your screen. Tap on "Yes"
2
to
continue the configuration.
The screen now displays "Register transponder"
3
. Bring your transponder
again to the reader unit until the notification changes to "Transponder regis
-
tered". The preparations on the time clock are now completed. To continue in the
web interace, make sure that the account used belongs to the user group
Mana-
ger
and the setting
Full Employee Access
is enabled as well as the permissions
Show User Settings Menu
and
Show Assign Transponders Menu
are in hand.
Open the settings in the side menu on the left-hand side of the web interface and
select Settings > User Settings > Time Clock User Management.
Within this menu item you will find a row that indicates a new transponder's
ID
4
, however, without assignation to a user. Double click in this row and wit-
hin the column called User
5
. A
dropdown menu
appears which allows you to
select an employee, the transponder shall be assigned to. After that, the trans
-
ponder can be used immediately.
Assign the transponders one by one!
i
Configuration of transponders
1
2
3
4
5
12
13


