


The Mini Time Clock offers several ways to track working hours.
Five different
modes
ensure that time tracking can be done quickly and easily for you and your
employees:
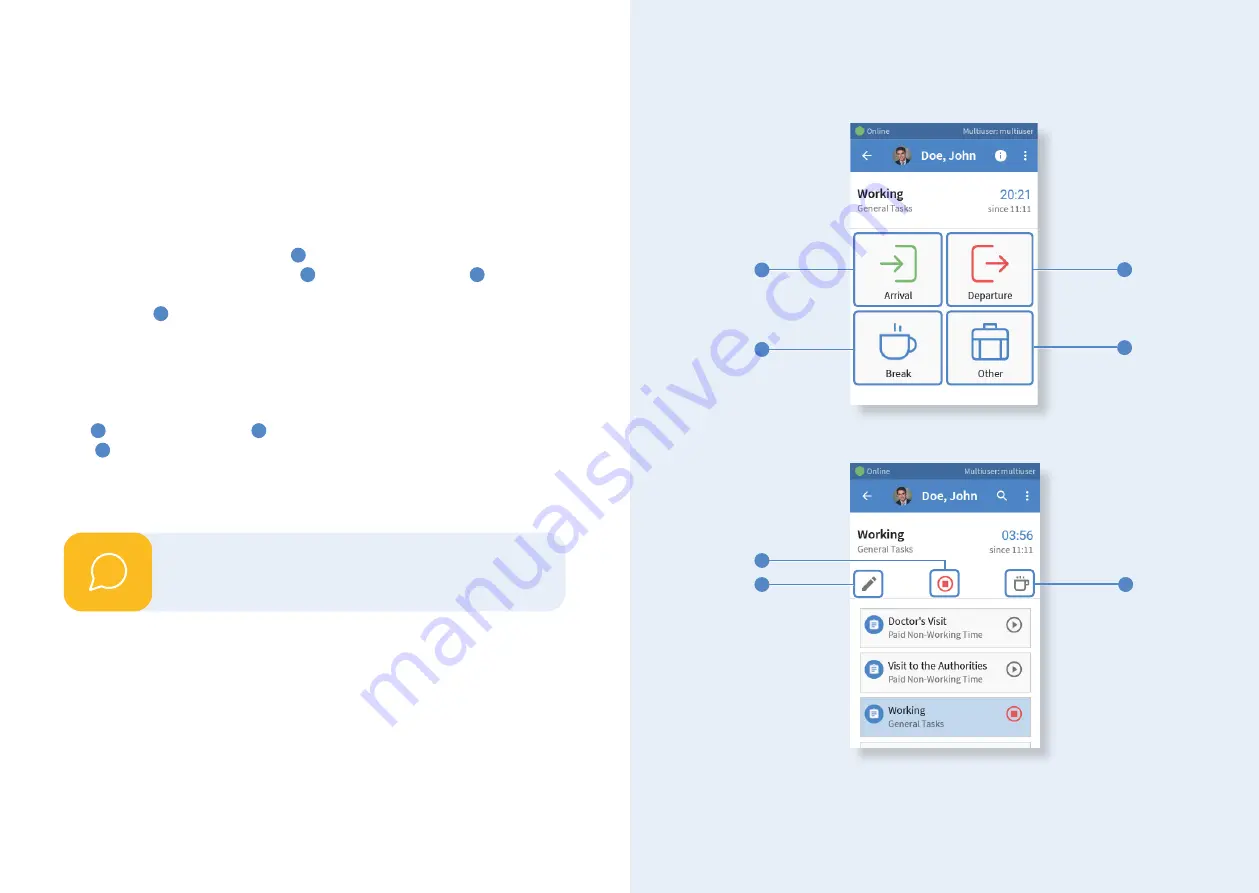
Terminal
This mode offers you a simple user interface with
four different buttons
. With
a single touch on the
clock-in field
1
time tracking starts, which can be stop-
ped with a tap on the
clock-out field
2
, and the
pause button
3
pauses your
time tracking, which can be restarted after the pause with the clock-in button.
Under
Others
4
you will find a selection of time tracking tasks.
Managers with
full employee access
can determine which task is tracked when you start time
tracking or which tasks are available under Others.
Multiuser task list
In this view, you have similar buttons as in the terminal view: a
start/stop but-
ton
5
and a
pause button
6
. When the time tracking is running, a
pencil
icon
7
appears additionally, which can be used to edit the currently running
task or to add a note. In the main area of this view,
tasks are listed
which have
been previously
activated for the time clock
in the web application. Tap on the
start button next to the desired task to start tracking your time.
Time tracking with the different modes
1
3
2
4
5
6
7
Learn on p. 14 how to change the tracking mode.
i
20
21