12
Selecting the landing spot
Einstellung der Ballplatzierung auf dem Tisch
Réglage de la position de la balle sur la table
The landing spot should be selected in
the “stand-by” condition of robot. The
robot can perform three main kinds of
serving style: fixed course, standard
alternative course and random course.
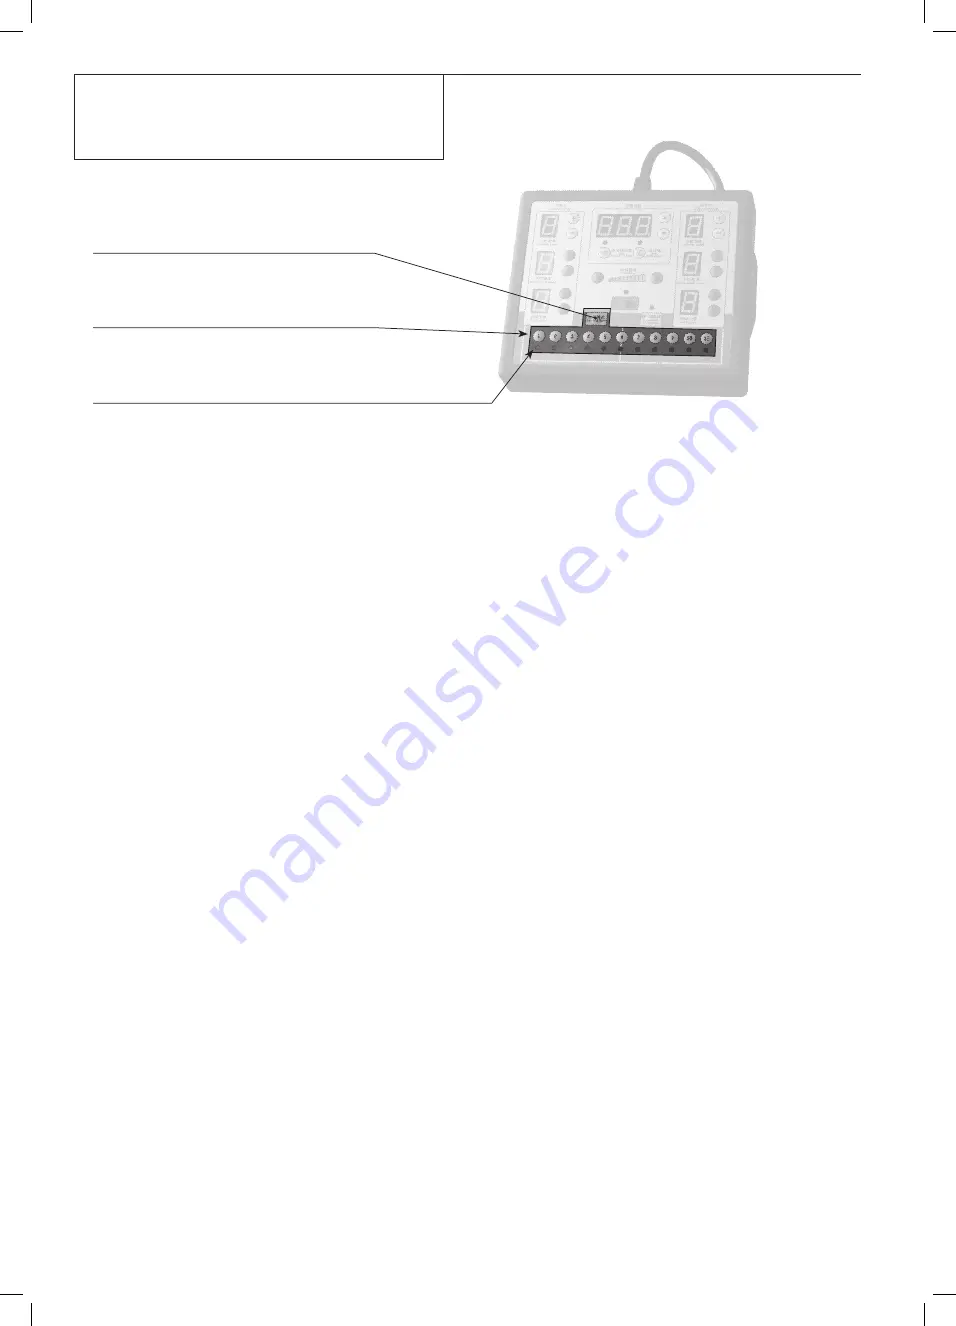
There are 11 digit keys located at the
bottom portion of control box.
Those keys indicate the 11 positions of
the table which the blue part indicates
the whole table area on the play side. To
select the landing spot of the ball, first
press the “Select the landing spot” key,
all indicator lights of 1-11 position will
be turned off at this point. Now we can
press either one of the position, then the
light of the corresponding position being
turned on. Start the robot to play after
finishing the selection. For example, to
play fixed course with the landing spot at
the # 9 position, we can press the digit “9”
key to start. If we want to play alternative
course and the ball will be landing at the
# 11 position three times, and at the # 3
position twice, we can follow the above
procedures, then press the digit “11” key
three times and digit “3” key twice.
The numbers of ball which land on the
same spot depend on how many times
you press on the same position key. You
can create as many as combination of the
serving style. The control box also has
a memory function that memorizes the
current setting which is capable to play
with the same setting the next time you
start.
Die Regelung der Ballplatzierung sollte
im “Stand-by”-Zustand erfolgen. Der
Roboter kann zwei verschiedene Arten
der Ballplatzierung erzeugen: kon-
stante Platzierung und alternierende
Platzierung.
Zur Einstellung der Ballplatzierung
befinden sich im unteren Teil des
Kontrollgeräts elf Positionstasten. Diese
Positionstasten zeigen die elf Positionen
des Tisches, die vom Roboter angespielt
werden können. Um die Ballplatzierung
festzulegen, drücken Sie zunächst auf
die „Select the landing spot“-Taste,
sodass alle elf Kontrollleuchten über
den Positions tasten ausgeschaltet
sind. Nun können Sie durch Drücken
der gewünschten Positionstaste den
jeweiligen Platzie rungspunkt festlegen.
Nach dem Drücken soll die jeweilige
Kontroll leuchte über der gedrückten
Posi tions taste aufleuchten. Nach Ihrer
Eingabe können Sie den Roboter starten.
Für eine konstante Platzierung wählen
Sie diese durch Drücken lediglich einer
Positionstaste aus.
Für die alternierende Platzierung drü-
cken Sie die Positionstasten in der von
Ihnen gewünschten Abfolge. Beispiel: Sie
möchten 2 Bälle auf Position 2, 2 Bälle
auf Position 10 und 1 Ball auf Position 6:
drücken Sie zweimal die Positionstaste
2, zweimal die Positionstaste 10 und
einmal die Positionstaste 6. Nach Ihrer
Eingabe können Sie den Roboter star-
ten. Die Anzahl der Bälle, die auf die
gleiche Stelle platziert werden, hängt
also davon ab, wie oft Sie die jeweilige
Positionstaste drücken.
Das Kontrollgerät verfügt außerdem
über eine „Memory“-Funktion, die sich
die gegenwärtige Einstellung speichert,
sodass diese nach einer Spielpause nicht
wieder erneut programmiert werden
muss.
Le réglage de la position de la balle sur
la table devrait être réalisé en mode
« stand-by ». Le robot peut effectuer
deux positionnements différents : un
positionnement constant ou en alter-
nance.
Pour le réglage de la position de la
balle, l’appareil de contrôle dispose de
11 touches. Ces touches montrent les
11 positions sur la table. Afin de choisir
une position, appuyer tout d’abord sur la
touche « select the landing spot », afin
d’éteindre les témoins lumineux des 11
touches de position. A présent, sélection-
ner une touche de position en appuyant
sur celle-ci. Le témoin lumineux de la
touche choisie doit s’allumer. Le robot
peut être mis en route. Pour un positi-
onnement constant, n’appuyer que sur
une touche.
Pour un positionnement en alternance,
appuyer sur plusieurs touches. Par
exemple : 2 balles en position 2, 2 balles
en position 10 et 1 balle en position 6 :
appuyer deux fois sur la touche de posi-
tion numéro 2, deux fois sur la touche
de position numéro 10 et une fois sur la
touche de position numéro 6. Le robot
peut être mis en marche.
Le nombre de balles placées sur la
même position dépendra du nombre de
fois où la même touche de position aura
été sélectionnée. Le boîtier de contrôle
dispose en outre d’une fonction mémoire
qui sauvegarde les derniers réglages du
robot, de sorte qu’il n’est pas nécessaire
de programmer à nouveau le robot après
une pause.
Indicator light of 1 to 11 positions
Kontrollleuchten der 11 Platzierungspunkte
Témoins lumineux des 11 touches de réglage de la position de la balle
1to 11 position selecting keys
11 verschiedene Platzierungspunkte
11 touches de réglage de la position de la balle
Landing spot selection key
Taste zum Auswählen der Platzierungspunkte
Touche pour le réglage de la position de la balle


